Perform WD My Cloud Dropbox Sync Automatically
Quick navigation:
- About WD My Cloud Dropbox Sync
- Sync Dropbox to WD My Cloud in Windows 10
- My Cloud Dropbox Sync Only Once
- Automatically Sync files between WD My Cloud and Dropbox
- Over to You
About WD My Cloud Dropbox Sync
Here is a one-paragraph summary: Dropbox is a popular cloud storage service that allows users to automatically back up and sync files across all their devices, including computers, mobiles, and tablets, and store them securely in the cloud.
The WD My Cloud Dropbox Sync feature integrates with My Cloud NAS, allowing for automatic synchronization between the two services. This integration enables seamless sharing and access to files across both platforms, streamlining data management and reducing the need for manual file transfers.
- Keep an exact copy of files for backup. To ensure data safety, sync files from WD My Cloud to Dropbox, a cloud storage service that can protect files from physical damage and hardware crashes, providing a secure backup of your important data.
- Low power consumption and 24 hours standby. Network-attached storage offers several advantages, including easy access and sharing of data across a network. Additionally, building a RAID (Redundant Array of Independent Disks) system with multiple spare disks can further enhance storage speed and reliability.
Sync Dropbox to WD My Cloud in Windows 10
Before starting any operation, ensure you have a solid understanding of the My Cloud Dropbox app's fundamentals. This includes knowing how to navigate the app, how to create and manage files and folders, and how to use the app's features to sync and access your files across devices.
- The Dropbox app can be installed on various My Cloud devices, including the Mirror, Mirror Gen2, EX2, EX2 Ultra, and EX4 models.
- My Cloud is set up and configured with internet access.
- You need a Dropbox account.
- It supports immediate sync, interval sync, selective sync, File sync.
- The default local sync folder is /Public/Dropbox.
The WD My Cloud Dropbox Sync feature allows seamless syncing of files between a My Cloud device and a Dropbox account. For example, the My Cloud EX2 Ultra can be used to sync files with a Dropbox account, making it easy to access and share files across multiple devices and platforms.
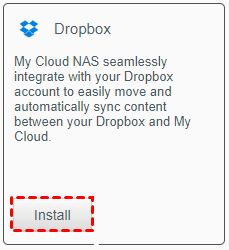
Step 1. To install Dropbox on your My Cloud system, go to the My Cloud dashboard, click the "Apps" icon at the top, find Dropbox, click "Install", and then click OK to confirm the installation.
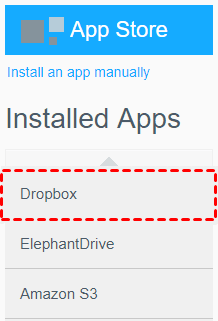
Step 2. Go to App Store and select Dropbox in the installed app list.
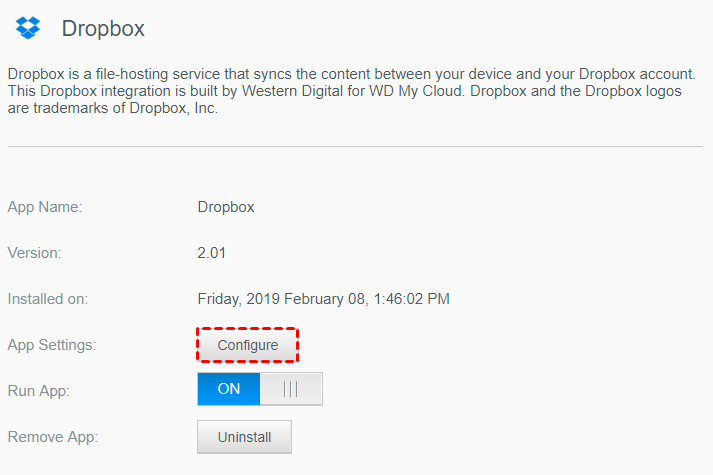
Step 3. Click Configure at the initial screen.
Step 4. To connect your WD My Cloud to Dropbox, sign in, enter your email address and password, and click Allow when prompted to authorize the device.

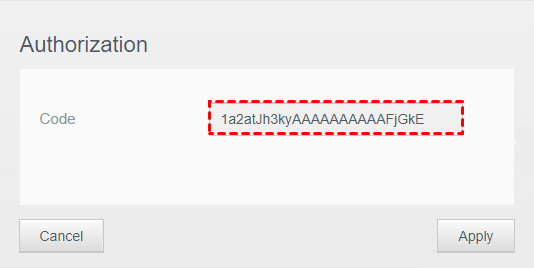
Step 5. Select and copy the authorization code below.

Step 6. Go back to the My Cloud configuration window, paste the authorization code in the box, and click Apply to save the changes.
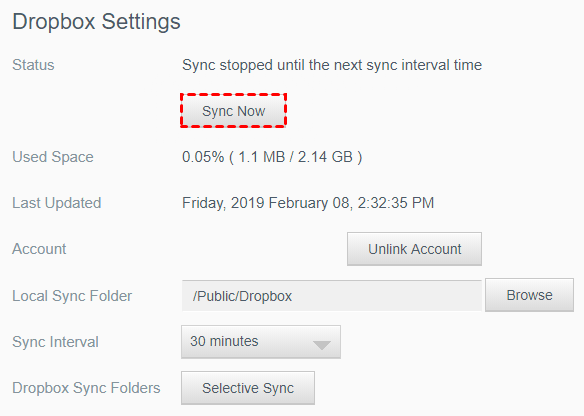
Step 7. The Dropbox sync has been initiated, allowing you to set sync settings in the Dropbox Settings, including options such as Stop Syncing, Local Sync folder, Sync Interval, and Dropbox Sync Folders.
My Cloud Dropbox Sync Only Once
The WD My Cloud Dropbox sync feature is useful for keeping files safe, but it has some flaws, including only syncing once, which can be a problem for users.
This issue is likely caused by a network file system not sending notifications when files change, but Dropbox only initiates file syncing when it receives these update events.
To fix the issue of Dropbox syncing issues, you can fix it by moving the Dropbox folder to a local drive, preferably the system partition, and also consider using a third-party file sync software like Qiling Disk Master Professional.
Automatically Sync files between WD My Cloud and Dropbox
To automatically backup Dropbox with the WD My Cloud Sync Software - Qiling Disk Master Professional, follow these steps. This user-friendly software has an intuitive interface, making it easy for even novices to use smoothly. With its features, you can seamlessly sync and backup your Dropbox files, ensuring your data is safe and secure.
- Rich sync methods: The software supports three types of file sync: File Sync, File Sync, and File Sync, which enable users to sync files from one location to another or between two locations. These methods differ in their focus, with the first three being one-way file sync approaches.
- It can sync files at various frequencies, including daily, weekly, monthly, or using event triggers, and even when a USB is plugged in.
- Multiple sync storage: This device can sync files to various locations, including cloud drives like Dropbox, Google Drive, and OneDrive, as well as NAS storage, external hard drives, flash drives, and network drives.
- Use less disk space: It allows you to sync files with specific file extensions, saving sync time and disk space, instead of syncing all files.
You can automatically sync files to any device or between any two devices with the help of this professional software. Download and install it on your computer.
The software only supports Windows operating systems, specifically Windows 11, 10, 8, 7, XP, and Vista. For server users, Qiling Disk Master Server is a recommended alternative.
Step 1. Download Qiling Disk Master Professional, install and launch it, then select File sync under the Backup tab.
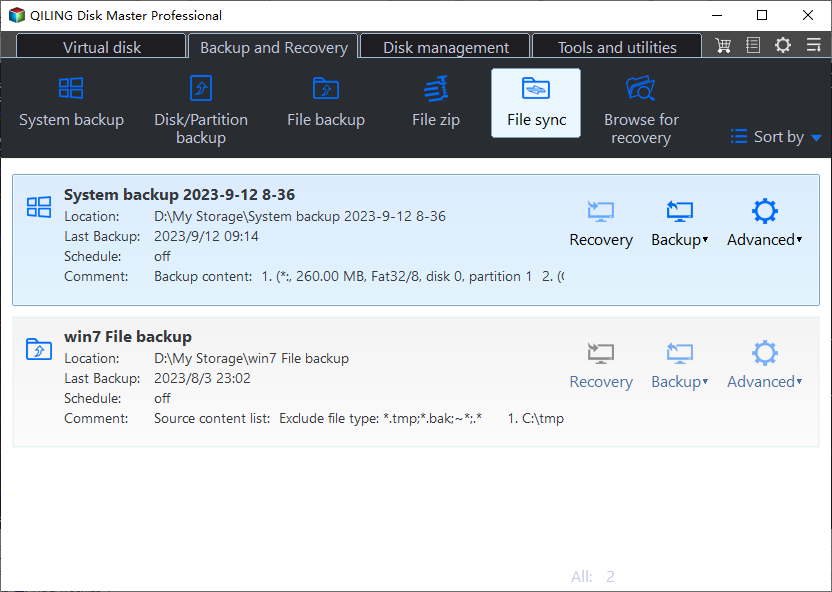
Other sync methods for My Cloud Dropbox Sync:
File Sync: The system will automatically synchronize changed files from one location to another.
File Sync: It will monitor files in real-To ensure your files are always up-to-date, time and sync any detected changes immediately.
File Sync: The system focuses on preventing unwanted changes to the destination, and will undo them even if others make changes.
Step 2. Select folder on WD My Cloud for synchronization.
First, click Folder on the main page of File sync.
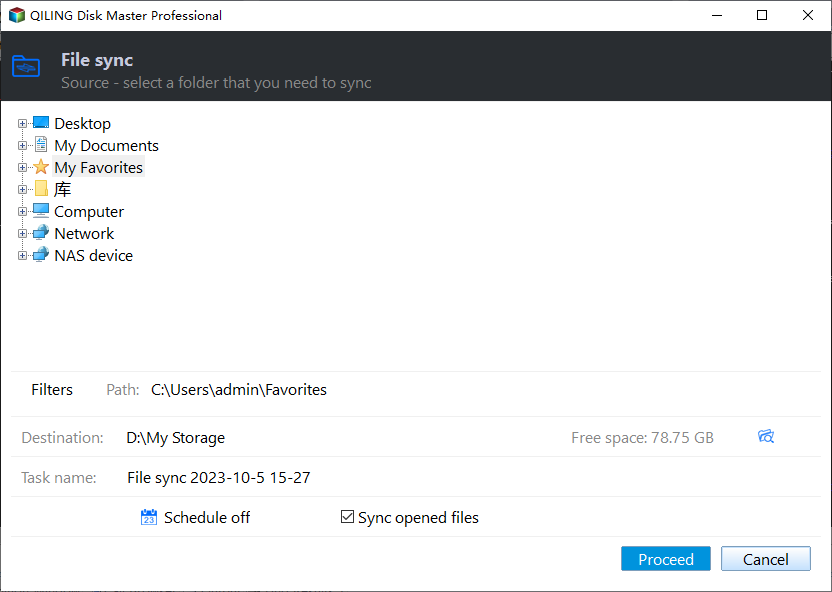
Then, in the pop-up window, click Share/NAS to continue.
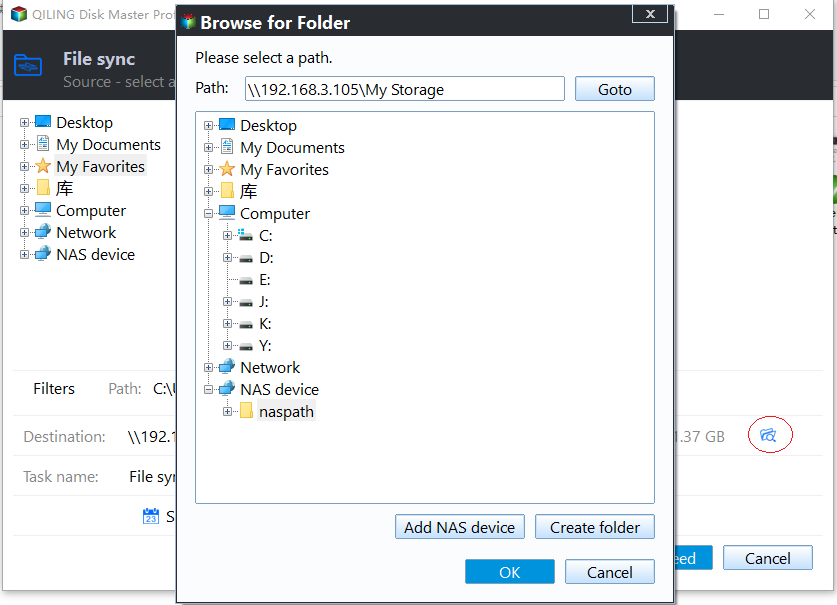
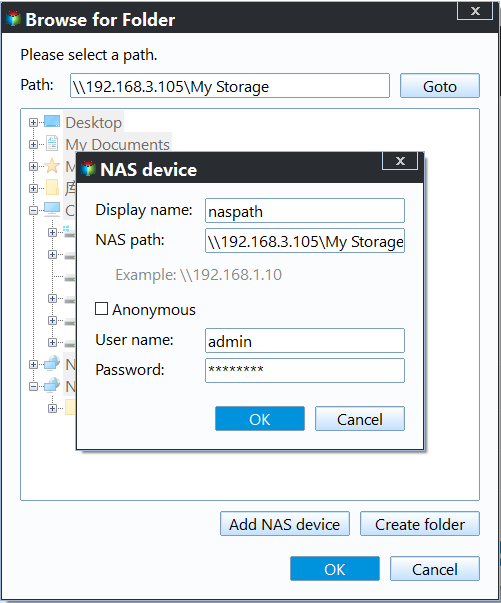
To add a WD My Cloud device, click "Add Share or NAS Devices" and enter the required information, then click OK. Next, double-click the network-attached storage and select the folder you want to sync.
Step 3. Select Dropbox as the destination path.
In the first place, click the inverted triangle and Select a cloud drive.
Then, select Dropbox, double-click it to choose a specific folder.
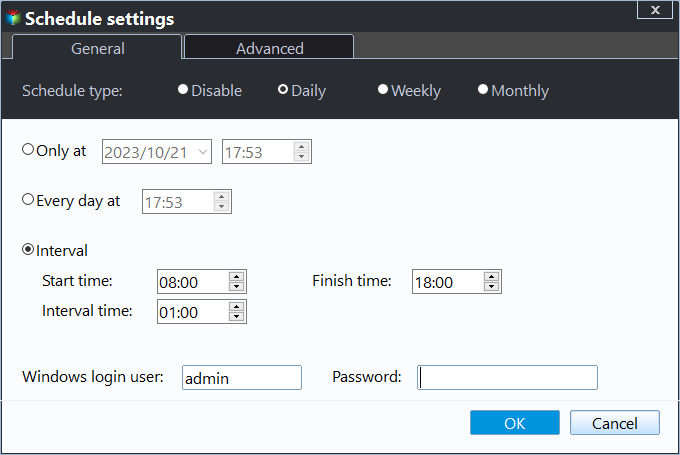
Step 4. Click Schedule Sync and enable it, then select sync settings for your task.
- Daily/Weekly/Monthly: The software can sync files at different frequencies, with the fastest option being every 1 hour in a day. It is recommended to select this frequency to ensure timely synchronization.Wake the computer to run scheduled tasks if you set the sync task to off-peak hour.
- Event trigger: It enables file syncing at specific system events, such as shutdown, startup, user logon, and user logoff.
- USB plug in: It is to automatically copy files when USB drive connectedThe device can be connected automatically to the system before a task starts, and remain connected until the task is completed. This way, you don't need to manually connect or disconnect the device, making the process more convenient and efficient.
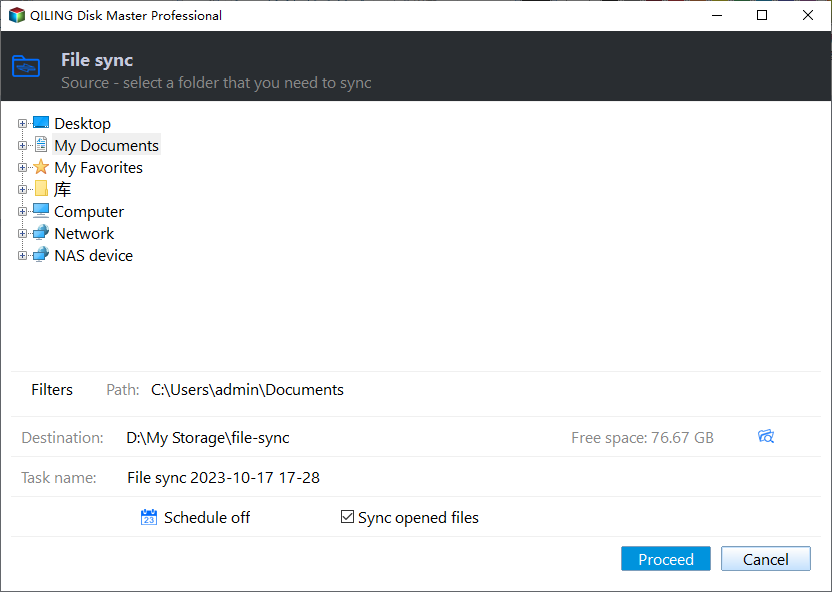
Step 5. Click Proceed to automatically sync files between WD My Cloud and Dropbox.
Tips:
◑ This software should not monitor the source folder name, otherwise it will no longer sync files.
◑ You are also allowed to sync local folder to DropboxYou can sync various types of folders and devices, such as syncing a folder to a network drive, syncing folders between computers, syncing a folder between drives, syncing files between a computer and a flash drive, and more.
Over to You
To automatically sync Dropbox to WD My Cloud or between them, you can use My Cloud or Qiling Disk Master Professional. The latter is recommended, offering various sync options such as daily, weekly, monthly, and even trigger sync, as well as real-time file sync via USB plug-in.
This software provides various sync methods, including File Sync, to meet different needs, and also offers a file backup feature for extra data security. Additionally, it allows you to create bootable media to sync or backup files without booting into Windows, ensuring you always have a copy of your important files. You can download it to get started with syncing!
Related Articles
- Top 3 Ways to Backup WD My Cloud to Dropbox Efficiently
- Backup WD My Cloud to Google Drive with the Best Freeware
This guide explains Top 3 Ways to Backup WD My Cloud to Dropbox Efficiently Backup WD My Cloud to Google Drive with the Best Freeware with clear steps, key checks, and practical tips. - Best Solution on Backing up Windows 7 PC to WD My Cloud
In this article, you will find the best way to backup Windows 7 to Western Digital (WD) My Cloud with everything included, operating system, installed programs, settings, personal files, etc. - 2 Ways to Backup Files on My Cloud Home to External Drive
Here are 3 ways to backup files on WD My cloud home to external drive, and one of which is automatic. Try it if you don't want to run it manually every time. - Offline Files Cannot Synchronize Access Is Denied Windows 10
Follow this guide for Offline Files Cannot Synchronize Access Is Denied Windows 10, with practical steps for moving, sharing, or syncing files and photos safely. - Mirror PC Folder to OneDrive | 3 Ways
You can mirror folder to OneDrive automatically with 3 practical ways, even if they are not in the desktop folder. Get details below.
Products
Articles & Tutorials
- Data Recovery
- Data Backup
- File Recovery
- File Backup
- File synchronize
- System Backup and Restore
- Disk and Partition Clone
- Technical articles
- Disk Master Help
- Windows Deleted File and Disk Recovery Tutorials
- Windows File and Data Recovery Tutorials
- More Windows Tutorials for Install, Security, Files, and PC Tips
- Windows Boot, Repair, and Recovery Environment Tutorials
- Windows Backup Tutorials
- Windows Restore Tutorials
- Windows Clone and Migration Tutorials
- Windows Server Backup, Recovery, and Management Tutorials
- Windows Disk, Partition, and Storage Management Tutorials