Solved: Hard Drive Not Showing Full Capacity in Windows 10
- User Case
- Why Is My Hard Drive Not Showing Full Capacity?
- Solutions to Hard Drive Showing Wrong Capacity in Windows 10
- Solution 1. Update Hard Drive Driver
- Solution 2. Format Hard Drive via Command Prompt
- Solution 3. Convert the Hard Drive from MBR to GPT
- Solution 4. Clone and Resize Hard Drive to Show Full Capacity
- Final Words
User Case
Drive not showing full capacity after installing image backup to new SSD drive.
"Hi, I upgraded to a bigger SSD drive after the old one became quite full. I used an image backup to do this. All works well after the reinstallation of the new drive. Only problem is my new 3TB hard drive not showing full capacity in Windows 10. I still see it is full in file explorer. Disk management shows the extra space as unallocated. I tried creating a new simple volume but file explorer still does not see it as part of drive C. Still get the message that it is full...(only seeing the old drive size). How can I get drive C to show its full capacity? Please help."
- Question from Microsoft Community
Have you ever encountered a situation that the hard drive not showing full capacity in Windows 10? According to users, this is a common problem with most drives larger than 2TB made by Seagate, Lacie, Western Digital or Sandisk. When this issue occurs, you may see a 2 TB hard drive showing only 500GB, 200GB, or 32GB of free space on your computer. Why is this happening? Is there a way to solve this problem? Read on to find all the answers!
Why Is My Hard Drive Not Showing Full Capacity?
The issue of external hard drives not showing full capacity in Windows 10 can be caused by several factors. Understanding these possible causes is essential before looking for solutions. Various reasons contribute to this problem, which will be discussed in detail in the following sections.
#1. The hard drive is out of date.
Outdated hard drives can fail on your computer, sometimes displaying the wrong capacity when plugged in.
#2. The previous formatting process was incomplete or incorrect.
Formatting a drive prepares it for use, allowing the computer to recognize and utilize the storage capacity of the drive, such as a hard drive or solid state drive. Incomplete or interrupted formatting can result in the drive not displaying its full capacity in Windows 10.
#3. The hard drive has been initialized to a wrong partition table.
If your hard drive is larger than 2TB and initialized as MBR, the space over 2TB will be shown as "Unallocated" in Disk Management and can't be seen in File Explorer, due to the MBR partition table's inability to address space exceeding 2TB.
#4. Clone the smaller hard drive to the larger one, leaving unallocated space.
When upgrading a hard drive to a larger one, some users find that their cloned drive doesn't show its full capacity in Windows 10. This is because cloning programs also copy the partition size, not just the data, and if the new drive is larger, the extra space is treated as unallocated.
Solutions to Hard Drive Showing Wrong Capacity in Windows 10
Now that we understand the possible causes, we can discuss how to fix the problem. You can choose the solution that best suits your situation.
- Solution 1. Update Hard Drive Driver
- Solution 2. Format Hard Drive via Command Prompt
- Solution 3. Convert the Hard Drive from MBR to GPT
- Solution 4. Clone and Resize Hard Drive to Show Full Capacity
Solution 1. Update Hard Drive Driver
If your hard drive is not showing its full capacity in Windows 10, try updating your hard drive driver, which can be done manually in Device Manager. To do this, open Device Manager, expand the "Disk drives" section, right-click on your hard drive, and select "Update driver" to search for and install any available updates. This simple step may resolve the issue and ensure your hard drive is recognized with its full capacity.
- To access the Device Manager, click on the "Start" button and type "Device Manager" into the search bar, then press Enter.
- Right-click on the hard drive, select "Disk drives", then click and expand it. Right-click on the hard drive and select "Update driver".
- Then click on "Search automatically for updated driver software". Windows will now try to automatically update your driver.
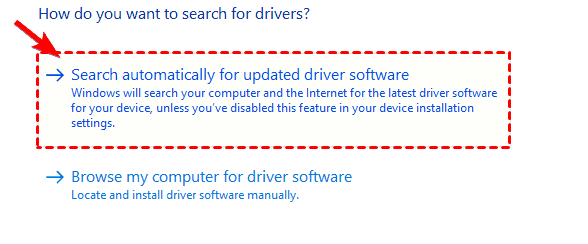
- To get the latest driver update for your external hard drive, follow the onscreen instructions.
Solution 2. Format Hard Drive via Command Prompt
Formatting a hard drive is a technical process that should not be interrupted, as it may damage the drive and cause issues such as the "hard drive not showing full capacity." To resolve this problem, you can try reformatting the hard drive using Windows built-in formatting tools, which is a safer and more reliable option.
✿ Note: formatting a disk will erase data, so backup first. The rewritten text still uses the same link to a relevant resource, but in a more concise way.
- To start the Command Prompt as an administrator, click the "Start" button, type "cmd" in the search bar, right-click on Command Prompt, and select "Run as administrator".
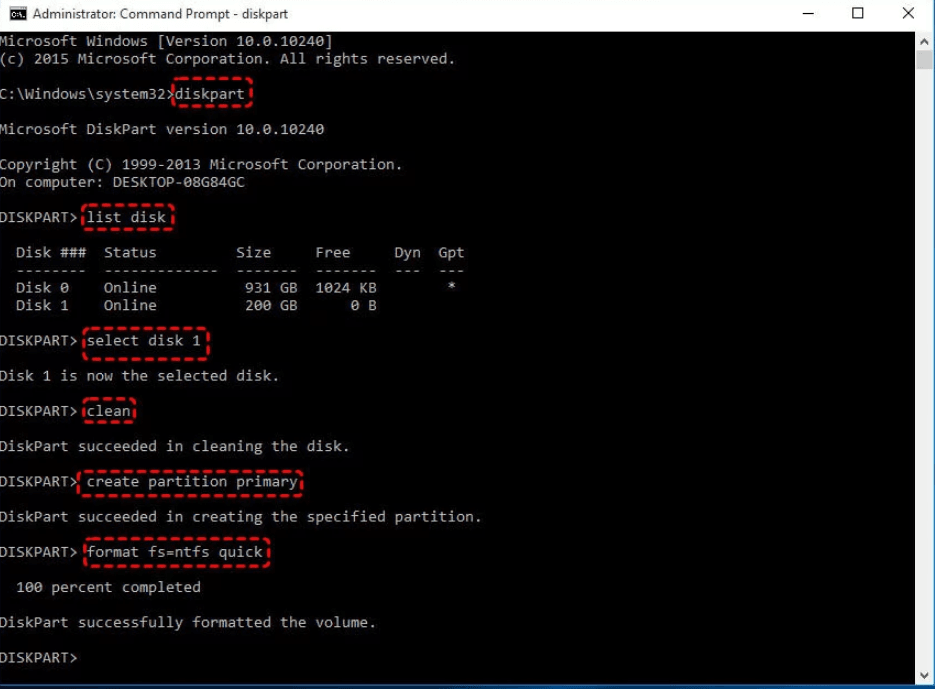
- Type "diskpart" and press Enter. Input and run the following commands and hit Enter after each.
- list disk (get a detailed list of all disks on your system)
- select disk n (n is the number of the target hard drive)
- clean (delete all partitions on the selected disk and clear it)
- create partition primary (create a primary partition on the disk)
- format fs=ntfs quick To format the drive with a file system, you can use the command `fs=exfat` in the format command. This will format the drive with the exFAT file system. For example: `format fs=exfat`.
- assign (set a drive letter to the newly created partition)
If the hard drive is not showing full capacity, you can try to check if the drive is in a healthy state by running a disk check on it. If the disk check finds any errors, you can try to fix them.
Solution 3. Convert the Hard Drive from MBR to GPT
If your 3TB hard drive isn't showing its full capacity in Windows 10, it's likely because the partition style is set incorrectly, and converting it from MBR to GPT can resolve the issue.
✿ Note: This process will first clean up all data on the disk. Therefore, back up important files if necessary.
- Click the "Start" button, type "cmd" in the search bar, right-click on the Command Prompt and select "Run as administrator" to run it with elevated privileges.
- Type "diskpart" and press Enter. Input and run the following commands and hit Enter after each.
- list disk
- select disk n
- clean
- convert gpt
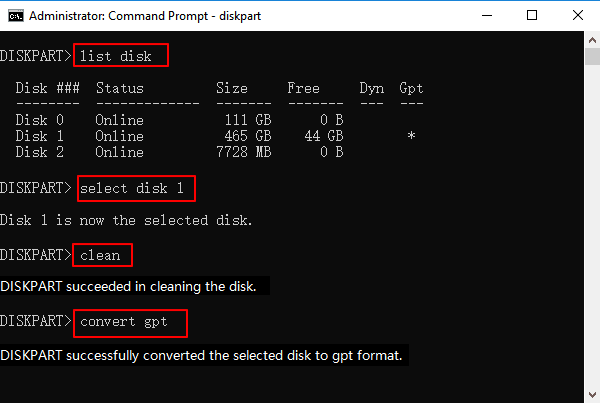
Then go back to Disk Management to see if your hard drive is showing full capacity.
Solution 4. Clone and Resize Hard Drive to Show Full Capacity
When upgrading or replacing a hard drive, cloning is a common method used to migrate data to the new disk. However, the cloned hard drive may not show its full capacity due to unallocated space.
Qiling Disk Master Professional is a reliable and powerful disk cloning software that can clone hard drives of different sizes without leaving unallocated space. It is designed for all Windows PCs, including Windows 11, Windows 10, Windows 8, and Windows 7, making it a versatile tool for various users.
❀ It provides you with 3 options to manage the partition size of the target hard drive. To clone a larger HDD or SSD, you can manually edit the partition size on the cloned disk, let the program automatically resize the partition to fit the entire hard drive, or clone without resizing the partition.
❀ It supports different disk partition styles. Qiling Disk Master Professional enables you to clone disks from MBR to MBR, MBR to GPT, GPT to GPT, and GPT to MBR, preserving disk space for larger hard drives over 2 TB.
❀ It provides you with "SSD Alignment" feature that helps you align partitions to optimize your SSD. This feature will help you a lot when you want to upgrade to an SSD and ensure you can boot safely from the cloned disk after cloning.
★ Step-by-step guide to cloning to larger drive without leaving unallocated space
Before you start, download the software to your computer, such as Qiling Disk Master Server for Windows Server users. After installation, follow these steps to clone and resize your hard drive, ensuring it shows its full capacity.
❀ Note: Cloning a hard drive will erase everything on the target drive and transfer all data from the source disk to the destination disk, so make sure to backup any important data on the target drive before cloning to avoid losing it.
- Connect the hard drive to your computer using the provided cable, and ensure that it is detected by your computer. You can do this by checking the computer's disk management or disk utility software, or by looking for the hard drive in the computer's file explorer.
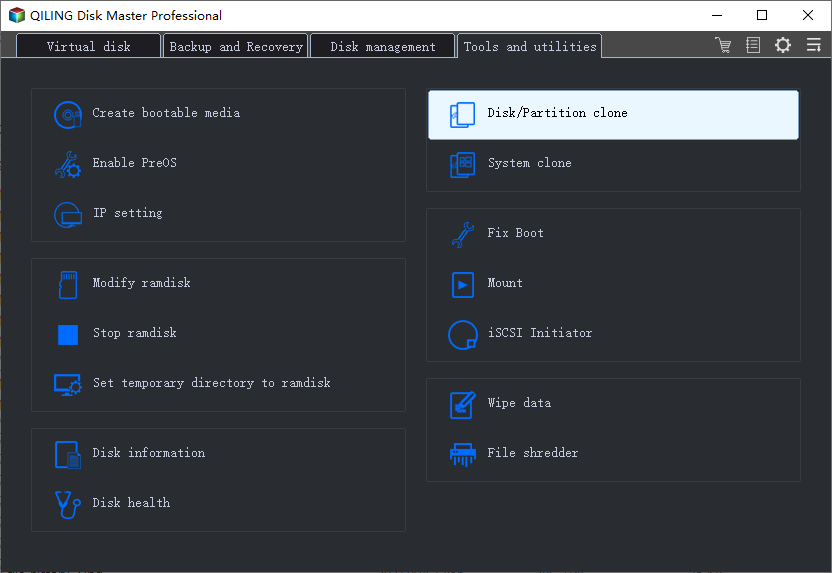
- Launch Qiling Bakcupper Professional. Click "Clone" on the left panel and select "Disk Clone" on the right.
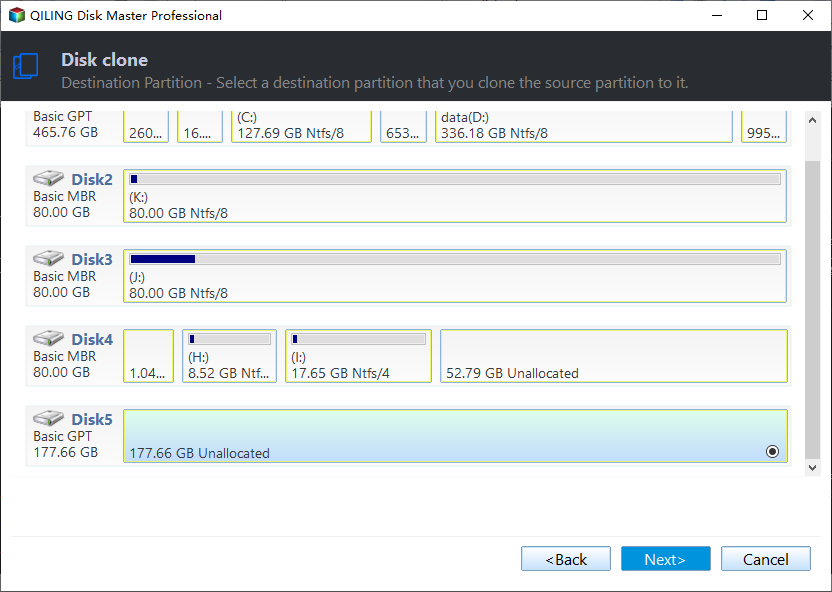
- Select your original hard drive as the source disk, then click on the larger hard drive to set it as the destination disk, and click "Next".
- In the Operation Summary page, click on "Edit partitions" and then click "Add unused space to all partitions" to automatically extend all existing partitions with unallocated space, or manually adjust the partition size using the third option.
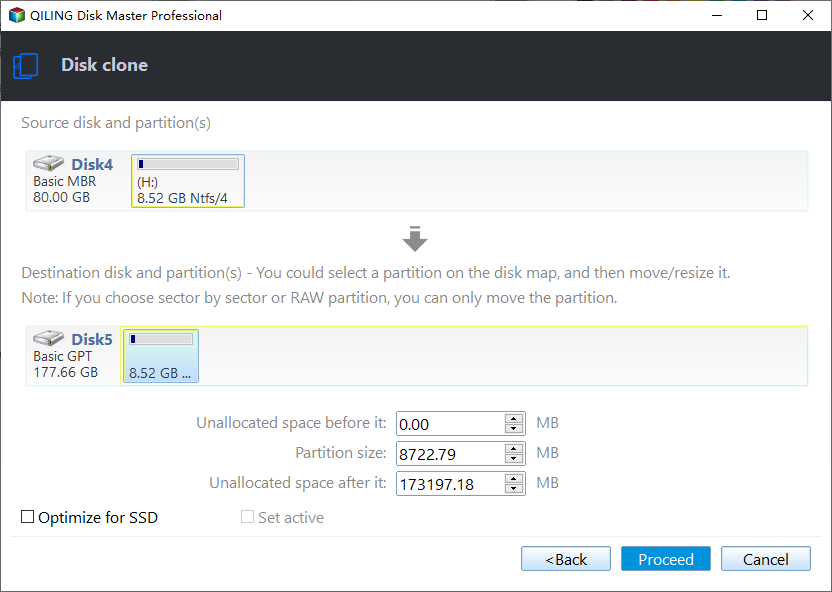
- If the target hard drive is an SSD, check the option "SSD Alignment" and then click "Proceed" to execute the operation.
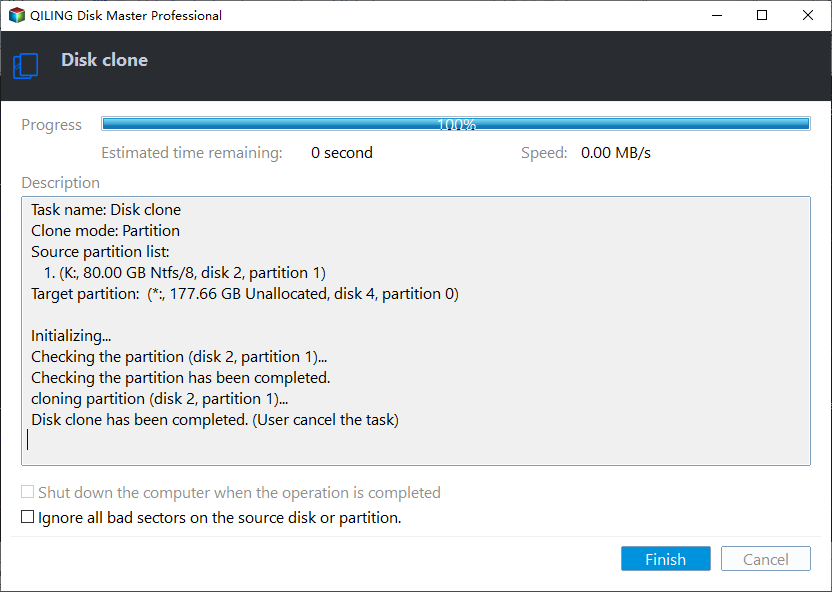
The cloned hard drive will have the correct size, regardless of the target disk's size. Additionally, the software can clone a larger hard drive into a smaller one using its intelligent clone feature.
Final Words
If your hard drive is not showing its full capacity in Windows 10, try these solutions: check for disk errors, disable disk write caching, check for malware, and use disk cloning software to clone and resize your hard drive. You can also use the software to backup and restore your data, and even wipe unallocated space to free up space on your Windows 10 system. By trying these methods, you should be able to resolve the issue and ensure your hard drive is showing its full capacity.
Related Articles
- Cloned Hard Drive Shows Wrong Size - Quick Fix Once For All
If the cloned hard drive displays an incorrect size in Windows 11/10/8.1/8/7, it's possible that the cloning process was not executed correctly. To learn how to clone a hard drive to a larger drive without leaving unallocated space, follow the steps provided here. - 3 Ways to Easily Fix 3TB Hard Drive Only Shows 2TB
You can learn the reasons for 3TB hard drive only shows 2TB and 3 easy ways to fix the problem. The stepwise tutorial will be included in each method. Please read on. - Upgrade to Larger Hard drive in Windows 10/8/7
If you find your old hard drive has not enough space for daily use, follow this guide to easily upgrade to a larger hard drive without reinstalling Windows. - How to Clone SSD to New SSD Without Losing (OS Included)
Cloning an SSD to a new SSD is an excellent approach to improve computer performance and enhance storage capacity. Do you wish to know how to clone an SSD to a new one? There is no need to look any further. This Qiling tutorial leads you through the entire process with step-by-step instructions. - Solved: Windows Could Not Format A Partition on Disk 0
If your hard drive is not showing full capacity in Windows 10, you can use Qiling Disk Master to check for unallocated space, resize partitions, and restore the drive to its full capacity safely. - Solved: Windows Failed to Start File Boot BCD Error
Windows failed to start because the Boot Configuration Data (BCD) for your PC is missing or contains errors? Learn causes and simple fixes for Windows failed to start File Boot BCD error.