How to Run SFC /Scannow in Windows 10, 11 (Stepwise Guide)
About sfc /scannow command
The SFC (System File Checker) command is a Command Prompt command that is used to verify and replace important Windows system files. There are several specific switches available in the SFC command such as:
- Sfc /scannow: scans integrity of all protected system files and repairs files with problems when possible.
- Sfc /verifyonly: scans integrity of all protected system files without repairing.
- Sfc /scanfile=: scans integrity of the referenced file and repairs file if problems are identified.
- …
Among all the command switches, sfc /scannow is the most frequently-used one. It is extremely useful to repair incorrect, corrupted, changed, or damaged system files. Then, how to perform sfc /scannow repair exactly?
How to use sfc /scannow in Windows 10/11 to repair corrupted system files
To run sfc /scannow in Windows 10/11, you can follow the steps below:
SFC scan on Windows
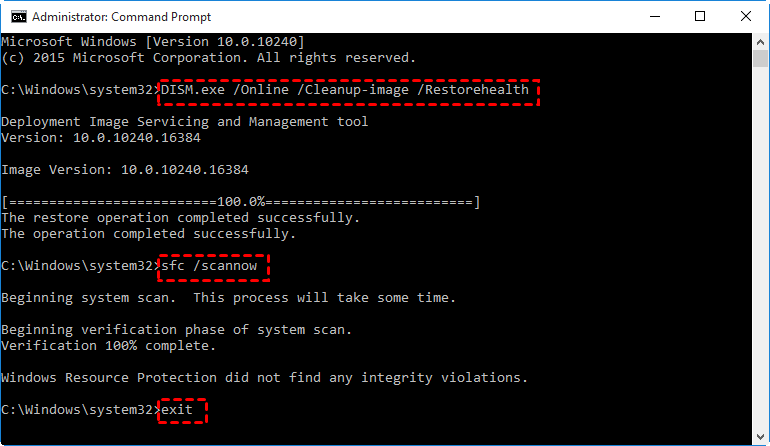
1. Tap the Search button on the taskbar and type “cmd” in the search box. Right click “cmd” and then select “Run as administrator”.
2. Type DISM.exe /Online /Cleanup-image /Restorehealth and press Enter. It may take several minutes for the command operation to be completed.
Note: Running the DISM (Deployment Image Servicing and Management) tool prior to SFC is only necessary on Windows 11/10/8.1/8. To run sfc /scannow in Windows 7, you can skip to Step 3.
3. Type sfc /scannow and press Enter to scan system files and replace corrupted files with a cached copy that is located in a compressed folder at %WinDir%\System32\dllcache.
Note: The %WinDir% placeholder represents the Windows operating system folder. For example, C:\Windows.
4. After the verification reaches 100%, you may receive one of the following messages:
▶ Windows Resource Protection did not find any integrity violations.
>> A good thing.
▶ Windows Resource Protection found corrupt files and successfully repaired them.
>> A good thing.
▶ Windows Resource Protection found corrupt files but was unable to fix some of them.
>> In this case, you can view details of the System File Checker process in %WinDir%\Logs\CBS\CBS.log, and then manually replace the corrupted file with a known good copy of the file.
▶ Windows Resource Protection could not perform the requested operation.
>> In this condition, you can perform the System File Checker scan in safe mode, and make sure that the PendingDeletes and PendingRenames folders exist under %WinDir%\WinSxS\Temp.
5. Type exit and press Enter to exit Command Prompt.
Offline SFC scan
If your PC fails to boot, you may perform an SFC scan offline. Here’s how to do it.
1. Boot your PC with Windows installation media or a recovery drive.
2. Open Command Prompt from Windows Recovery Environment.
- For Windows installation media, click Repair your computer > Troubleshoot > Advanced options > Command Prompt.
- For a recovery USB, click Troubleshoot > Advanced options > Command Prompt.
3. In the Command Prompt window, type sfc /scannow /offbootdir=c:\ /offwindir=c:\windows and press Enter.System File Checker utility checks the integrity of Windows system files and repairs them if required.
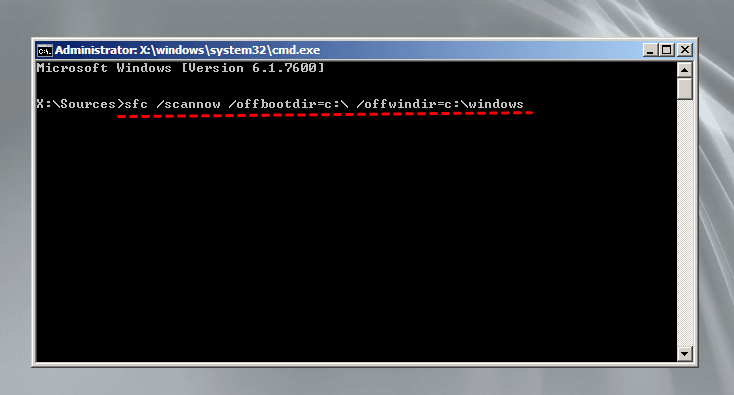
Note: You need to replace C: with the drive letter of the partition that contains your Windows installation.
4. After the process is complete, reboot your computer.
Although you can fix corrupted system files with the sfc /scannow command, problems may occur during the process, such as sfc /scannow not working, sfc /scannow stuck, etc. You even need to reinstall Windows to repair damaged system files when sfc /scannow fails. How to get away from the scare of sfc /scannow failure? Please read on.
💡Bonus tip: auto backup Windows 10/11 for system recovery
To be released from the heavy work of reinstalling Windows when sfc /scannow fails, you should backup Windows regularly. Compared with reinstalling Windows and all the applications, restoring system from the backup is much easier. Here I’d like to recommend the best free backup software—Qiling Disk Master Standard.
- All-around data protection: it enables you to perform full system backups as well as backing up specific files, documents, disks and partitions.
- Windows PE boot: it allows you to create bootable media which will help you restore system under Windows PE when your computer fails to boot due to missing or corrupted system files.
- Wide compatibility: all Windows PC operating systems including Windows 11/10/8.1/8/7/Vista/XP are supported. For Windows Server 2022/2019/2016/2012/2011/2008/2003, please turn to Qiling Disk Master Server.
Learn how to backup Windows on a regular basis via Qiling Disk Master below:
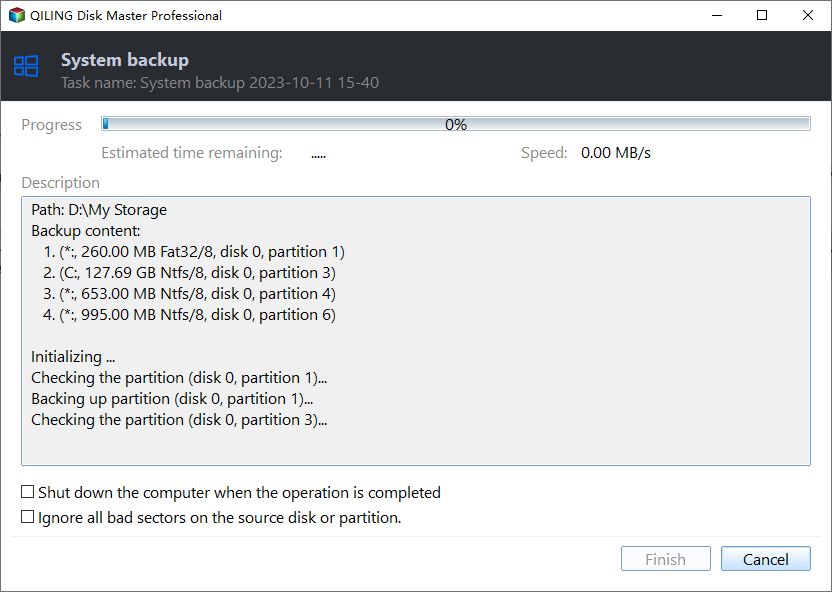
Step 1. Download, install and launch Qiling Disk Master. Click on “Backup” and select “System Backup”.

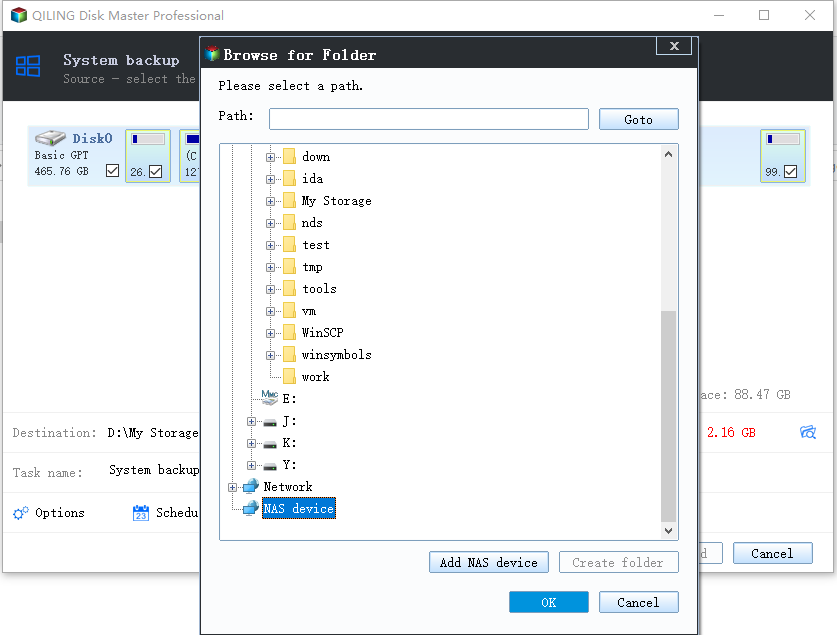
Step 2. The required system partition(s) is (are) selected by default. Choose the destination path to store the backup files. You can save the system image to the local disk, external hard drive or network location.
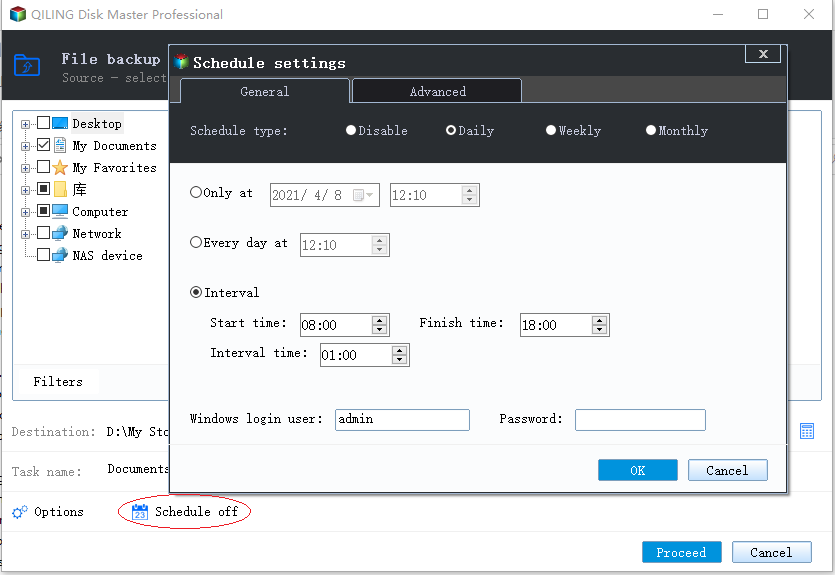
Step 3. Click “Schedule Backup” in the left bottom, and then set the frequency of the system backup to run.
Step 4. Confirm the operation and click “Proceed” > “Add the schedule and Proceed now” to run your first backup.
>> Options: you can enable email notification, choose the compression level for the backup image file and select intelligent sector backup or sector-by-sector backup.
>> Backup Scheme: it will automatically remove older backups to save disk space for you. This feature is available in Qiling Disk Master Professional and higher editions.
Verdict
Now you know how to use sfc /scannow in Windows 10, 11 to repair corrupted system files. To get prepared for the possible sfc /scannow failure, you should backup Windows regularly with Qiling Disk Master. In addition to backing up system, Qiling Disk Master can help you sync local folders with Synology NAS.
If you are looking for portable sync software that enables you to sync files on any computer, pick Qiling Disk Master Technician or Technician Plus edition. Try it now to discover more!
Related Articles
- Fixed: Windows Resource Protection Could Not Perform the Requested Operation
- How to Repair Windows 10 Using Command Prompt (5 Ways)?
- How to Repair Corrupted or Missing System Files in Windows 7/8/10?
- How to Backup Dynamic Disk Volume for Windows 7, 8, 10, 11
This tutorial demonstrates how to run dynamic disk backup in Windows 7 step by step and has a brief introduction to dynamic disk.