[Solved] Windows 10 Couldn't Be Installed
- My comptuer says "Windows 10 couldn't be installed" when upgraded from Windows 7
- The reasons and fixes for "Windows 10 couldn't be installed"
- Way 1. Free up space on system reserved partition
- Way 2. Extend system reserved partition
- Way 3. Stop and restart the Windows Update Service
- Way 4. Delete "Rollback" in Registry
- Further reading: Fix "Windows 10/ 11 installation has failed"
My comptuer says "Windows 10 couldn't be installed" when upgraded from Windows 7
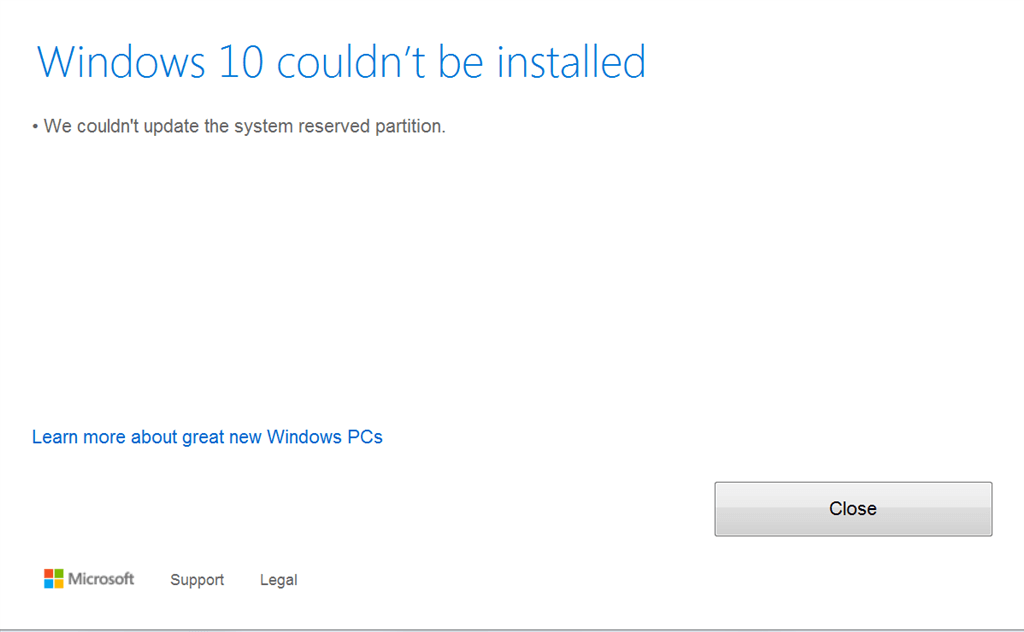
"Does anyone have ever gotten the message "Windows 10 couldn't be installed we couldn't update the system reserved partition. "error? I just want to upgrade my old Windows 7 to Windows 10 operating system but I just got the error message. What's wrong with my computer? Why I couldn't install Windows 10 on it? Any suggestion? Thanks a lot!
The reasons and fixes for "Windows 10 couldn't be installed"
When upgrading to Windows 10, it's not uncommon to encounter errors like "We couldn't update the system reserved partition" or "Failed: 1 update". These issues can be caused by insufficient free space for the system reserved partition or problems with the Windows update process. To resolve these errors, you can try freeing up space on the system reserved partition or check for issues with the Windows update process, depending on the specific error message you receive.
Way 1. Free up space on system reserved partition
1. To open the Disk Management console, press the Windows key + R to open the Run dialog box, type "diskmgmt.msc" in the box, and then press Enter.
2. At the Disk Management screen, right-click on the system reserved partition and select "Change Drive Letter and Paths".
3. At the next screen, choose "Add" and enter "G" for the drive letter.
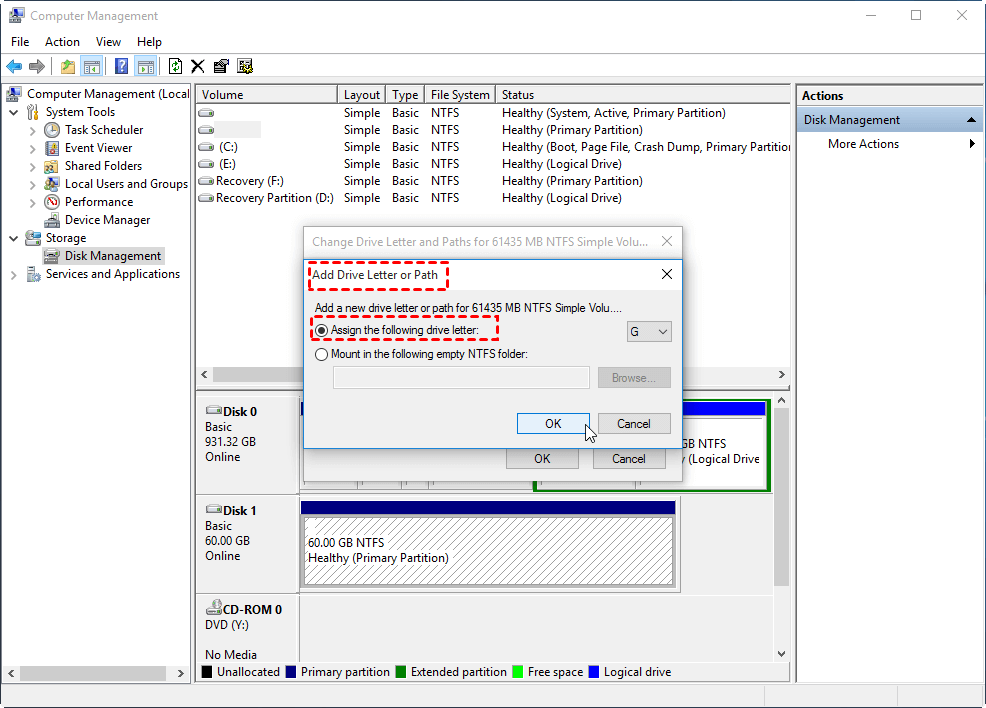
4. Click "OK".
5. To perform a disk cleanup, type "disk cleanup" in the search box and select Disk Cleanup.
6. In the pop-up Drive Selection window, select the G: drive and click "OK".
7. Follow the instructions to complete the disk cleanup.
After upgrading to Windows 10, there should be sufficient space on the SRP to upgrade. Be aware that you should change the drive letter to "None" before trying to upgrade to Windows 10. If Windows 10 couldn't update the system reserved partition after running Disk Cleanup, you can extend the SRP.
Way 2. Extend system reserved partition
To extend the System Reserved Partition (SRP) without losing data, you can use free partition software like Qiling Disk Master Standard. This tool can help you extend the SRP even when it's right behind the system partition (C: drive), which is typically the case. By using Qiling Disk Master Standard, you can safely extend the SRP, making more space available for your system without compromising your data. You can download and follow the steps provided by the software to achieve this.
1. Right-click on the C: drive, select "Resize Partition", and proceed with the process, taking note that a fresh Windows 10 install on a blank disk may only require a few hundred MBs of unallocated space.
2. To allocate the unallocated space next to SRP, drag the slider bar from left to right. This will ensure that the unallocated space is adjacent to the SRP partition.
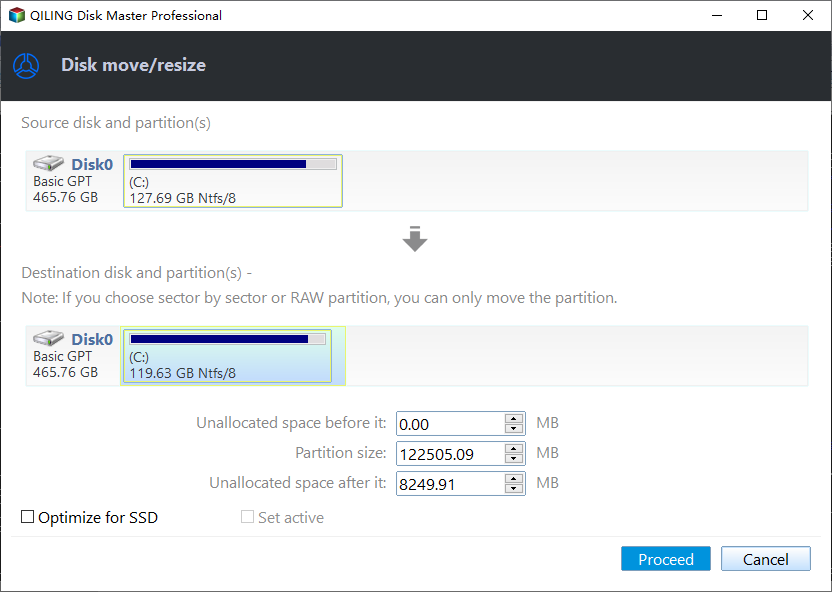
3. To finalize the partition layout, click on the "Proceed" button. This will apply the changes and finalize the partitioning of the drive.
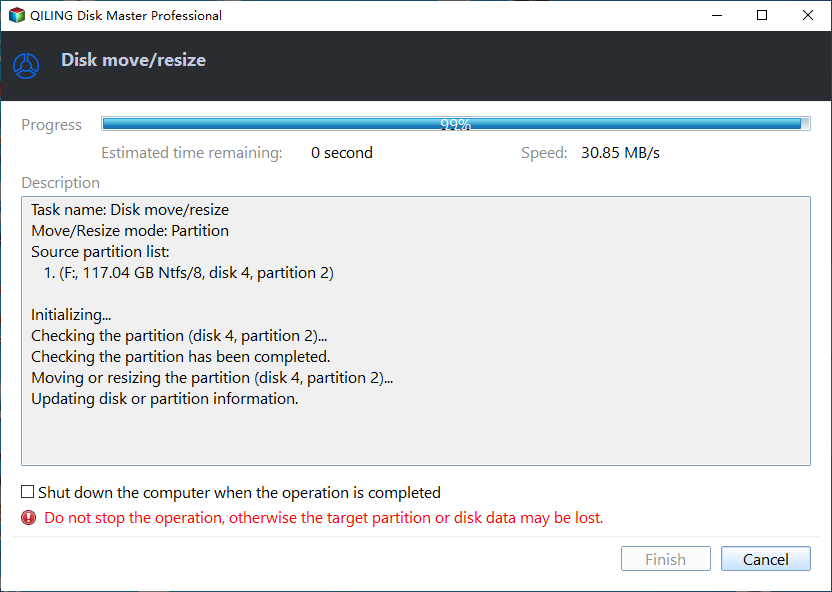
When the upgrade process is completed, you will be prompted to restart your computer and complete the operations under PreOS Mode, after which your computer will reboot and allow you to upgrade to Windows 10.
If you had partitioned your hard drive before installing Windows, you wouldn't have had a system reserved partition, which could be a solution to fix the Windows 10 installation problem. Alternatively, you could merge the system reserved partition into the C: drive, but this is not safe and not recommended by Microsoft. Another option is to use a disk management tool to add space to the system reserved partition from another partition on the same disk.
Way 3. Stop and restart the Windows Update Service
Step 1. Press "Windows" + "R" to open "Run" window.
Step 2. Input "services.msc" and hit Enter to open "Services" window.

Step 3. Locate "Windows Update" services, right-click it and choose "Stop".
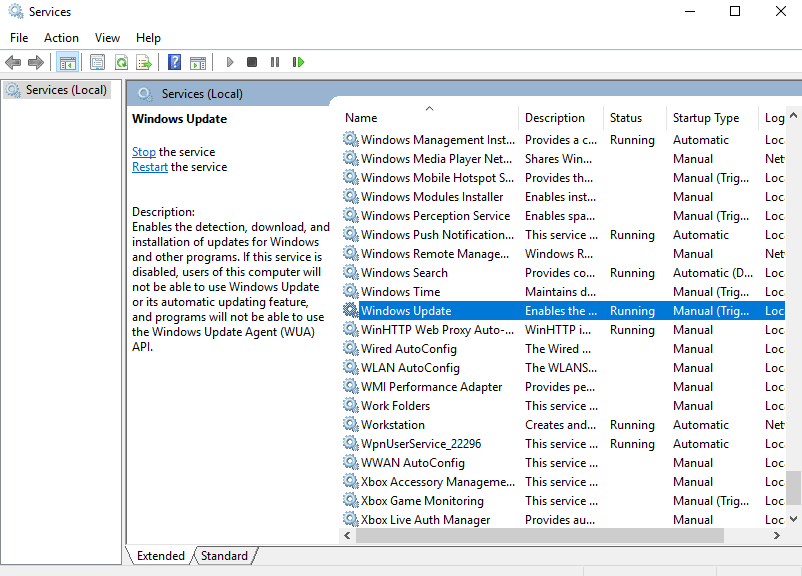
Step 4. Close this window and open "Services" window again;
Step 5. locate "Windows Update" services, right-click it and choose "Start".
Way 4. Delete "Rollback" in Registry
Step 1. Open "Run" window, input "regedit" and click "OK" to open Registry Editor.
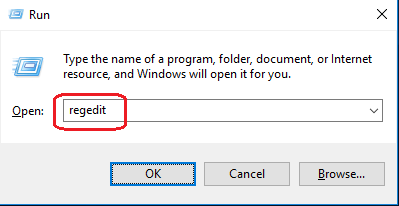
Step 2. Navigate to the following path:
HKEY_LOCAL_MACHINE\SOFTWARE\Microsoft\Windows\CurrentVersion\WindowsUpdate\OSUpgrade\Rollback
Step 3. Right-click "Rollback" and choose "Delete".
Further reading: Fix "Windows 10/ 11 installation has failed"
If you failed to install Windows 10 or 11 with the error "Windows 10 (11) installation has failed" instead of Windows 10 (11) couldn't be installed, you can try the following solutions to resolve the issue.
Fix 1. Remove all external devices
To resolve the issue, disconnect all peripheral devices, update your OS to Windows 10 or 11, and then reconnect your devices.
Fix 2. Turn off anti-virus software and firewall
Sometimes, anti-To resolve Windows 10/11 Update issues caused by virus software and firewall, disable the firewall and remove third-party anti-virus applications to see if the problem is resolved. Here's how: disable the Windows Defender Firewall and remove any third-party antivirus software, then restart your computer and check if the update works. If it does, you can re-enable the firewall and reinstall the antivirus software. If not, you may need to seek further assistance.
Step 1. In the search box, input "firewall" and click "Check firewall status" to open it.
Step 2. In the pop-up window, click "Turn Windows Firewall on or off ".
Step 3. Choose "Turn off Windows Firewall (not recommended)" for both Public and Private network settings.
Step 4. Click "OK" button to save the changes.
Related Articles
- Fixed: Cannot Install or Upgrade to Windows 11
Learn why your device cannot install or upgrade to Windows 11 and how to fix it with different ways in different situations. - Solved: Windows Could Not Format A Partition on Disk 0
To resolve the Windows error code 0x80070057, which occurs when trying to clean install Windows 10 and formatting a partition on disk 0, try the following: Disconnect all external devices, including USB drives and SD cards, and then restart your computer. Next, boot from the Windows 10 - Solved: Windows Failed to Start File Boot BCD Error
Windows failed to start because the Boot Configuration Data (BCD) for your PC is missing or contains errors? Learn causes and simple fixes for Windows failed to start File Boot BCD error. - How to Use Windows Media Creation Tool to Install Windows 10, 8, 7?
To install or upgrade your OS using the Windows Media Creation Tool, you can create a Windows installation USB drive with it. - Stepwise Guide to Free up Disk Space in Window 10
This post tells four effective ways to free up disk space, especially for C drive on Windows 10. - The Best Solution to Ghost Hard Drive in Windows 10
You will learn how to ghost hard drive in Windows 10 for data protection and remove ghost drive easily to get rid of its bad effect.