Guide | Enable UEFI Secure Boot for Windows 11
- What is UEFI secure boot?
- How to make sure whether the PC supports UEFI secure boot?
- ▶ Method 1. Check system information tool
- ▶ Method 2. Use CMD command
- ▶ Method 3. Use PowerShell Cmdlet
- ▶ Method 4. Check Windows Disk Management
- ▶ Method 5. Check the motherboard's production date
- How to enable UEFI secure boot?
- Windows 11 Secure Boot bypass using the install disk to boot
- Does UEFI secure boot affect performance of the PC?
- Conclusion
What is UEFI secure boot?
UEFI (Unified Extensible Firmware Interface) is a standard that ensures PCs can only boot with OEM-approved software, thereby protecting them from virus and malware attacks.
When Secure Boot is enabled, the computer only loads drivers with Microsoft certificates, preventing malware from loading and protecting the system from manipulation and infection.
Secure boot is widely supported, and you can learn how to enable UEFI secure boot on this page.
How to make sure whether the PC supports UEFI secure boot?
If you're wondering whether your PC supports UEFI secure boot, you're not alone. Fortunately, there are 5 ways to check if your PC has this feature, making it less of an unusual question for non-computer professionals.
▶ Method 1. Check system information tool
First, you can check the secure boot state in the System information.
1. Press "Win+R" simultaneously, type msinfo32 and hit "ENTER".
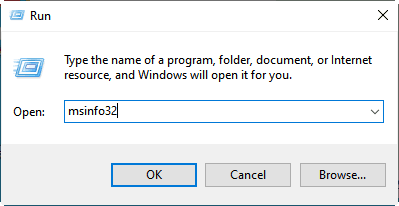
2. To check if secure boot is enabled on Windows 11, go to the "System Information" window, select "System Summary", and look for "Secure Boot State" on the right side. If it's "on", secure boot is enabled; if it's "off", you need to enable it for Windows 11.

▶ Method 2. Use CMD command
You can use Command Prompt to check whether Secure Boot is enabled in Windows. Run the command below to view boot configuration details, then confirm the Secure Boot status before changing BIOS or UEFI settings.
1. Press the "Win+R" keys at the same time to open the Run window, type "cmd" in the text box, and press the "ENTER" key to open the Command Prompt.
2. Type bcdedit/enum {current} and hit "ENTER" to execute it.
3. If the path shows "winload.efi", it means Windows has enabled UEFI secure boot, and if it shows "winload.exe", it means Windows has enabled the traditional way to boot.

▶ Method 3. Use PowerShell Cmdlet
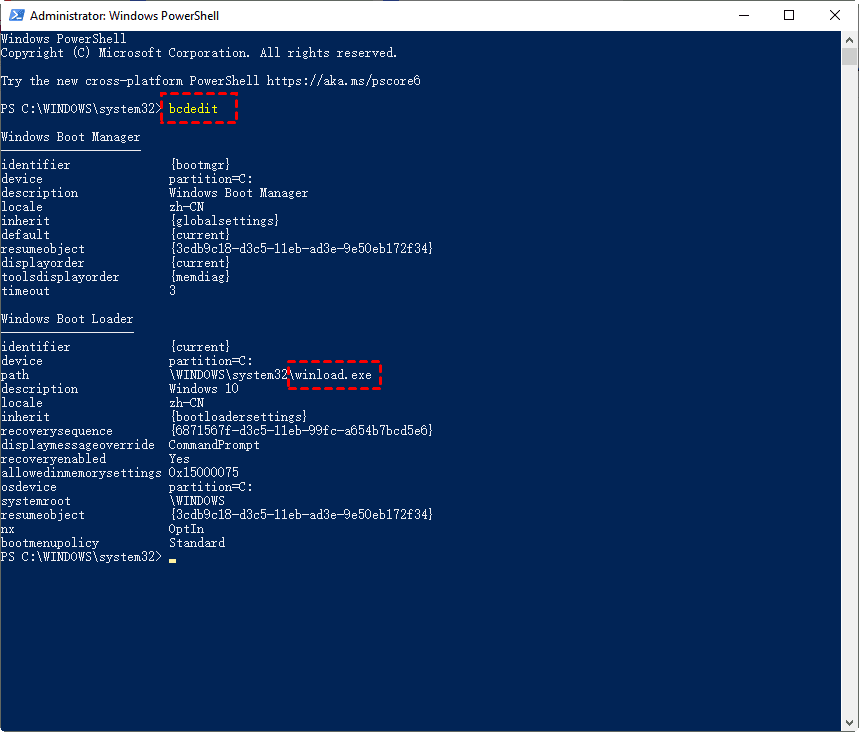
The Windows PowerShell would help by checking the "path".
1. To run PowerShell as administrator, go to the Start menu on the lower left, right-click on "Windows PowerShell" and select "Run as administrator".
2. To commit the changes, type "bcdedit" and press Enter. Then, locate the "path" field as you did in Method 2. Check what is behind the path, which should be either "winload.efi" or "winload.exe".
▶ Method 4. Check Windows Disk Management
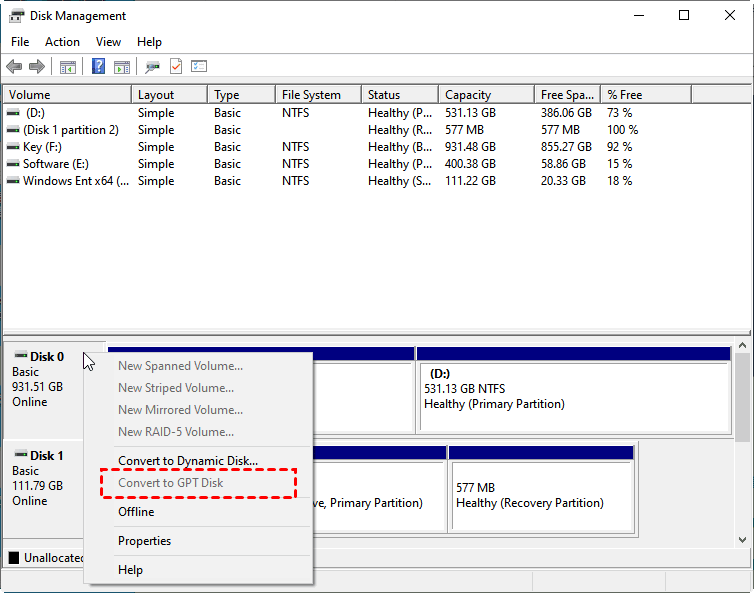
If the "Convert to GPT Disk" button is greyed out, it means the PC is in UEFI secure boot mode, and if it's not greyed out, it means the PC is in legacy BIOS mode.
1. To open the Disk Management window, press the Windows key + R to open the Run window, type "diskmgmt.msc" and press the Enter key.
2. If your PC shows the option to "Convert to GPT Disk", it indicates that your PC is running in the traditional mode, whereas if it shows "Convert to MBR Disk", it signifies that your PC is running in the UEFI secure boot mode.
▶ Method 5. Check the motherboard's production date
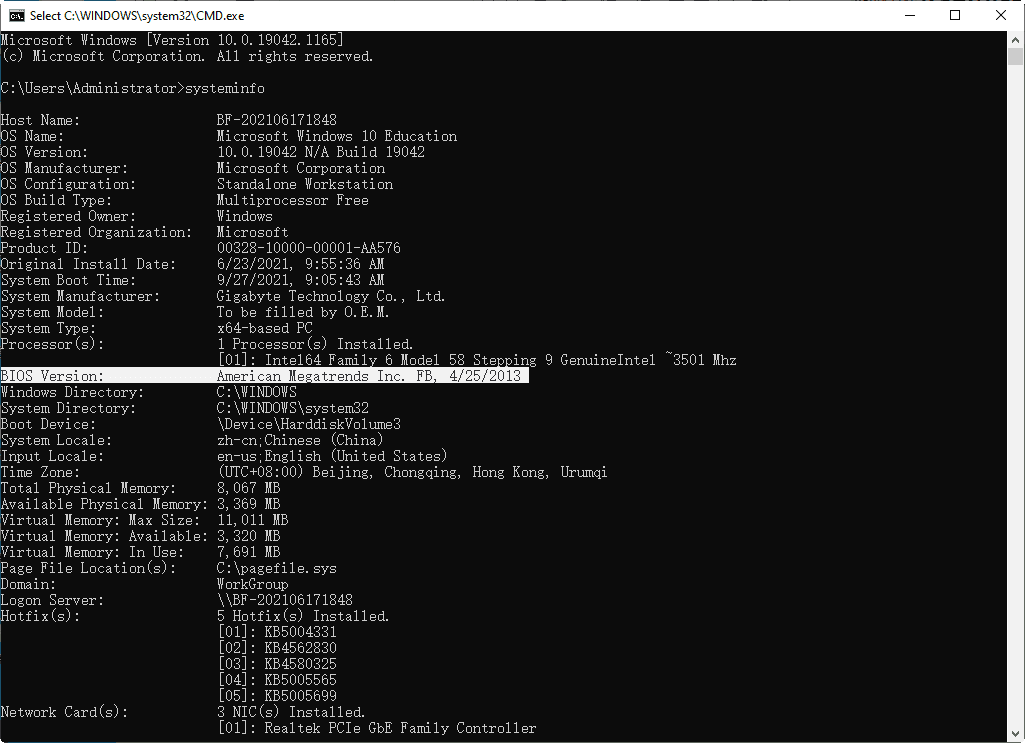
Besides, you can also view the motherboard's production data in "BIOS Versions", then determine if the secure mode is enabled based on that.
1. To open the Command Prompt in Windows, press the "Win + R" keys simultaneously to open the Run window. Type "cmd" in the text field and press the "ENTER" key. This will open the Command Prompt.
2. In the window, type "systeminfo" and hit enter. This will display system information, including the motherboard's production date, which can be found under the "BIOS Versions" option. Wait a moment for the info to load before checking.
Attention: When changing the secure boot state, you may encounter hardware failures. To resolve this, simply disconnect and then reconnect the faulty hardware. This should resolve the issue.
How to enable UEFI secure boot?
If your PC supports secure boot but it hasn't been enabled, you can follow these steps to enable the secure mode. (Note: I assume this is the continuation of the guide, and the previous steps are not included in this response)
1. To secure your computer, reboot and press the key that takes you to the BIOS system (the key varies by computer model, typically ESC, Delete, F1, F2, or F10). Once in the BIOS, navigate to the "Boot" section and select "Secure Boot" to ensure your system is protected.
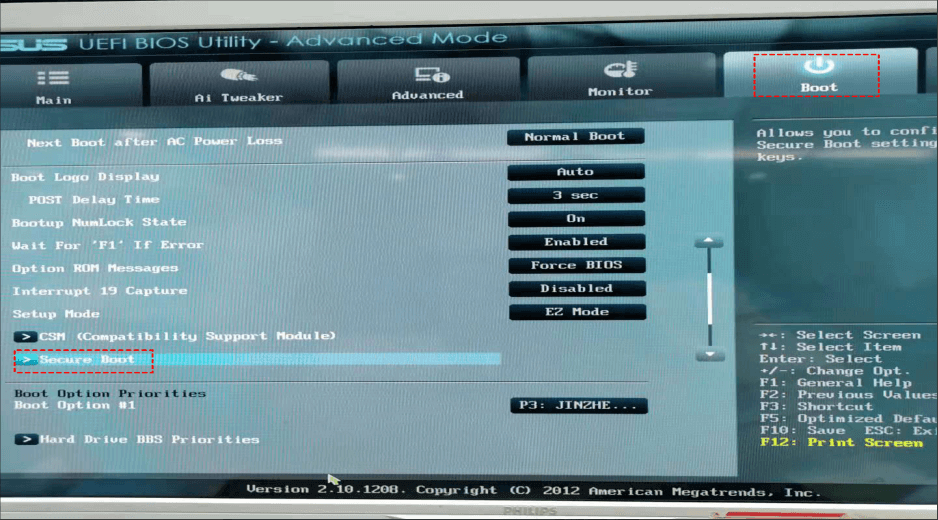
2. Now, you can secure boot is shut down. Click on Key Management.
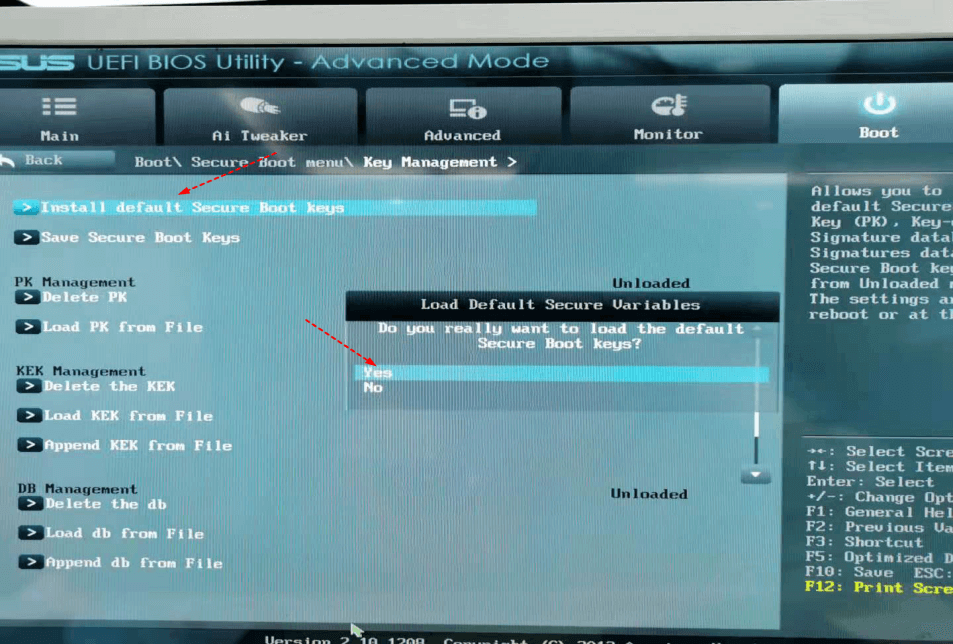
3. Select "Install default Secure Boot Keys" to enable secure boot.
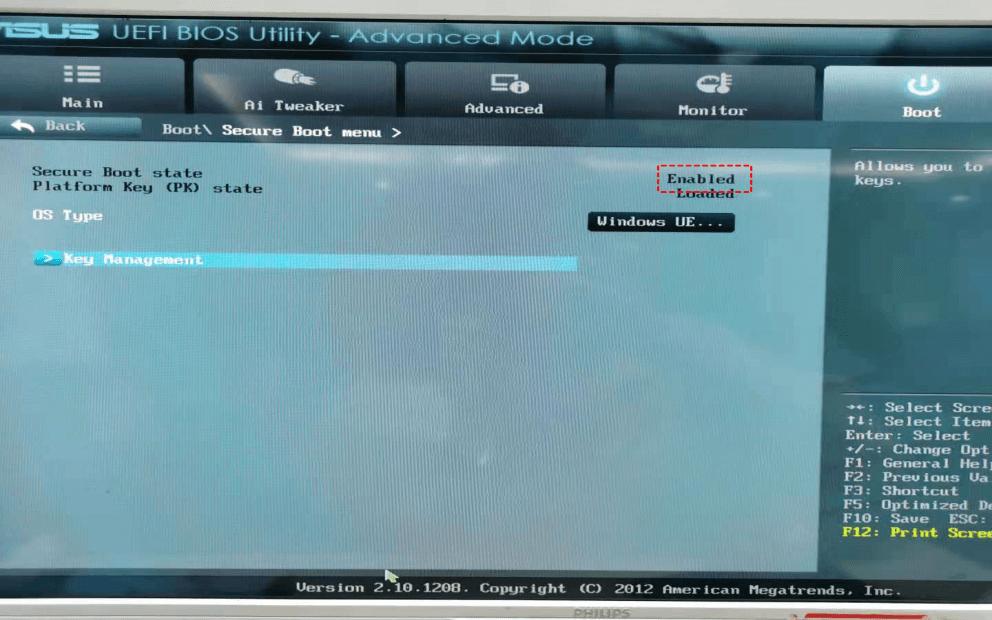
4. The Secure Boot feature was enabled on the previous column, which was visible after returning to it.
Windows 11 Secure Boot bypass using the install disk to boot
If your computer doesn't support secure boot, you can use the install disk to boot and bypass UEFI detection, allowing you to install Windows 11. This guide will walk you through the detailed steps to bypass UEFI detection and install Windows 11.
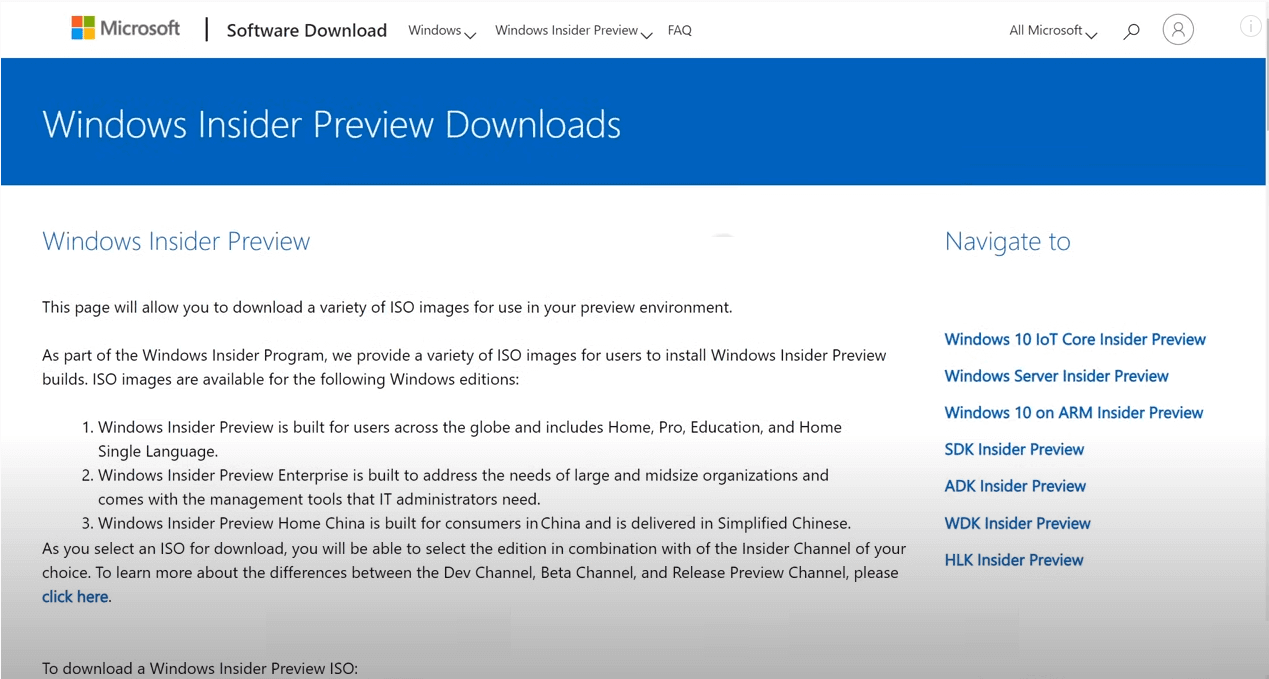
1. To download Windows 11, first download the Windows 11 ISO pack from the official website, then create an account and click on the profile to start the download process, which may take a bit of time.

2. After creating an account and logging in, scroll down the page, select the desired version and language, and then download the ISO file of the Windows 11 preview version.
3. After downloading the Windows 11 installation files, you need to create a bootable installation media, such as a USB drive or CD/DVD, to guide you through the installation process.
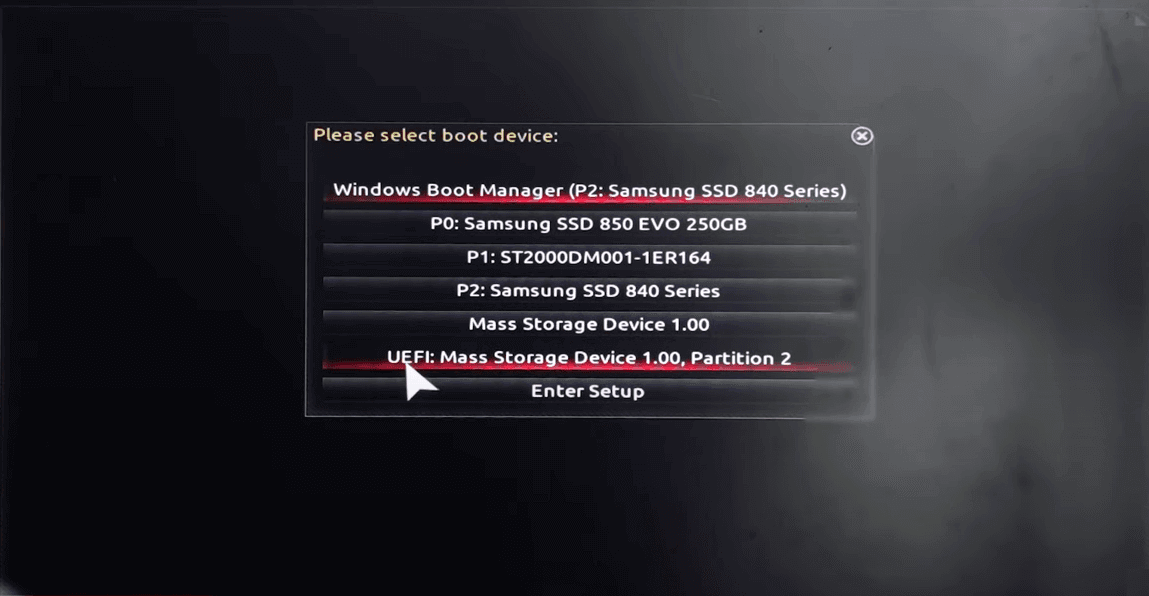
4. Insert the prepared installation disk into the USB port of the PC that needs to install Windows 11, and immediately press the shortcut key to enter the boot startup interface, which can be accessed via different keys on various motherboards (usually F8, F11, or F12).
5. After booting into the startup window, select the installation disk option and click on it.
6. After a minute, the Windows installer interface will appear, and you can follow the on-screen guide to complete the Windows 11 installation as you would with a regular Windows installation.

Does UEFI secure boot affect performance of the PC?
Enabling UEFI Secure Boot provides protection against virus attacks, but it does not affect a PC's performance.
Conclusion
This page explains what UEFI is and how to enable it for Windows 11 updates. There are 5 methods to check if your computer supports UEFI Secure Boot. If it doesn't, you can bypass UEFI detection using an installation disk and proceed with the Windows 11 installation. If you successfully enable UEFI Secure Boot, you can then proceed with the Windows 11 upgrade.
Related Articles
- [Tutorial] How to Install Windows 11 without Secure Boot and TPM
Although you are not allowed to install Windows 11 on devices that don't enable Secure Boot or TPM 2.0, you can still find some workarounds to get it done. This article will show you the detailed steps to install Windows 11 without Secure Boot/TPM and a way to work Windows 11 on any unsupported PC. - Are UEFI and GPT Required to Install Windows 11?
In this post, you'll learn whether UEFI and GPT are required for Windows 11 installation. Also, the ways to set boot mode as UEFI and to change disks from MBR to GPT will be introduced. - Fixed: Cannot Install or Upgrade to Windows 11
Learn why your device cannot install or upgrade to Windows 11 and how to fix it with different ways in different situations. - [Clear Guide] How to Create Windows 11 Boot USB
This article will share 2 methods on how to create Windows 11 boot USB. Also you can learn to boot from the Windows 11 bootable USB. - CHKDSK Cannot Run Because the Volume Is in Use by Another Process
CHKDSK Cannot Run Because the Volume Is in Use by Another Process: this guide summarizes the key steps, practical tips, and safer options so you can finish the task clearly and avoid common mistakes. - How to Clone C Drive on Windows 10 in 2024 [Newest Solution]
How to Clone C Drive on Windows 10 in 2024 [Newest Solution]: this guide summarizes the key steps, practical tips, and safer options so you can finish the task clearly and avoid common mistakes.