Five Effective Ways to Improve Windows 11 Performance
- Need to improve Windows 11 performance
- How to improve the performance of Windows 11
- │Method 1. Turn off visual effects
- │Method 2. Disable automatic startup programs
- │Method 3. Open Storage Sense
- │Method 4. Turn off fast startup to resolve Windows 11 Slow
- │Method 5. Clean unneeded files
- │Method 6. Upgrade HDD to SSD
- │Method 7. Install a new RAM
- Conclusion
Need to improve Windows 11 performance
Since Microsoft released Windows 11 on October 5, 2021, many users have upgraded from Windows 10 to Windows 11. This new operating system comes with new and enhanced features, but also stricter system requirements. If your PC meets the minimum requirements, you can install Windows 11.
Windows 11 can become sluggish over time, particularly on older PCs and devices with low configuration, leading to issues like freezes, delays, crashes, and other performance problems. To improve the performance of Windows 11, this article will provide guidance.
How to improve the performance of Windows 11
To optimize Windows 11, start by uninstalling any unnecessary software to free up space and potentially improve performance. Additionally, consider using professional anti-virus software to scan your PC for viruses, which can also help resolve performance issues. If these steps don't resolve the problem, you can try troubleshooting one solution at a time based on the previous suggestions.
│Method 1. Turn off visual effects
Turning on visual effects can improve the visual experience, but it may consume more graphics processor load, potentially reducing performance on older hardware. Disabling high visual effects can help improve Windows 11 performance.
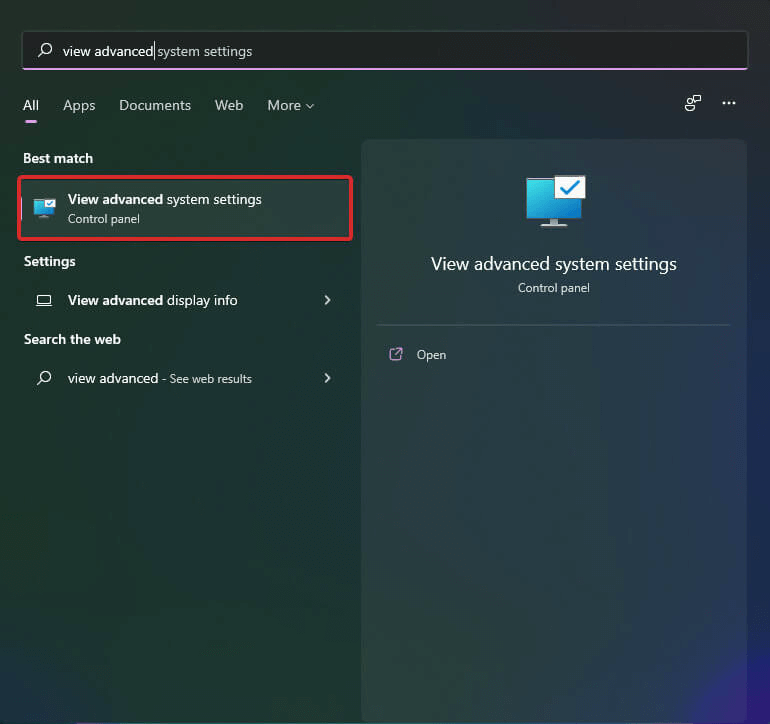
Step 1. To access the View advanced system settings, click the Windows icon at the desktop and type it in, then open it.
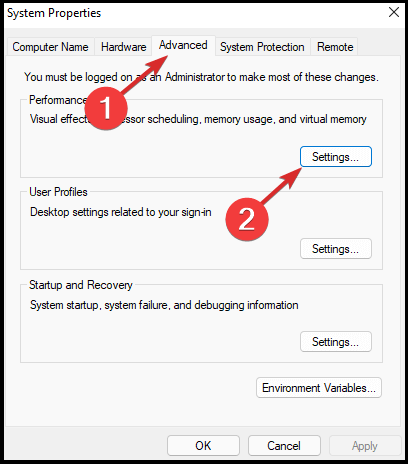
Step 2. Click Advanced and select Performance Settings.
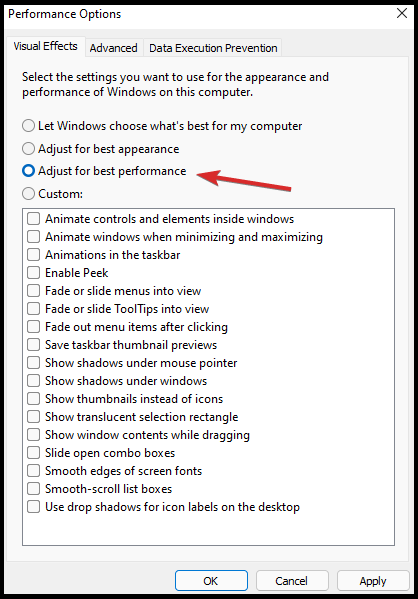
Step 3. Tick Adjust for best performance option.
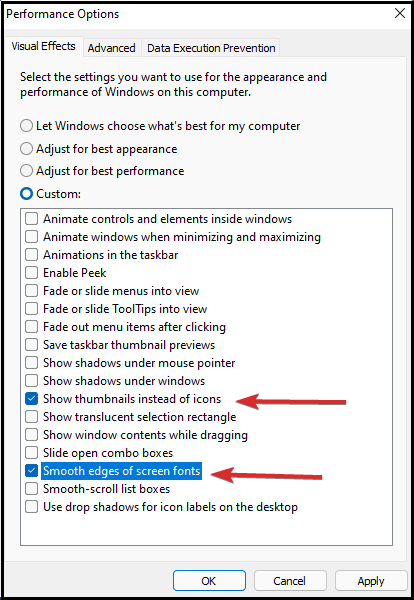
Step 4. From the Custom shown list, checkmark the following options: Show thumbnails instead of icons and smooth edges of screen fonts.
Step 5. Click Apply and OK to save these operations.
│Method 2. Disable automatic startup programs
Some unnecessary programs will start automatically when you boot, consuming storage and memory. To prevent this, you can disable startup programs, which will stop them from running in the background at boot time.
Step 1. Right click Search icon at the desktop, select Task Manager.
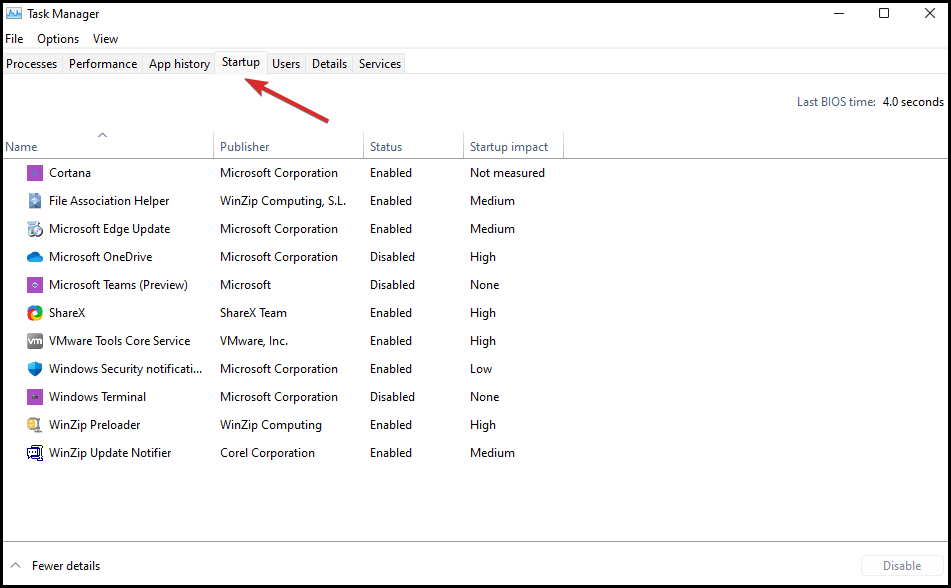
Step 2. Click on the Startup tab.
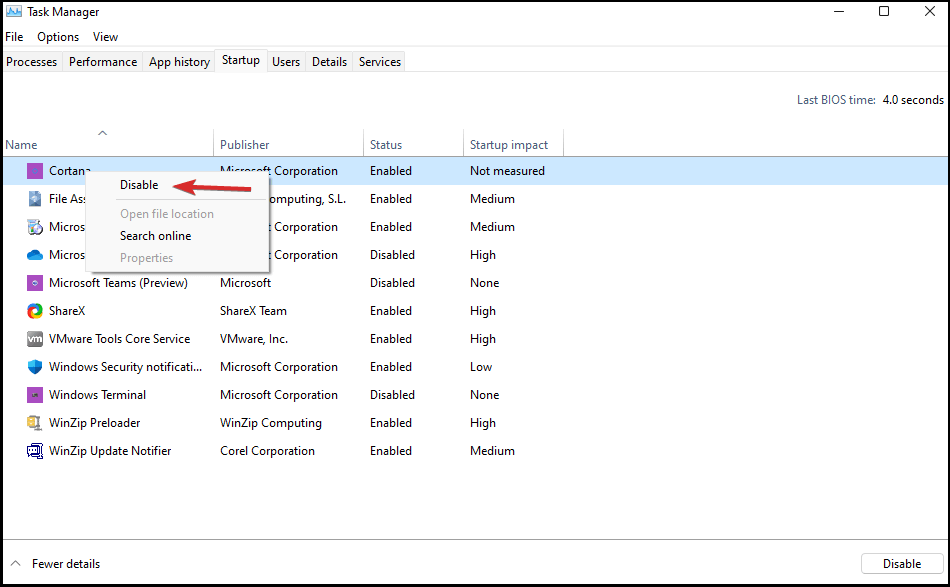
Step 3. Right-click any program that you don't want to load in startup and select Disable.
│Method 3. Open Storage Sense
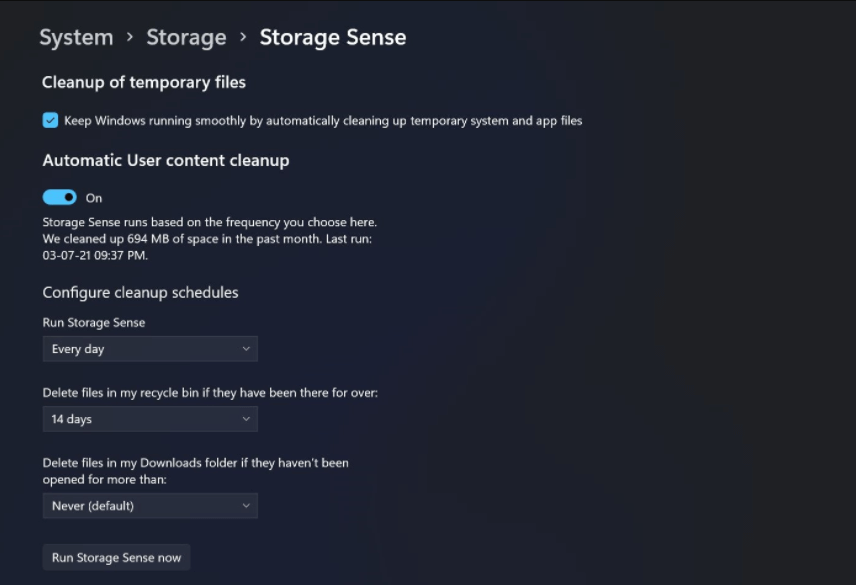
Windows 11 still has the Windows 10 Storage Sense function, which manages computer storage and releases space by deleting temporary system files, items in the recycle bin, etc. when needed, to improve Windows 11 performance.
Step 1. Click the Search icon at the desktop, select Settings.
Step 2. Click on Storage and tap Storage Sense.
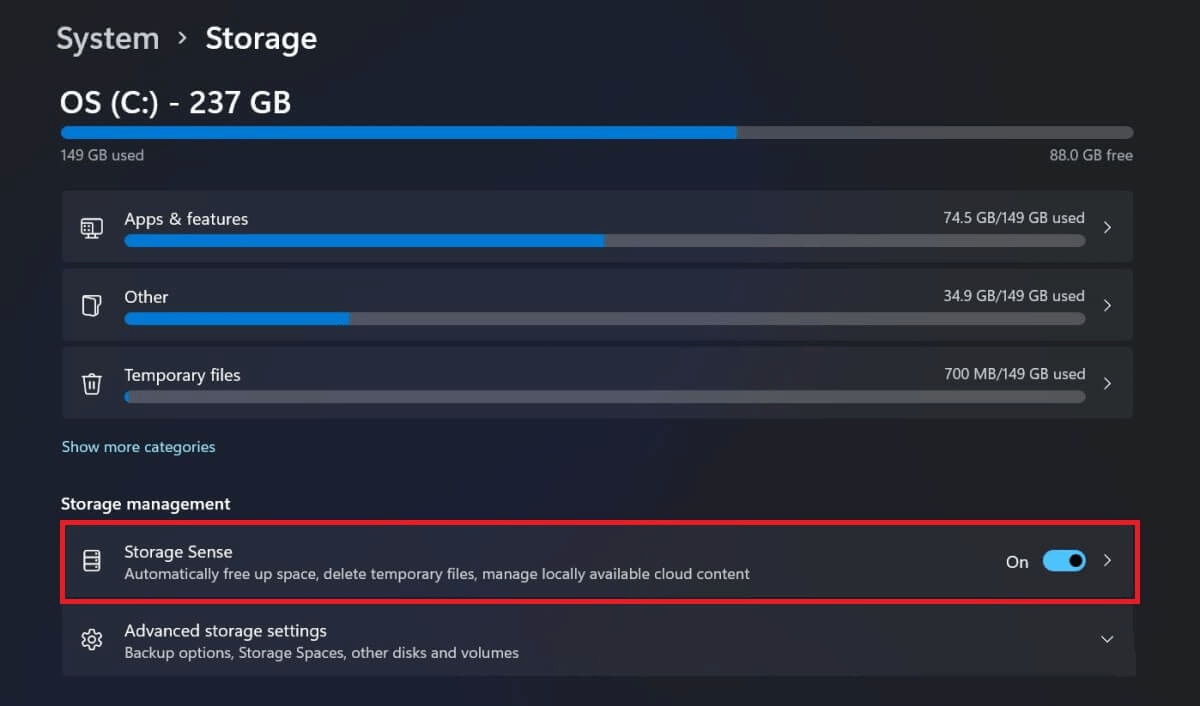
Step 3. To enable Storage Sense, turn it on by going to Settings > System > Storage > Storage Sense. Then, select the desired automatic cleanup schedule to set how often you want your device to automatically clean up temporary files and other data.
│Method 4. Turn off fast startup to resolve Windows 11 Slow
Windows 11 operating system has a Turn on Fast Startup capability. You may use it to improve your system's boot-up timing. However, if you have this option selected, you may encounter the problem of Windows 11 delayed boot. As a result, you may want to disable the Fast Startup option to enhance system efficiency. To disable the Fast Startup option, perform the following steps.
Step 1. To access the Control Panel, you can type "Control Panel" in the search box, usually found on the taskbar, and click on the result that appears. This will open the Control Panel window, where you can manage various system settings and preferences.
Step 2. To access power options, select the "Hardware and Sound" option in the Control Panel, then select "Power Options". If you can't find the power option immediately, search for "Power Options" in the Control Panel.
Step 3. Select the "Choose what the power button does" option and uncheck the box next to "Turn on fast startup" to disable it.
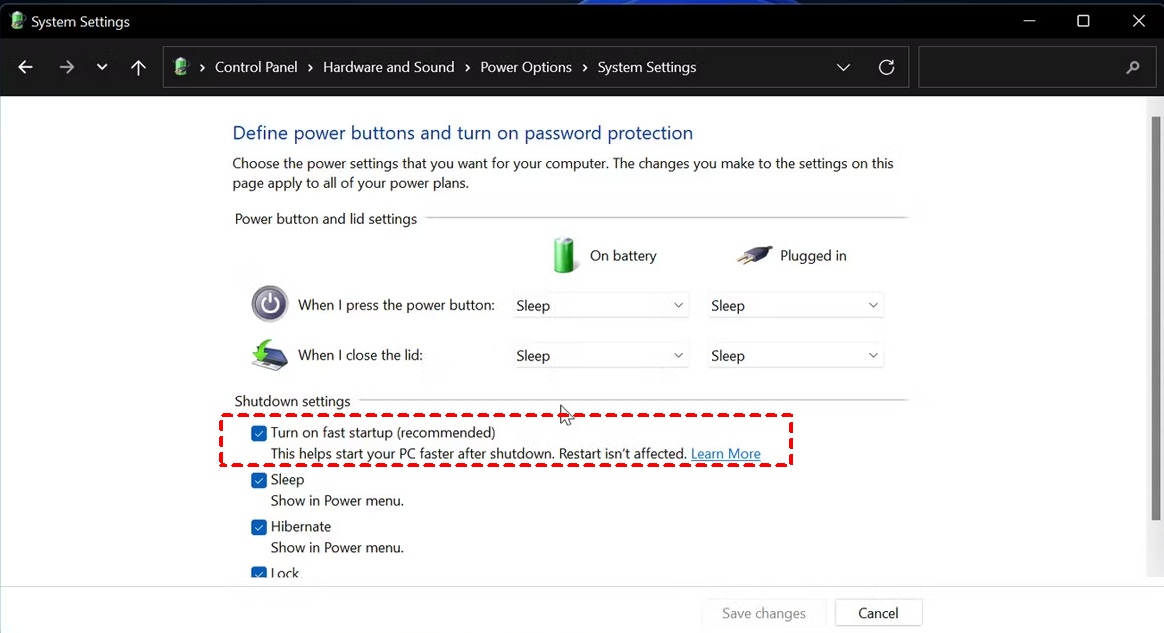
Step 4. Tap on the "Save Changes" option.
Restarting your computer can often resolve Windows 11 slow performance issues by clearing out any temporary issues or glitches that may be causing the slowdown. This simple step can help to refresh the system and get it running smoothly again.
│Method 5. Clean unneeded files
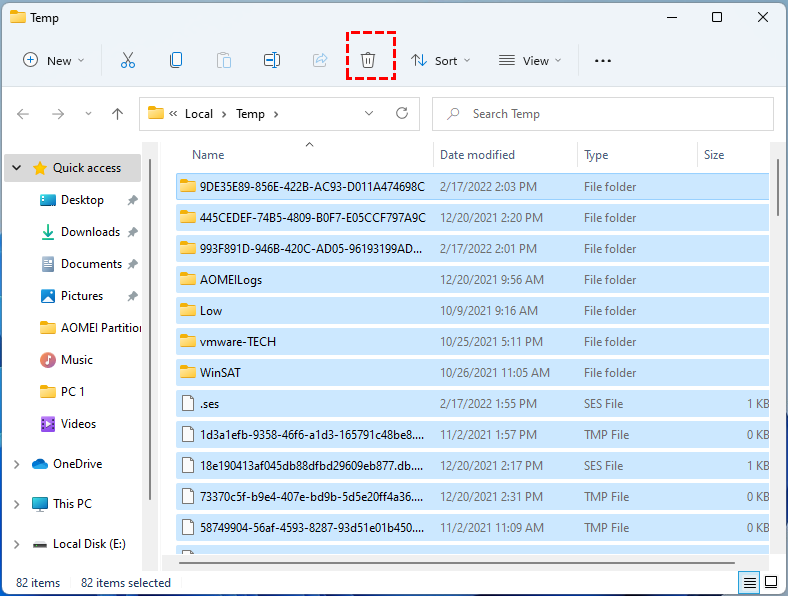
Windows creates temporary files in memory when a task is completed, allowing the computer to run smoothly and quickly. However, if these files become corrupted or outdated, they can cause Windows 11 to run slowly.
Step 1. Press the "Windows + R" keys together to open the "Run" dialog box.
Step 2. To access the "Temp folder" from the C: drive, type "%temp%" and press the Enter button.
Step 3. To remove temporary files, press the "Ctrl + A" keys to select all the files, then press the "Delete" key to remove them.
Step 4. If a dialog box appears, click on the "Do this for all current items" option and tap the "Continue" button.
Note: Wait for the deletion process to complete, and if any temporary files remain, skip them.
│Method 6. Upgrade HDD to SSD
If Windows 11 is running slowly on a traditional Hard Disk Drive (HDD), consider installing it on a Solid-State Drive (SSD) instead, which can significantly improve startup time, file access speed, and overall system responsiveness.
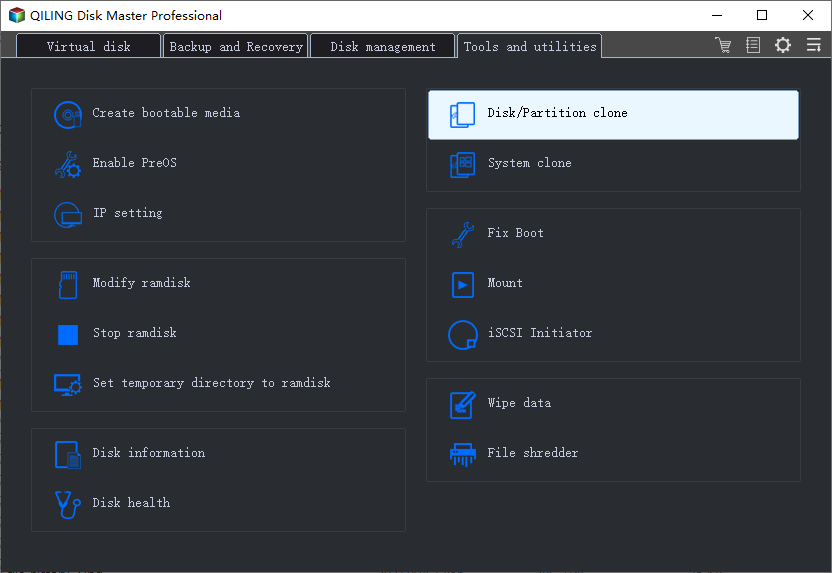
To safely and quickly upgrade to an SSD, I recommend using Qiling Disk Master Professional to clone your entire HDD to the SSD. This tool is designed to solve various disk partition problems and supports Windows 11/10/8/7/Vista/XP users, making it easy to use for anyone, even those who are not tech-savvy. Its operation is effortless, allowing you to upgrade to an SSD without any difficulty.
In addition to the steps mentioned earlier, you can also perform scheduled disk defragmentation to clean up fragmented files, which can improve the running speed of Windows 11.
Step 1. Install and launch Qiling Disk Master, then click on the "Tools" tab page and select "Clone Disk".
Step 2. Select the hard disk that you want to clone as the source disk and click "Next".
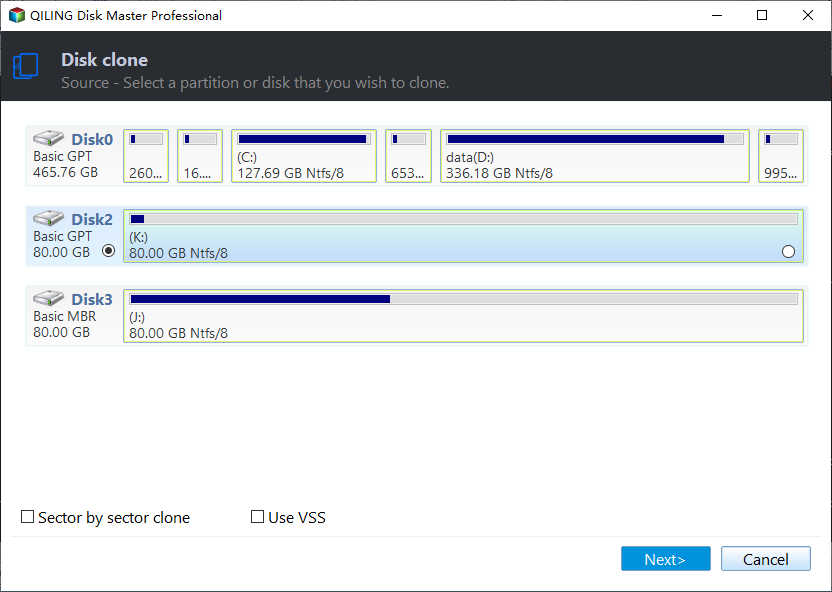
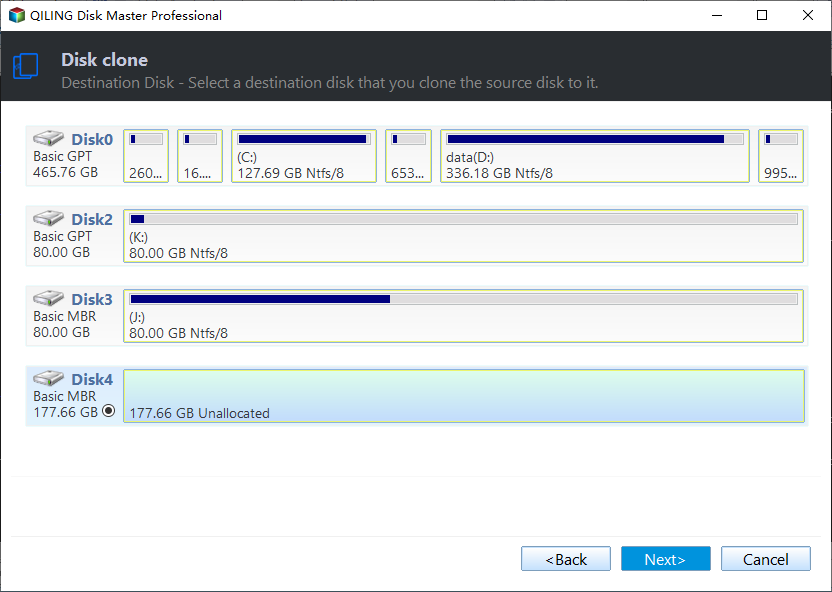
Step 3. Select the destination disk to store the data on the source disk, and then click "Next".
Step 4. First, select the source and destination disk in the window. Then, you can check the source and destination disk in the next window or change to "Sector to Sector clone", and click the "Confirm" button to continue if there is no problem.
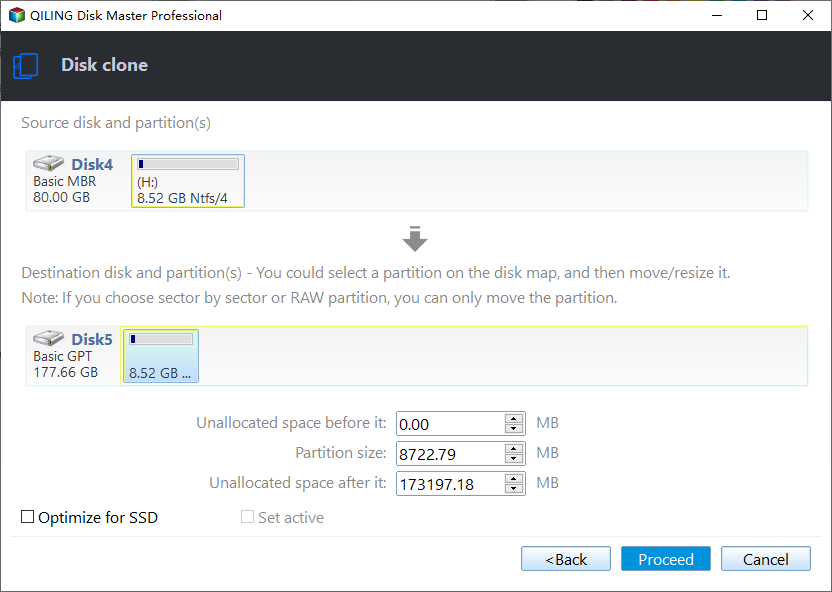
Here, you can also click the "Settings" button to adjust the partition size on the destination disk, or tick "4k alignment" to improve the reading and writing speed of SSD if the target disk is an SSD drive.
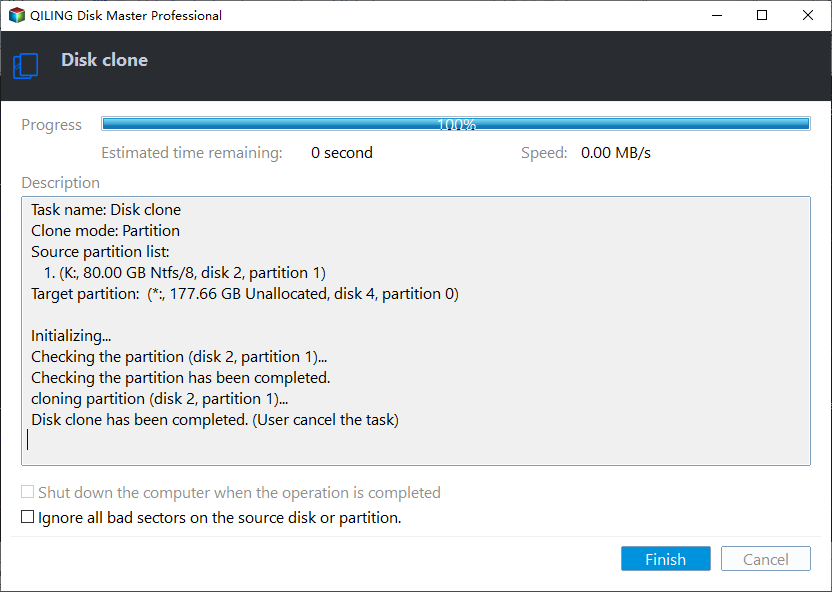
Step 5. To start cloning the hard drive, click "Apply" and "Proceed" in the main interface after selecting the source and target drives.
│Method 7. Install a new RAM
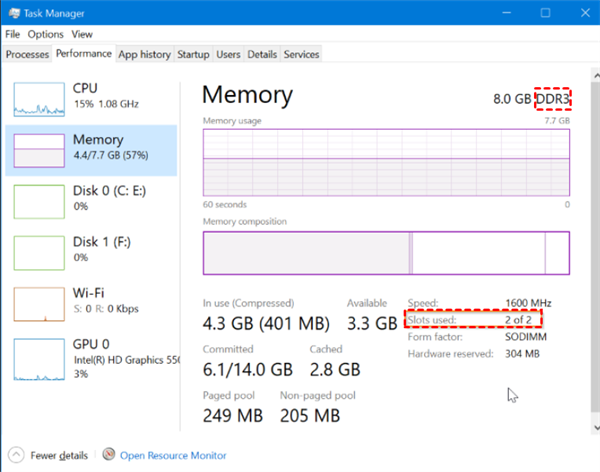
RAM, or Random Access Memory, temporarily stores data when performing tasks, and its operation affects the computer's overall speed. If budget allows, consider adding a 4/8 GB memory stick to your PC.
To upgrade your computer's RAM, first, open the Task Manager and click on "Performance". This will show you the type of memory and the number of slots used. Based on this information, purchase compatible RAM and install it on your computer.
Conclusion
This article provides five methods to improve Windows 11 performance, offering both free and paid options. You can choose the one that suits your needs.
Related Articles
- [5 Ways] How to Speed Up Computer Windows 10 Successfully?
If your Windows 10 computer runs very slow, you can take a look at this post. We gather 6 easy but effective ways to speed up Windows 10 computer. So, read it on and learn how to increase Windows 10, Windows 8 and Windows 7 hard disk speed. - 6 Methods: Clean up Windows 10 to Improve Windows PC Performance
How to clean up Windows 10 safely when the low disk space warning appears? In this post, 6 most common but effective ways will be provided to help clean up Windows 10 disk space with ease. - How to Speed up Dell (Inspiron) Laptop on Windows 11/10/8/7?
Dell Inspiron running slower and slower? Here you can learn how to speed up Dell Inspiron laptop or PC based on Windows 10/8/7. - [Solved]: Laptop Slow After Windows 11 Update
What you should do if your laptop slow after Windows 11 update? Don't worry, this article will show you why this happened and how to fix it effectively. - Full Guide | HP Omen 15-ce0xx RAM and SSD Upgrade
This article shares HP Omen 15-ce0xx RAM upgrade tutorial and offers a guide to upgrading your SSD for better performance. - Clone HDD to SSD in Lenovo Laptop for Better Performance
On Lenovo laptop, how to clone HDD to SSD and make sure it's bootable? Follow this guide to implement hard drive migration so as to get better performance.