Three Ways to Safely Move Programs to Another Drive on Windows 11
- Why need to move programs to another hard drive on Windows 11?
- Different methods to move programs to another drive on Windows 11
- │Method 1. Moving programs via Settings
- │Method 2. Moving programs with Steam Mover
- │Method 3. Moving programs via App Mover
- Further reading: How to increase available free space
- Epilogue
Why need to move programs to another hard drive on Windows 11?
Windows 11 supports a hybrid work environment with innovative features, keeping pace with the times, and aims to boost users' work efficiency through a flexible experience.

Windows 11 often installs programs on the C drive, leading to a full C drive issue if left unchecked, causing PC slowdowns and potential system crashes.
To avoid issues with your Windows 11 system, you can move programs to another drive, freeing up space on your C drive, by using the built-in Disk Cleanup tool, the System Properties window, or a third-party program mover tool.
Different methods to move programs to another drive on Windows 11
Moving installed programs to another drive on Windows 11 can sometimes result in unsuccessful program runs due to lost important files when simply copying and pasting. To avoid this issue, consider using alternative methods to move installed programs to another drive and run them normally.
│Method 1. Moving programs via Settings
If the target programs are installed from Microsoft Store, Settings will be helpful, or the App & features move will be greyed out. Please keep reading to realize detailed steps.
Step 1. Click the "Start" key and then click "Settings" in the lower left of the popped window.
Step 2. Click "Apps", and all installed apps will be displayed in the "Apps & features" section.
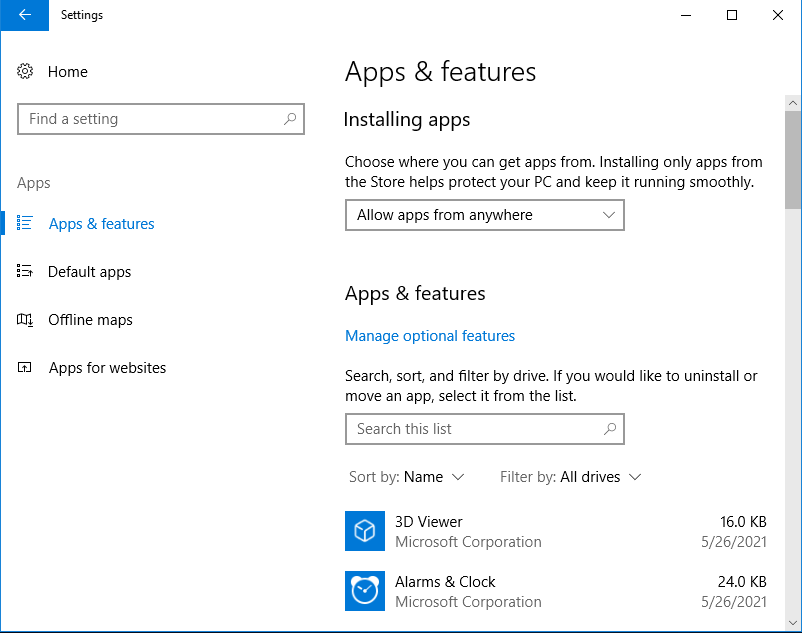
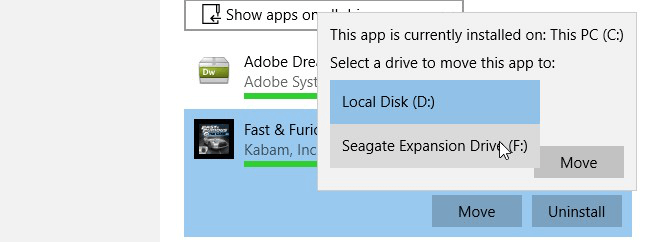
Step 3. Select the target program, click "Move" and choose D drive to store it, then confirm the operation by clicking "Move" on the pop-up window.
│Method 2. Moving programs with Steam Mover
If the first method doesn't work, you can try the Steam Mover. This tool allows you to move games and programs to another drive without reinstalling, making it a convenient alternative to the first method.
Warnings:
✍ You can only move installed programs from one NTFS drive to another NTFS drive, as the file system type is a requirement for the operation to be successful.
✍ Executing the wrong commands can lead to accidental loss of important data, resulting in significant financial and reputational losses for individuals and organizations. This highlights the importance of verifying commands and data before executing them, especially in critical systems and applications.
Step 1. To use Steam Mover, install and open the application, and click the button next to the "Common Folder" option.
Step 2. To move a program, select the path of the folder where the program you want to move is located, typically found in the "Programs" or "Program Files" folder, usually in the "C:\Program Files" or "C:\Program Files (x86)" directory on a Windows computer.
Step 3. To remove a program, open the Control Panel, click on "Programs and Features", then click on "Add/Remove Programs", navigate to the "Alternative" folder, select the folder where the program files are stored, and click "OK" to confirm the uninstallation.
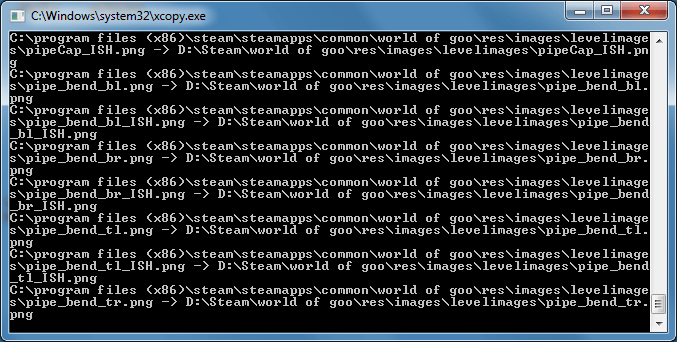
Step 4. Select the programs you want to move, then click the blue arrow to initiate the process.
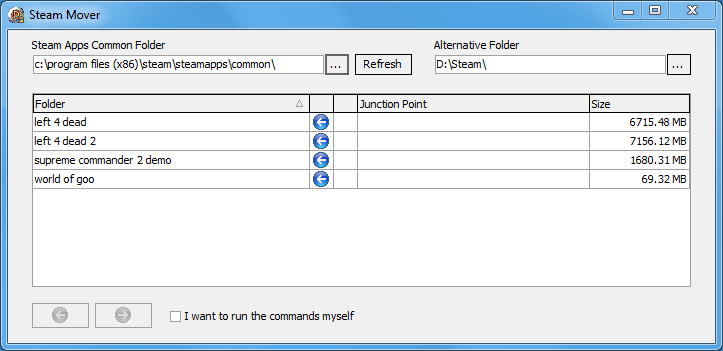
Step 5. Please wait for a while.
Step 6. The folder path under the Junction Point Column will be updated to a new folder.

│Method 3. Moving programs via App Mover
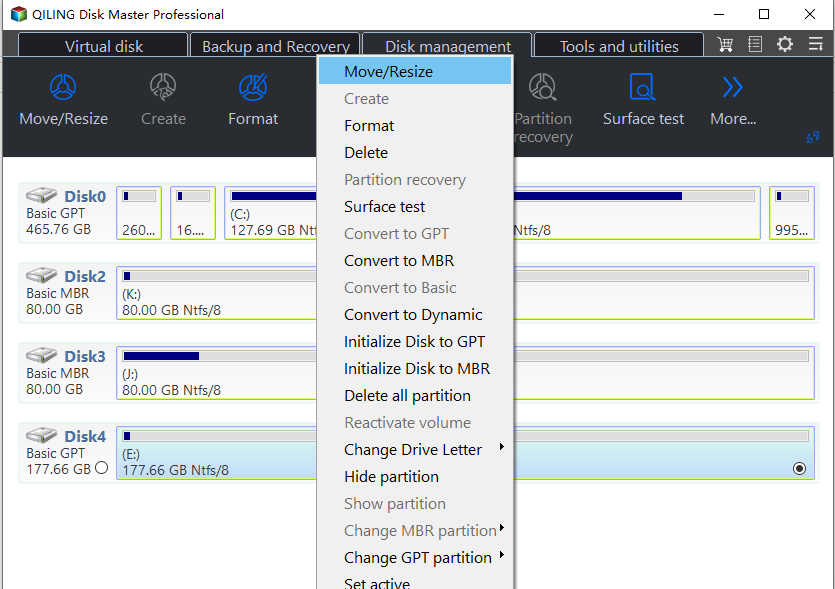
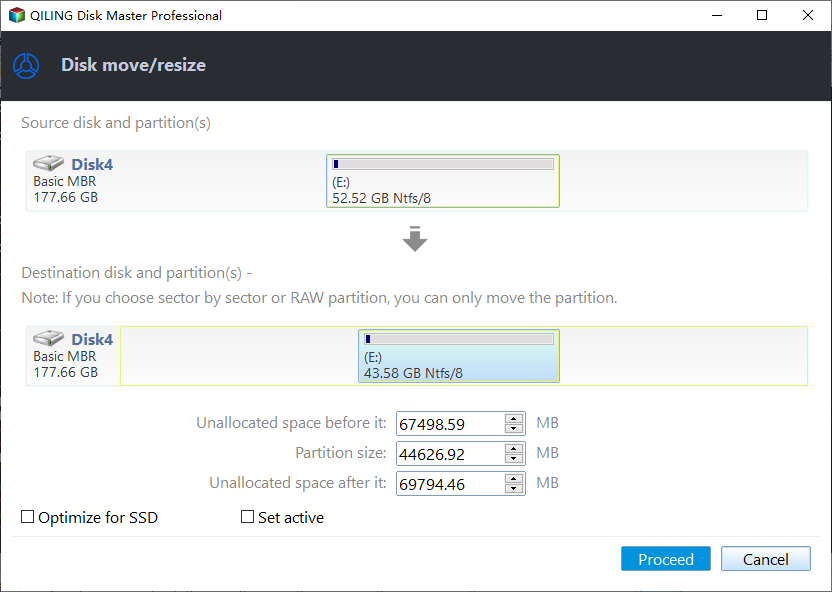
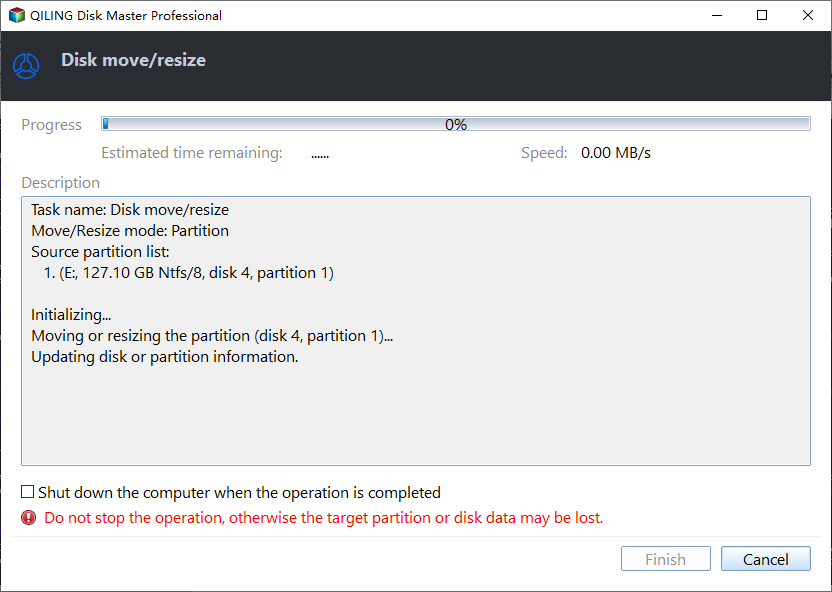
If the target programs didn't install from Microsoft Store, and if the file system isn't NTFS, the above methods won't work. In such cases, Qiling Disk Master Professional can help you move programs to another drive on Windows 11.
The "App Mover" feature enables users to move installed programs to another drive on the same disk without losing data, even if they're unfamiliar with the PC. It also allows users to copy all data from one hard drive to another, overcoming traditional limitations and providing a convenient and reliable option.
This software offers features like migrating the OS to an SSD, allocating free space, deleting large files, and more, providing advanced functionality.
You can download the Demo version to see how to move installed programs to another drive on Windows 11, allowing you to free up space on your primary drive and keep your programs organized.
Note: It's suggested to free up space on the destination drive before moving programs to it.
Further reading: How to increase available free space
You can free up space on your device by using Storage Sense, which automatically deletes temporary files, or Allocate free space, which temporarily moves files to the cloud to give you more space, allowing you to choose the method that best suits your needs.
◉ Free up your drive with Storage Sense
Storage Sense is a Windows 11 feature that automatically removes temporary files, empties the recycle bin, and deletes unnecessary files to free up space on SSD or HDD, and can be scheduled to run at regular intervals.
Step 1. Click the Start key, Settings, System, and Storage in turn.
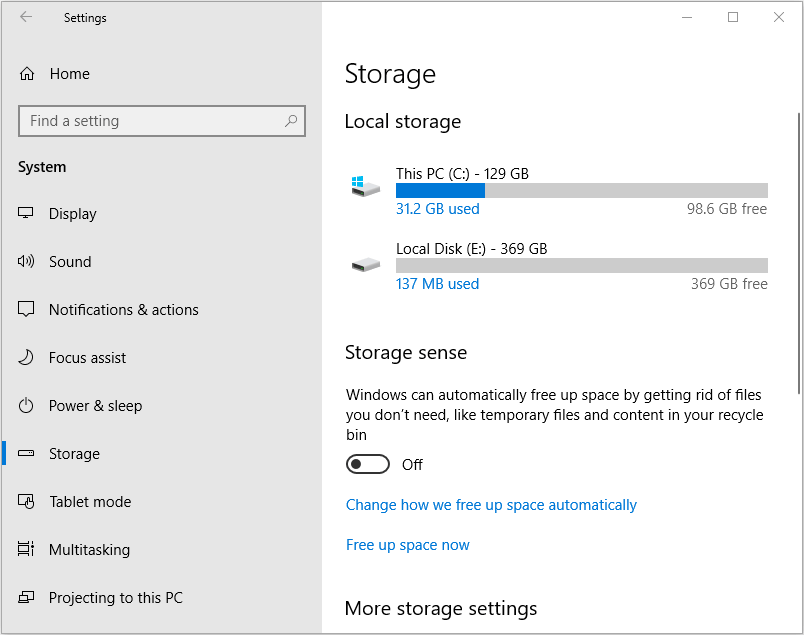
Step 2. Turn on the Storage Sense.
Step 3. To free up space on your computer, click on the target drive, and select the files you no longer need or want to delete.

◉ Allocate free space to C drive
To extend the C drive for better performance, you can allocate free space from another partition to C drive with a disk management tool. This method increases available space without manually deleting files or reinstalling programs.
Step 1. Open Qiling Disk Master Professional, right-click the D drive and select "Allocate Free Space".
Step 2. Choose the size and destination drive.
Step 3. Check your procedures in "Pending Operations" on the sidebar. Then click "Apply" to execute this operation.
Epilogue
This article provides guidance on moving programs to another drive on Windows 11, with Qiling Disk Master Professional being a convenient option. It also offers solutions to increase the free space on the C drive, providing three methods for moving programs and two methods for freeing up space.
To move programs to another drive on Windows Server, you can use Qiling Disk Master Server, a tool designed for Server users.
Related Articles
- How to Safely Move Programs from C Drive to D Drive in Windows 10?
Learn how to move programs from C drive to D drive or another drive in Windows 10 without reinstalling, thus you can easily and effectively solve C drive full issue. - How to Transfer Programs to External Hard Drive in Windows 10?
In this page, I am going to show you how to transfer programs to external hard drive without reinstalling on Windows 11/10/8/7, and offer a step-by-step guide. - Can I copy a program from one hard drive to another?
Are you bothered by "how to copy programs from one disk to another in Windows 10?" Don't worry, some utilities will be introduced in this article to move programs from one drive to another without data loss. - QILING Disk Master Professional
Qiling disk master is one of the professional, user-friendly software to a backup drive, files, resize or move partition, system clone software for windows PC. - Transfer Files from Windows 10 to Windows 11 Easily (3 Ways)
You will learn 4 effective ways to transfer data from Windows 10 to Windows 11 over network or without network. And this article also helps with free Windows 11 upgrade. - Best Way to Upgrade Hard Drive to Larger Drive or SSD on Windows 11
Upgrading the hard drive on a Windows 11 computer is necessary to improve performance and efficiency. To do this, the best cloning software can be used to clone the existing hard drive to a solid-state drive (SSD), effectively replacing the old hard drive with a faster and more reliable one.