How to Transfer Data from Windows 10 to Windows 11 (4 Ways)
- The need to transfer files from Windows 10 to Windows 11
- How to transfer files from Windows 10 to Windows 11 easily
- Way 1: Transfer files from Windows 10 to Windows 11 over network🔥
- Way 2: Transfer files from PC to PC using OneDrive
- Way 3: Transfer files from Windows 10 to Windows 11 using external hard drive
- Way 4: Transfer files from PC to PC using free sync software👍
- Hot topic: about Windows 11 free upgrade
- 1. How to check if I can upgrade to Windows 11
- 2. How to download and install Windows 11
- 3. How to downgrade Windows 11 to Windows 10 without losing data
- Final words
This video only provides 3 methods, so to learn more, please continue reading below.
The need to transfer files from Windows 10 to Windows 11
If you've upgraded to Windows 11 from Windows 10, you may want to transfer files from your old Windows 10 installation to your new Windows 11 one. Microsoft allows users to free upgrade to Windows 11 if their Windows 10 meets the minimum system requirements. This means you can easily move your files, settings, and applications to your new Windows 11 installation.
If you use the To upgrade to Windows 11, check for an update or use the Windows 11 installation assistant. This may preserve your files from Windows 10. However, if your computer doesn't meet the system requirements, you may need to consider a new computer or hardware upgrades.not meet the Windows 11 system requirement or you choose to clean install Windows 11Be aware that you may lose all of your data during the process unless you keep a copy of your files in advance.
Regardless of your situation, you can learn three useful ways to transfer files from one PC to another, either over a network or without the need for an internet connection.
How to transfer files from Windows 10 to Windows 11 easily
You can easily transfer files from Windows 10 to Windows 11 to prevent any data loss in the Windows installation process. There are 4 useful methods to transfer files, which include using the built-in Windows 10 File Transfer feature, transferring files via a USB drive, using a cloud storage service like OneDrive, and using a third-party file transfer software like Qiling Disk Master. These methods allow you to transfer your files, settings, and applications from Windows 10 to Windows 11, making the transition smoother and more efficient.
- If the two computers are on the same network, you can use your existing home network to transfer files from one computer to another.
- To transfer files from your old PC to your new Windows 11 PC, you can use Microsoft OneDrive to backup important folders, including Desktop, Documents, and Pictures, and transfer them to your new PC as long as you sign in with the same account, allowing you to access all your files on your new computer.
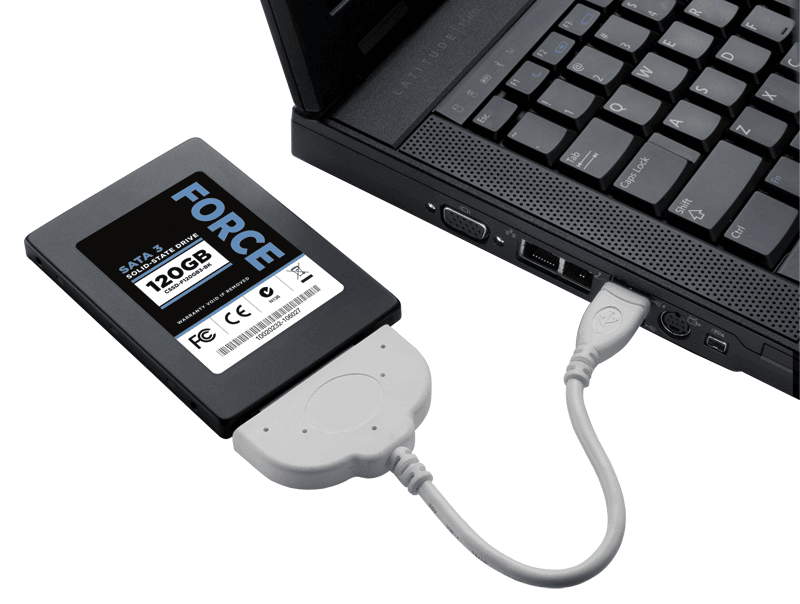
- If your computer doesn't have internet, you can use an external hard drive or USB flash drive as an intermediary between the two computers to transfer data. Just ensure the external drive has enough storage capacity to hold all the data you want to transfer.
- You can use free file sync software, such as cloud drives like OneDrive, NAS or network drive, external disk, etc., which helps update changes regularly.
Select one of the methods and transfer files from PC to PC with the steps in the corresponding method.
Way 1: Transfer files from Windows 10 to Windows 11 over network🔥
Step 1. On your Windows 10 PC, right click on the folder you want to transfer, select Properties, click on the Sharing tab, and then click the Share button.

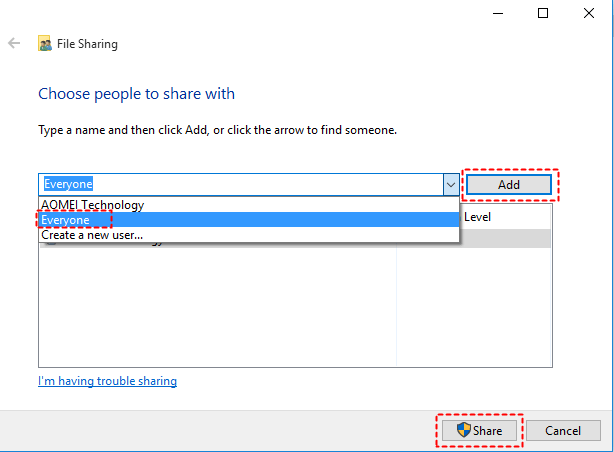
Step 2. In the File Sharing window, select Everyone from the drop-down menu and click on Add. Then click on Share.
Step 3. When you see "Your folder is shared", click Done.
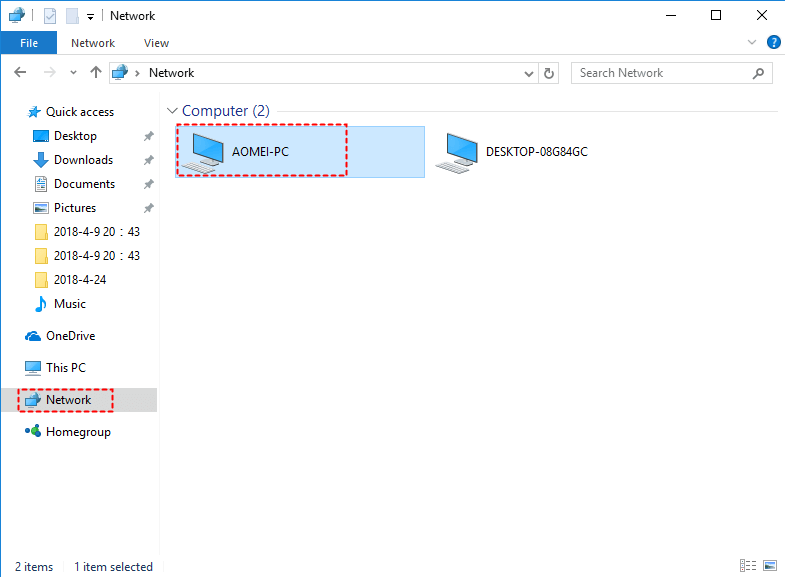
Step 4. To access a shared folder on a Windows 11 computer from a Windows 10 computer, keep both computers on and access the shared folder by going to "This PC" > "Network", then double-clicking on the source computer icon.
Way 2: Transfer files from PC to PC using OneDrive
If you're using Windows 10 or Windows 11, you likely have OneDrive, the preinstalled cloud storage, which can help you transfer files from one PC to another.
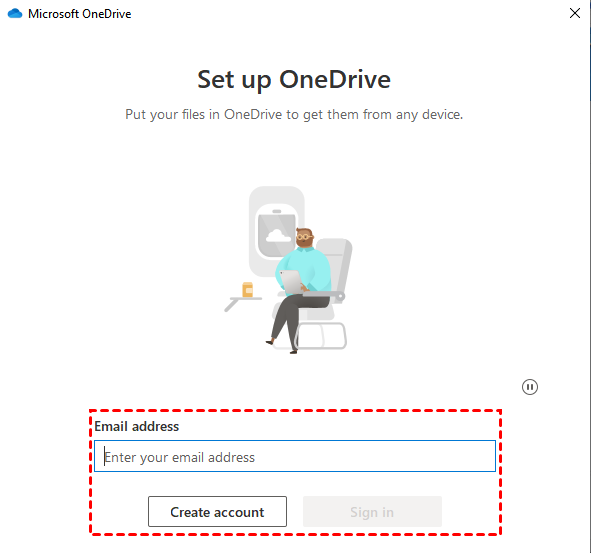
Step 1. To set up OneDrive on your Windows 10 computer, search for "onedrive" and follow the prompts to sign in with your email address and password, clicking "Sign in" to complete the setup.
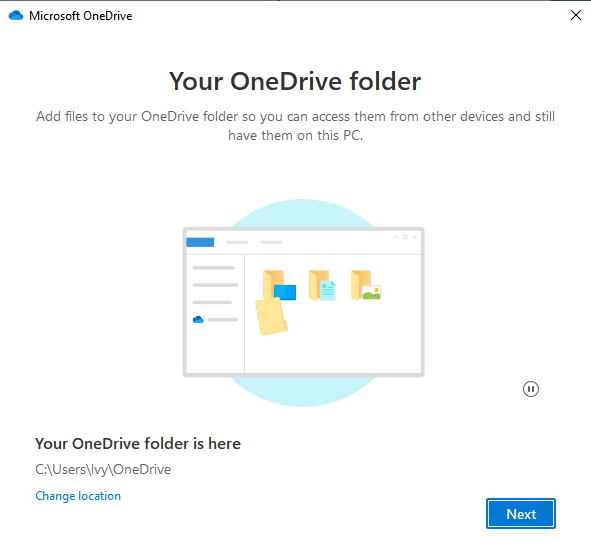
Step 2. After loading the account info, you will see the Your OneDrive folder window and the default location of OneDrive. Confirm it and click Next.
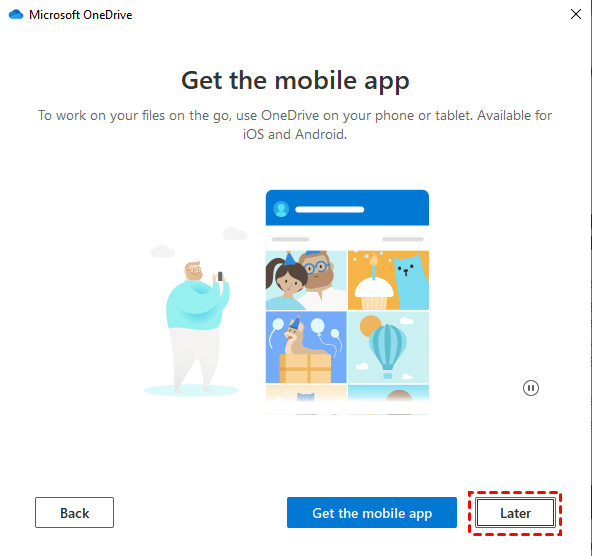
Step 3. Then, you will be asked to get to know your OneDrive, click "Next" three times, and "later".
Step 4. In the "Your OneDrive is ready for you" window, click "Open my OneDrive folder" to verify that all your files are present, and also check them in cloud storage or other devices.

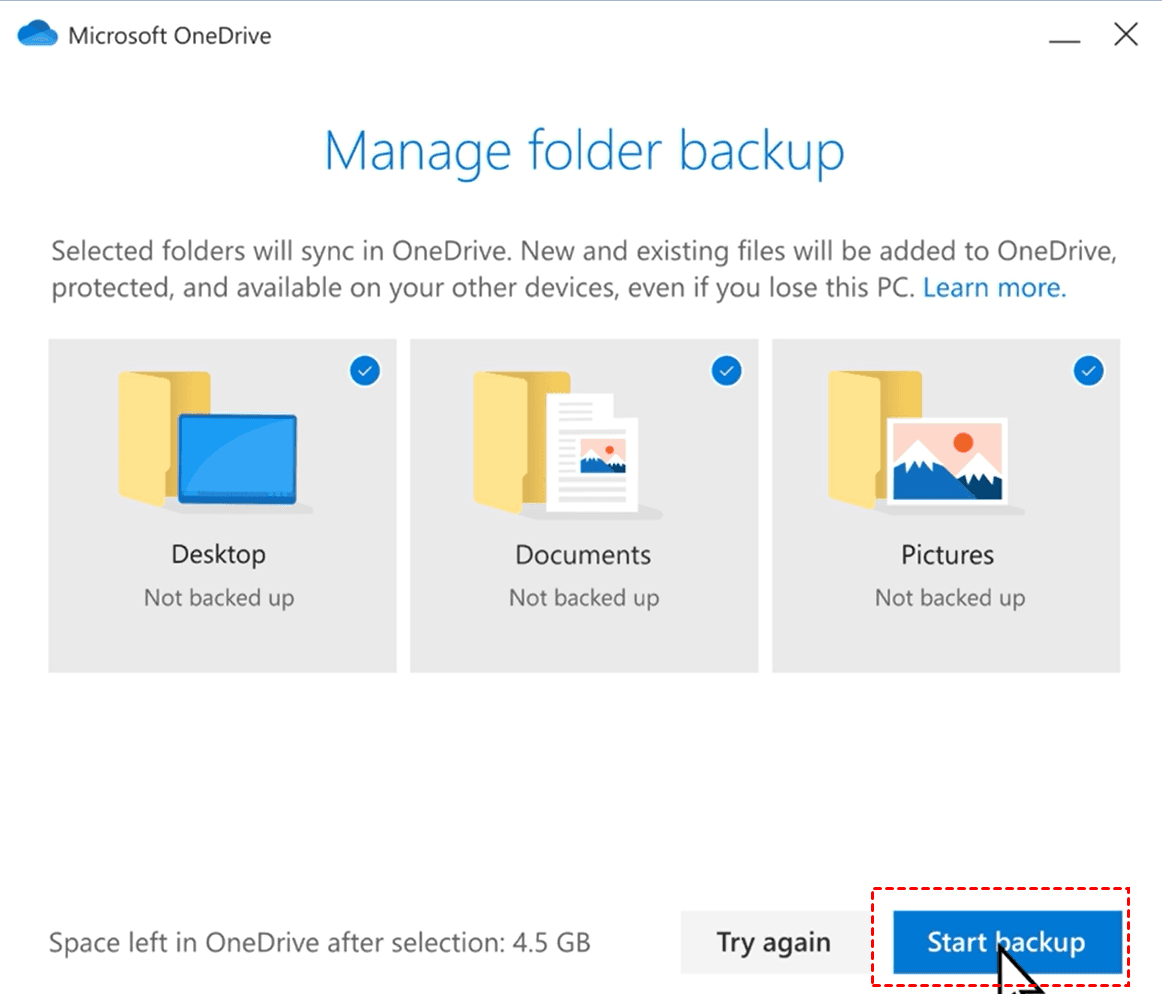
Step 5. To set up OneDrive on Windows 11, start your computer, sign in, and set up your Microsoft OneDrive account. By default, OneDrive will automatically sync your Desktop, Documents, and Pictures folders.
✍ How to stop syncing certain important folders
- From To manage your backup settings, right-click the cloud icon, select Help & Settings > Settings > Backup > Manage Backup, and uncheck any backup options you want to disable.
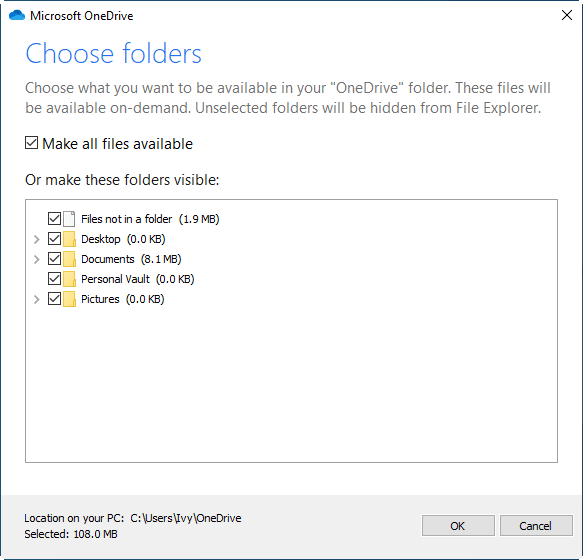
- From Account: To access the "Choose folders" feature in OneDrive, right-click the cloud icon, select Help & Settings > Settings, and navigate to the Account section. From there, click on "Choose folders" to select the specific folder you'd like to make available on-demand within your OneDrive folder.
Way 3: Transfer files from Windows 10 to Windows 11 using external hard drive
Step 1. Connect your external hard drive to your Windows 10 computer and open File Explorer. Click on "This PC" in the sidebar, find your drive, and double-click it to open a new window.
Step 2. Copy all the files you want to transfer into a folder. Right-click this folder and select the Copy option.
Step 3. To transfer files, go back to File Explorer, right-click a blank space, and select "Paste", which will initiate the file transfer process. Wait for the process to complete.

Step 4. Disconnect your drive from Windows 10, then connect it to your Windows 11 computer. Open the drive in File Explorer, copy the saved folders from the external drive, and paste them into your current computer.
Way 4: Transfer files from PC to PC using free sync software👍
You can transfer files from Windows 10 to Windows 11 without internet using free sync software on Windows 11/10/8.1/8/7/XP/Vista. This allows you to move files like documents, videos, emails, and photos to a new device using storage devices such as OneDrive, shared drives, NAS, network drives, external hard drives, or USB flash drives.
With its Schedule Sync feature, the file sync process becomes significantly more streamlined compared to previous methods, making it easier to manage.
- The syncing feature will automatically update changes from Windows 10 to Windows 11, as long as the files or folders are part of a sync task.
- The sync task is automatic, so you don't need to manually copy and paste files after setting it up.
- With the advanced edition, you can automatically copy files when a USB drive is connected, eliminating the need to manually transfer files between Windows 10 and Windows 11. Simply insert the drive into both operating systems, and your files will be synced automatically.
To transfer files, download the free file sync software Qiling Disk Master Standard. For server users, consider Qiling Disk Master Server instead.
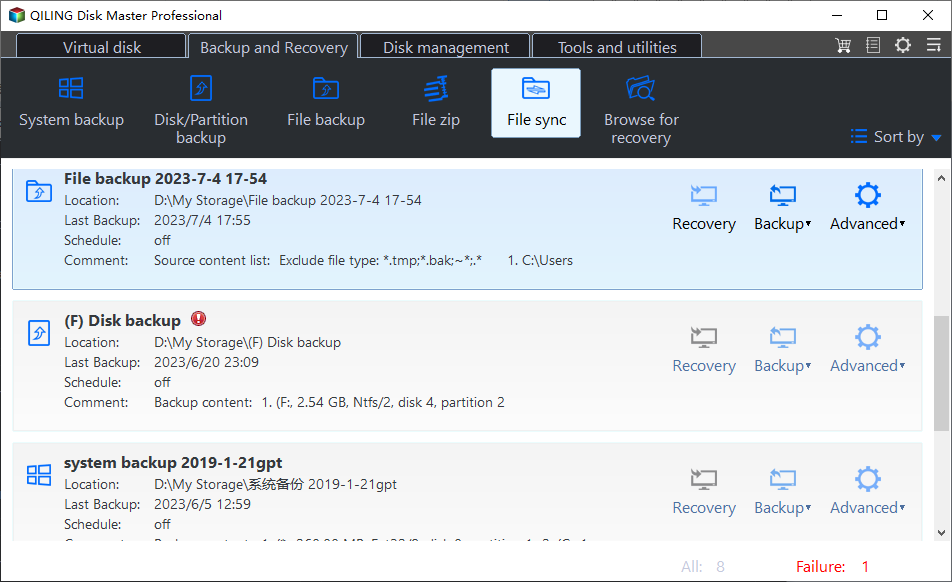
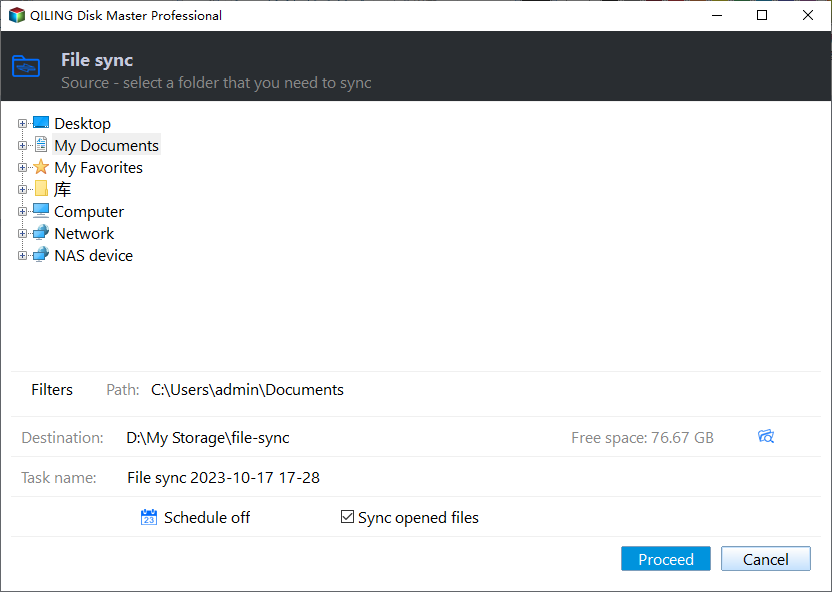
Step 1. Open free sync software - Qiling Disk Master Standard. Then, navigate to "Backup" and "File Sync".
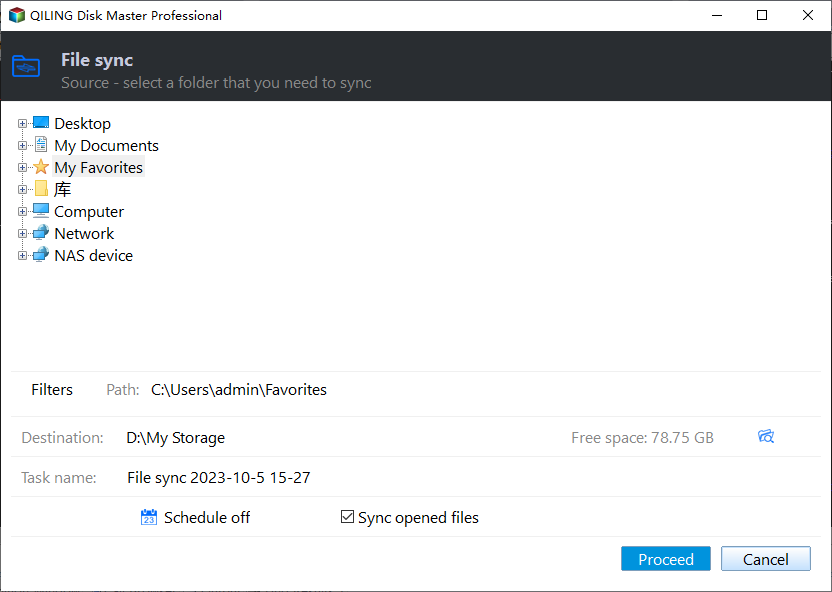
Step 2. In the File Sync window, click on "Folder" and select the folder containing all the files you want to transfer from Windows 10 to Windows 11.
Step 3. After selecting files, you need to select a way to transfer files from Windows 10 to Windows 11.
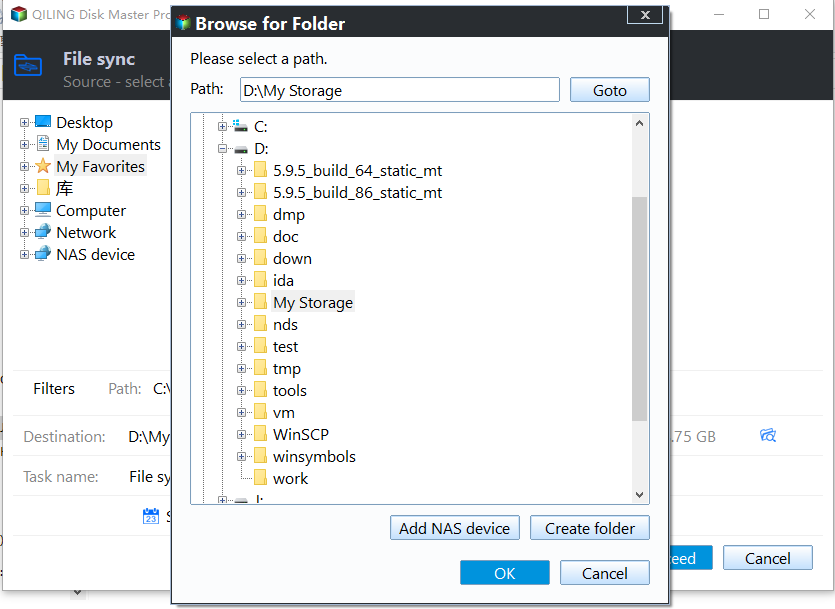
- From a local path: Connect an external hard drive or USB flash drive to your computer and ensure it's recognized by your computer. Select this device as the local path for the backup.
- From a cloud drive: To sync files to OneDrive in Windows 10, select a cloud drive and ensure you have downloaded and signed in with your account.
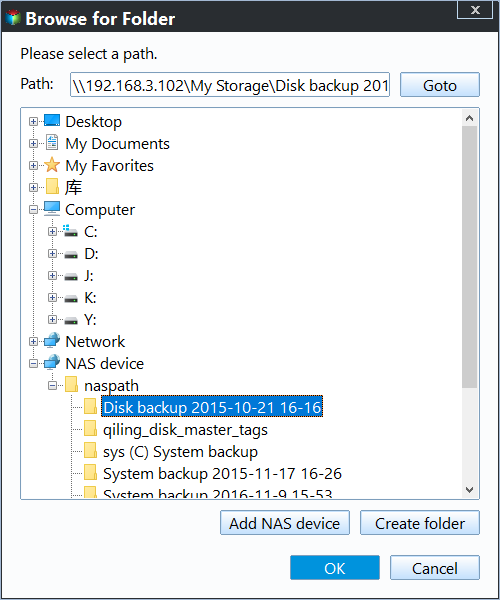
- From NAS or network share: To sync a folder to a network drive or NAS, click "Add Share or NAS Device" and confirm that you have the necessary read and write permissions to avoid connection issues.
Here take Select a cloud drive as an example.
In the Select Cloud window, select OneDrive and click "OK" to confirm.
Step 4. Confirm the sync task and set schedule settings to get changes. Select Daily, Weekly, or Monthly in the Schedule Sync feature and click Proceed to transfer files from Windows 10 to Windows 11.
Tip: To sync deletions automatically, enable the "Sync the deletions in the source directory to destination" setting in the Options.
Hot topic: about Windows 11 free upgrade
Many users are searching online for information on how to transfer files from Windows 10 to Windows 11, but are also seeking answers to other questions such as whether they can upgrade to Windows 11, how to download and install it, and how to downgrade from Windows 11 back to Windows 10. The following content will provide the answers to these and other related queries.
1. How to check if I can upgrade to Windows 11
If your computer is running Windows 10 with version 2004 or later and meets the minimum system requirements for Windows 11, you will get the free upgrade option, no later than mid-2022, depending on device age and hardware.
To check if your computer meets these requirements:
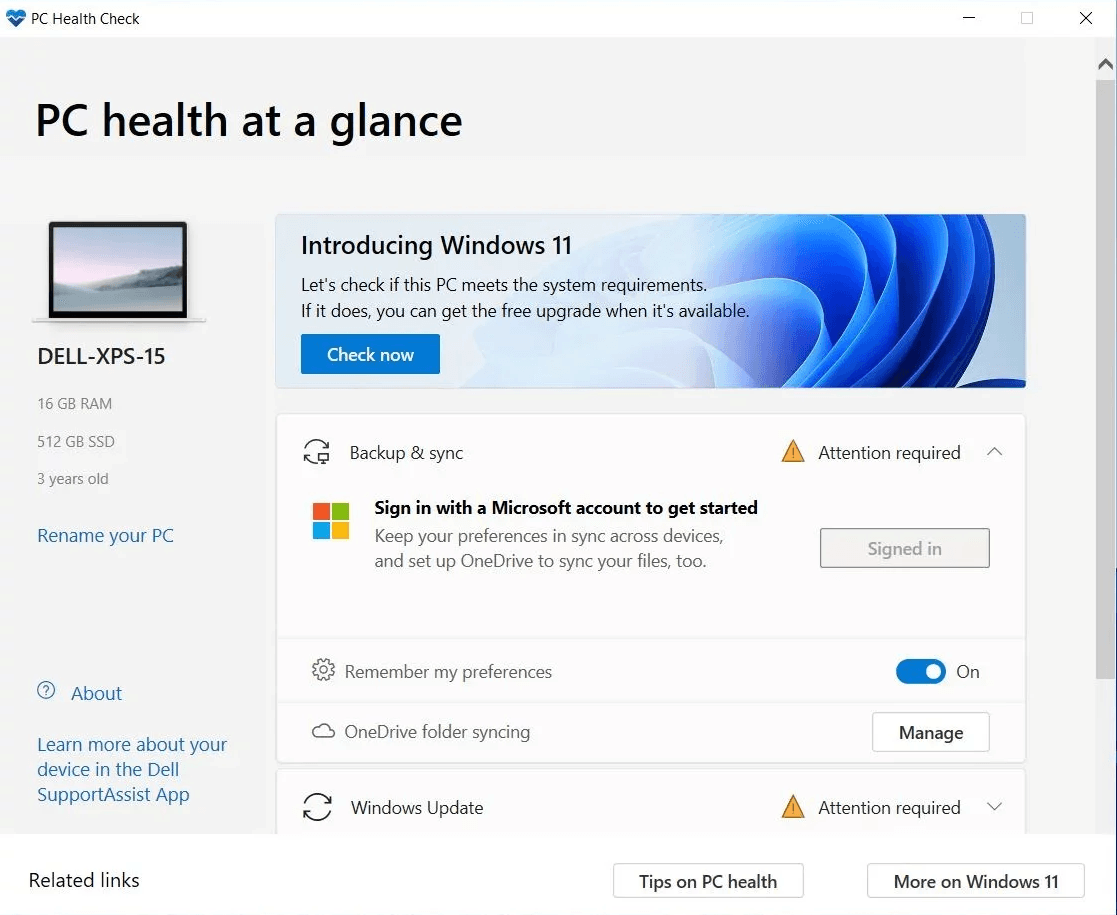
- #1: Use PC health checker provided by Microsoft.
- #2: Use a third-"The software includes a built-in feature to check for updates, allowing users to stay current with the latest party and Windows 11 updates, ensuring a seamless and secure experience."
2. How to download and install Windows 11
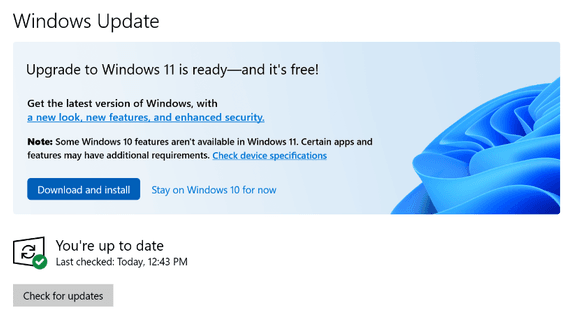
#1: From Windows Update: Go to Settings > Update & Security > Windows Update, click on Check for Updates, and if available, select Download and Install to upgrade to Windows 11.
#2: Use Windows 11 installation assistant or Windows 11 ISO file. If you can't see the Windows 11 update in the previous method, you can still upgrade Windows 10 to Windows 11 using the Windows 11 installation assistant or Windows 11 ISO file.
3. How to downgrade Windows 11 to Windows 10 without losing data
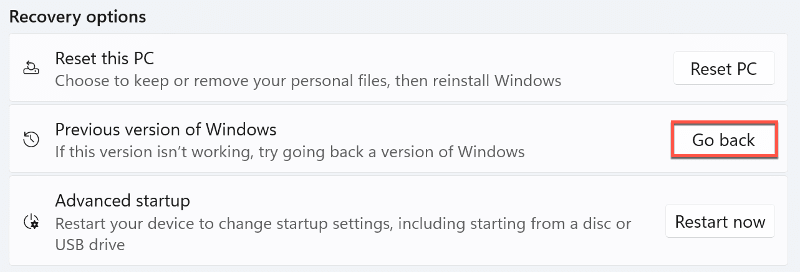
#1: Use Previous version of Windows: Microsoft allows users to return to Windows 10 from Windows 11 within 10 days of installation, keeping their files intact, through the "Previous version of Windows" recovery option.
#2: Uninstall Update or clean install Windows 10. If you're unable to use the previous version of Windows or have upgraded to Windows 11 more than 10 days ago, you can try using it again. However, please note that it's essential to backup your files to an external hard drive in Windows 11 to avoid losing your data. If the previous version of Windows doesn't work, you may need to use a different solution.
Final words
For those who want to transfer files from Windows 10 to Windows 11, the easiest method is using free sync software like Qiling Disk Master Standard, which can keep files in sync regularly, making it a convenient option for those who want to keep their files up-to-date.
It supports various storage devices, including OneDrive, external hard drives, and others recognized by Windows, and offers a scheduling feature to sync files daily, weekly, or monthly.
This software still has advanced sync methods like File Sync, which can be unlocked by upgrading to the professional version.
Related Articles
- How to Backup Windows 10 Before Upgrading to Windows 11
It's important to backup Windows 10 before upgrading to Windows 11. If there is a problem after the upgrade, or if you don't like the functions of the new system, you can easily restore to the previous state through a backup. You can learn three ways to backup Windows 10 in this page. - 3 Free & Easy Ways to Transfer Windows 11, 10 to New Hard Drive
Here you can transfer Windows 10, 11 to new hard drive to replace or upgrade hard drive with Qiling Disk Master, clean install, or built-in Backup and Restore (Windows 7). Swipe to learn specific steps. - Move Program Files to Another Drive Windows 11/10/8/7 | 3 Ways
Although it's not suggested to move program files to another drive, you still can make this task safely. The secret is to create a system image backup in advance. - How to Download, Install, and Setup Windows 11 (2 Cases)
The new generation of Windows – Windows 11 has attracted a lot of attention. How to download and install Windows 11? Get a full guide from this page. - Best Free Windows 11 Migration Tool
You will know the best Windows 11 migration tool and learn how to migrate the operating system, files or data to a new drive easily using this tool. - How to Fix MBR in Windows 7 With or Without Installation CD or DVD?
This article provides a step-by-step guide on how to fix the Master Boot Record (MBR) in Windows 7, whether or not you have a Windows installation disc.