Backup Windows 7 to Network Drive with 2 Free Methods
Quick Navigation:
- Why need to backup Windows 7?
- Advantages of backing up to network drive
- Windows 7 backup to network drive with Backup and Restore
- Windows 7 network drive backup via free backup software
- Conclusion
Why need to backup Windows 7?
Regularly backing up computer systems is crucial for preserving data on a computer, especially for widely used systems like Windows 7. Many issues can lead to system crashes, including corrupted system registry files, malware, and hardware failure, making backups essential to prevent data loss.
In addition to system backups, it's also important to regularly backup your personal data, including audios, videos, texts, graphics, and applications, to a network drive, external hard drive, or other offsite locations.
Computer users can rely on backups due to the unpredictability of hardware failures or system crashes. Windows 7 Professional and above users can utilize the built-in Windows 7 Backup and Restore feature to save to a mapped network drive, while users of other Windows versions or operating systems can employ free backup software to achieve the same result.
Advantages of backing up to network drive
Compared to USB flash drives, network drives have several advantages. Users can download files from another computer as long as they've been uploaded via a network drive, eliminating the need for physical transfer. Additionally, sharing files with others is also more efficient, as network drives can facilitate seamless sharing without the need for handing files from person to person.
Image files stored on a network drive can withstand computer errors, as long as the network connection is stable, the network drive can function effectively.

Windows 7 backup to network drive with Backup and Restore
Windows Backup and Restore is a built-in backup software that allows you to backup your Windows system, including the operating system, installed programs, and personal data, to a network drive or other location. The software has a simple and concise graphical user interface, making it easy to use. Alternatively, you can also use the WBAdmin command in the command prompt to backup your system to a network shared location.
To set up a backup with Windows 7 Backup and Restore
1. To open Backup and Restore, go to Control Panel > System and Security > Backup and Restore.
2. To start the Windows Backup Wizard, click on the "Set up backup" command link. This will guide you through the entire backup process.

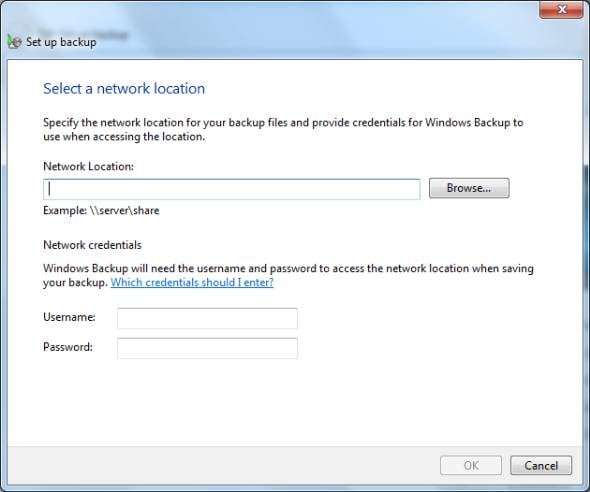
3. When prompted, select "Save on a network" and enter your network drive address.
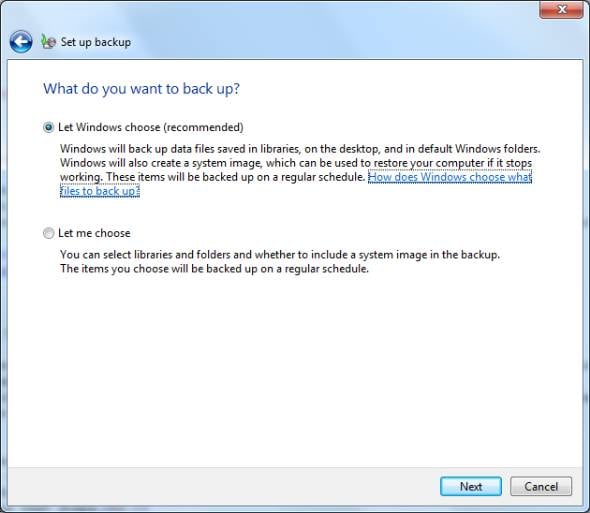
4. If you don't want to manually select the backup items, you can choose "Let Windows choose" on the next screen. This will allow Windows to automatically select what to backup.
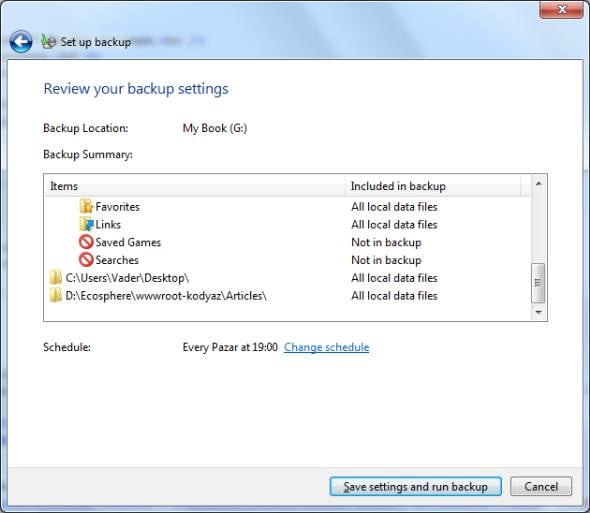
5. To modify the schedule, you can change the time when Windows Backup runs automatically or turn off the schedule altogether. Once you've made your changes, click "Save settings and run backup" to confirm.
To set up a more flexible scheduled backup, you can also use Task Scheduler, a tool for managing scheduled tasks, to backup files.
In Windows 7 Home, you won't see the "Save on a network" option, so you can either upgrade to Windows 7 Ultimate or use third-party software to backup to a network drive.
Automatic backup windows 7 home to network drive via free backup software
Qiling Disk Master Standard is a free network backup software that is easy, safe, and fast to use, designed for average users, offering basic functions like system backup, disk backup, partition backup, and file backup, and featuring several useful tools.
- It supports backing up Windows 7 in daily, weekly, monthly schedules.
- Incremental backup allows you to back up only changed files by default, especially when scheduled backups are enabled. This process utilizes normal compression, automatic splitting, and intelligent sector backup to minimize the size of the backup image.
- Create bootable media: This software allows you to create a Windows 7 bootable USB and backup files without needing to boot into Windows. Additionally, it enables you to restore a backup image to a new hard drive from a network drive, even if the drive is not bootable.
Best solution to backup Windows 7 to network drive
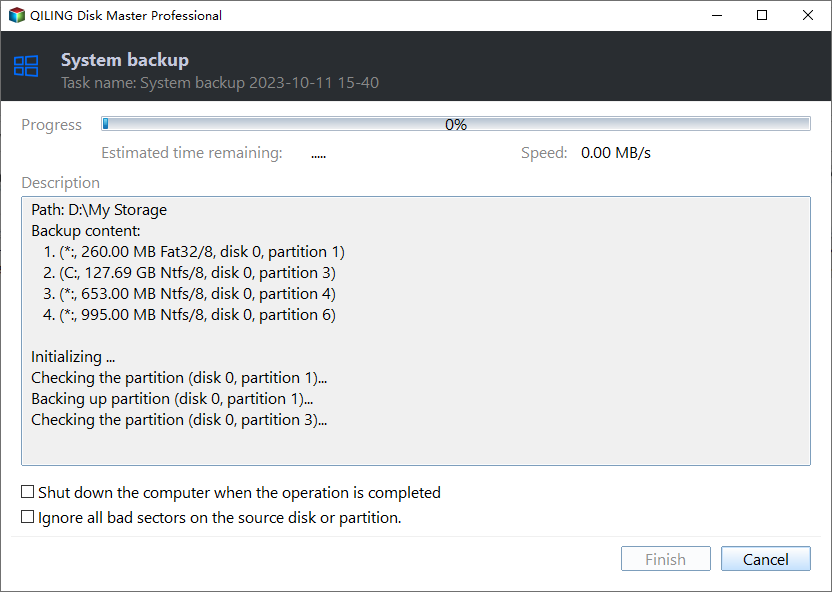
Step 1. Download Qiling Disk Master Standard, install and run it, click on Backup in the main interface, then select System Backup.

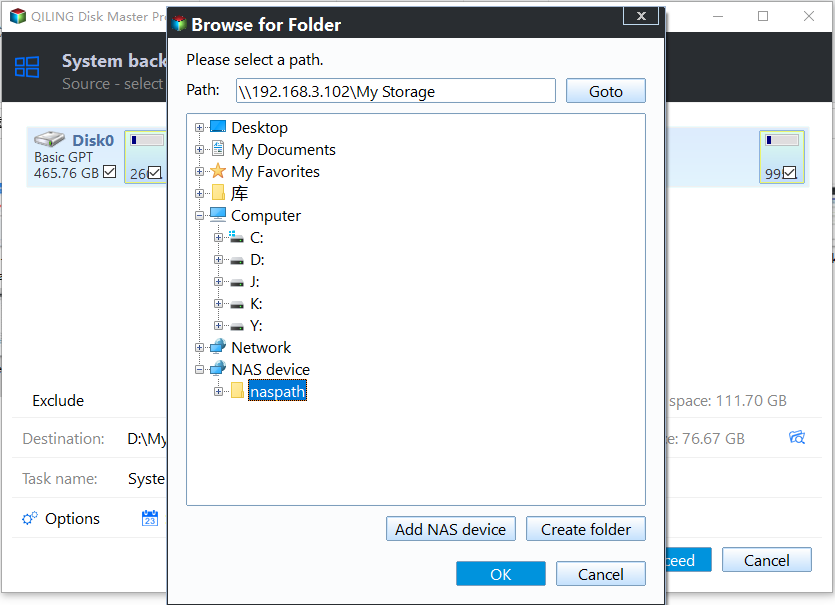
Step 2. Qiling Disk Master automatically selects partition C and system-related partitions for users. To proceed, click the inverted triangle and select "Add Share or NAS Devices".
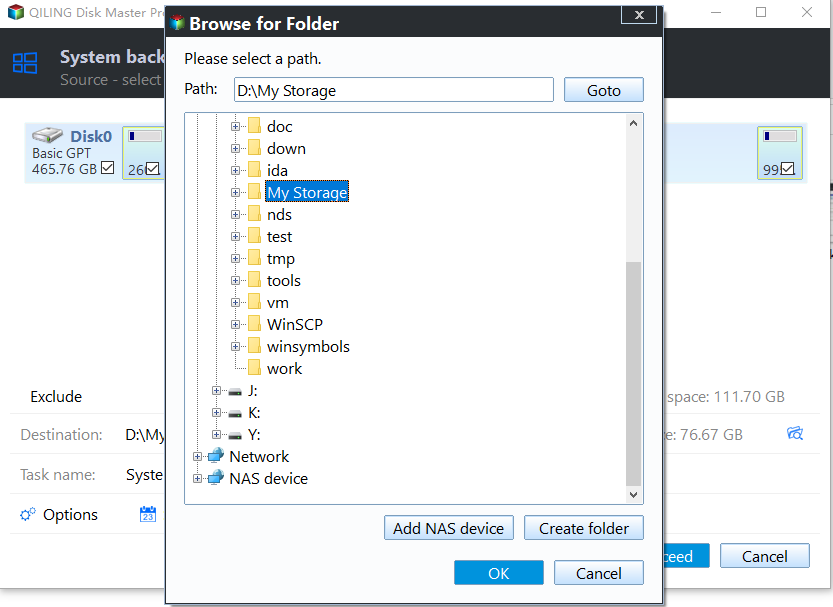
Step 3. A smaller window appears, asking you to type the network path, select a shared folder on it, and click OK to add it.
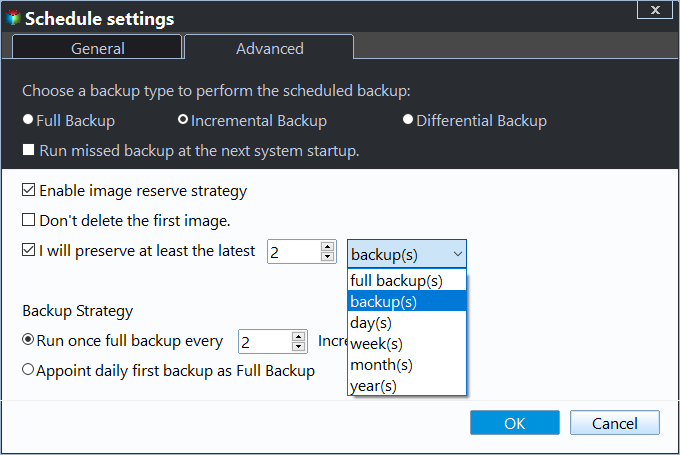
Step 4. To schedule a backup, click Schedule Backup and enable it, then select the desired frequency (daily, weekly, or monthly), click Proceed, and the backup process will create a full backup followed by 6 incremental backups.
To backup Windows 7, you can use differential backups, which only require one full backup plus the latest differential backup to restore all changes made since the last full backup, or incremental backups, which need all linked incremental backups to restore any changes since the last full backup.
To avoid running out of space on your backup drive, it's recommended to enable automatic backup cleanup and regularly delete old backup images, which can be done using the methods described. This feature is available on the premium version, giving you the option to use it or not.
Conclusion
To backup Windows 7 to a network drive, you can use one of the two methods offered in this article. Using Qiling Disk Master is a good option as it is easy to use and compatible with all Windows editions, including Windows 11/10/8.1/8/7/Vista/XP.
This software helps reduce backup image size and resolves issues completely, with some advanced features available on the upgraded edition, such as differential backup and automatic cleanup, allowing for easier maintenance.
Related Articles
- Easier Way to Automatic Backup Windows 7 to Network Drive
This article will show you 3 ways to automatic backup Windows 7 to network drive, the last one is much easier. Go head and check it. - Windows 7 Professional/Home Premium Backup to Network Drive
In this article, I will share you something about Windows 7 backup save on a network missing and Windows 7 Professional backup to network drive. Swipe to learn more. - How to Fix Windows 7 via Startup Repair or CHKDSK from Command Prompt?
This article helps to disable Windows 7 Startup Repair and fix Windows 7 Startup Repair loop via CHKDSK or Bootrec command prompt. - Quick Fixed: User Profile Service Failed the Logon Windows 10
If your Windows 7 computer stuck on Welcome screen out of some reasons, you can refer to this article and find effective solutions. - How to Upgrade/Clone Xbox 360 Slim HDD to A Bigger HDD in 3 Steps
If your Xbox 360 hard drive or slim hard drive is getting full, don't worry! This article will guide you through a simple 3-step process to upgrade and clone your Xbox 360 slim hard drive to a bigger HDD, allowing you to keep all your game files without losing any. - Free Download USB Image Tool on Windows 10/11
This guide explains Free Download USB Image Tool on Windows 10/11 and provides practical steps, tips, or recovery options to help you complete the task safely.