How to Make Partitions in Windows 7, 8, 10 after after Installation
Reasons to make partition
Disk partitioning involves dividing a hard drive into multiple logical units, allowing you to separate your operating system from your data and reduce the risk of data corruption in case of system issues. This process can be performed after installation, and it's a good practice to make partitions in Windows 7 to keep your data safe.
2 ways to make partitions in Windows 7 after installation
Method 1: Make partitions with Disk Management
To make more partitions on a Windows 7 disk after installation, you can use the Disk Management tool. After opening Disk Management, you can delete or shrink existing partitions to free up space, and then create new primary or logical partitions as needed. This allows you to customize the disk layout and allocate space for different purposes.
Step 1: Use Windows+R to open Run, type "diskmgmt.msc" and click OK.
Step 2: Right-click on the partition you wish to resize and select the Shrink Volume option.
Step 3: Enter the desired size of your drive in megabytes (1000 MB = 1 GB), and then click the Shrink button.
Note: You cannot shrink your volume more than the amount indicated in the Size of available shrink space in MB section.
Step 4: In the Disk Management window, right-click on the unallocated space and select the New Simple Volume option, then click on the Next button to continue through the New Simple Volume Wizard.
Step 5: To allocate memory for a new partition, enter the desired amount and click Next. Then, to store data, format the partition by clicking on "Format this volume" and selecting the desired settings.
For File System, select NTFS
For Allocation unit size, select Default
To give a new drive a name, type the name you wish to give it in the Volume Label field. This is the name that will be displayed for the drive in the system.
Click on the Perform a quick format
Then click on the Next button
If you want to create another new partition, follow the same steps. However, if your disk is MBR, you may encounter an error message saying that you cannot create a new volume in this allocated space because the disk already contains the maximum number of partitions. In this case, you may need to convert your disk from MBR to GPT to create more partitions.
The MBR disk can only support 4 primary partitions or 3 primary partitions and 1 extended partition. To expand the partition limit, you need to convert the MBR to GPT.
Method 2: Make partitions with Qiling Disk Master
If Disk Management cannot shrink a volume to a small enough size or if you can't create a new partition due to the maximum number of partitions, you can use third-party partition software, such as Qiling Partition Master, to resize, merge, or split partitions, or even convert a volume from one type to another. These tools can provide more flexibility and control over your disk layout than the built-in Disk Management tool.
You can use third-party software like Qiling Disk Master Standard to create partitions in Windows 7/8/10/11 without formatting, and resize BitLocker partitions if needed.
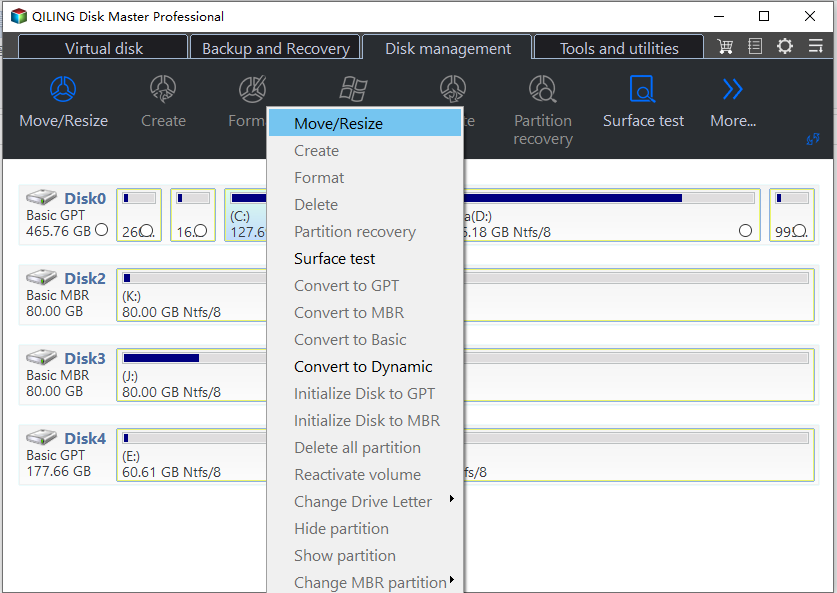
Step 1: Download Qiling Disk Master and launch the software.
Step 2: Right-click the partition you want to shrink and choose Resize/Move Partition.
Step 3: To extend the partition, position the mouse pointer on the right border of the partition and drag the border rightwards to extend the partition, or type the desired size of the unallocated space after the partition.
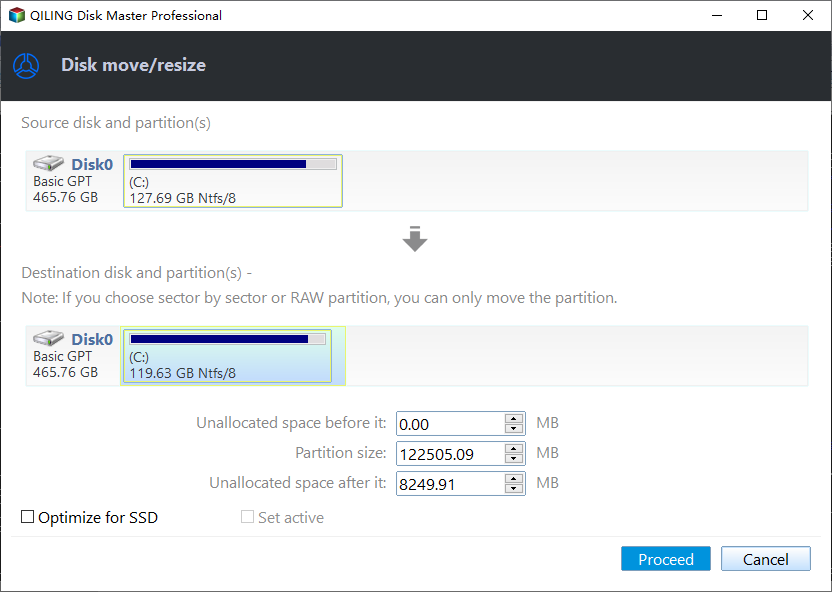
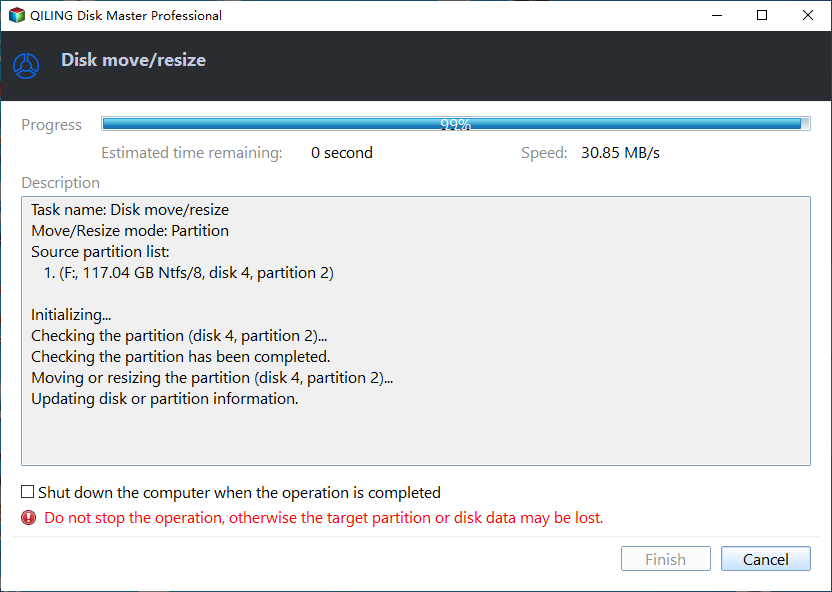
Step 4: Click Proceed button to save the change.
Another easy way to create partition without unallocated space.
If there's no unallocated space, you don't need to resize the partition for unallocated space. You can create a new partition directly on the old partition with NTFS or FAT32 file system as long as it has free space, but this feature requires upgrading to the Pro edition.
To resize the F drive, right-click on the F partition, select "Split Partition", input the desired drive letter and new partition size, then click "OK" and finally "Proceed" to apply the changes.
If a disk is using the Master Boot Record (MBR) system and already has four primary partitions, creating another partition is still possible. Although the error message "you cannot create a new volume in this allocated space because the disk already contains the maximum number of partitions" is displayed, it's not a cause for concern. The additional partition can be created, albeit as a logical drive rather than a primary partition.
When you've already used up all 4 primary partitions on your hard drive, you can still create new partitions using Qiling Disk Master, which will automatically convert them to logical partitions. This tool also enables you to move partitions that cannot be managed through the standard disk management software.
Conclusion
This passage explains how to create a partition in Windows 7/8/10, providing two methods to choose from, allowing users to select the approach that suits them best.
Qiling Disk Master offers additional features beyond partitioning, including the ability to convert FAT32 to NTFS, create bootable media, and migrate an operating system to an SSD.
Related Articles
- DiskPart: Create Primary or Extended Partition for Windows 10/8/7
Read this post to learn how to create a primary partition or extended logical drive with specified size using DiskPart from command prompt. You can also use DiskPart free alternative - Qiling Disk Master to create a partition. - Create Hard Disk Partitions Before Installing Windows 10/8/7
Learn how to create hard disk partitions before installing Windows 11/10/8/7 operating system on your hard drive for your system, applications, games and other data better organized. - How to Clone Dynamic Disk in Windows 11 (2 Ways)
To clone dynamic disk in Windows 11, you can learn 2 useful ways in this article including the easier way. Please read on. - Best Way to Clone Windows 11 to NVMe SSD
This article provides the best way to clone Windows 11 operating system to NVMe SSD drive in order to gain faster transfer speed and better performance. - Recent Ransomware Attacks Should Be Treated as A "Wake-up Call"
Recent Ransomware Attacks that have hit 150 countries since Friday should be treated by governments around the world as a "wake-up call". - How to Upgrade Acer Aspire Laptop to SSD in Windows 10/8/7/XP?
Want to replace the hard drive in your Acer laptop? Click to learn how to upgrade Acer Aspire V5/R3/One laptop small hard drive to new and fast SSD in Windows 10/8/7/XP.