How to Turn on System Restore in Windows 7?
- Overview of System Restore in Windows 7
- How to fix System Restore greyed out in Windows 7
- Turn on system restore Windows 7 via Group Policy Editor
- Turn on system restore Windows 7 via Registry Editor
- How to turn on System Restore in Windows 7?
- How to turn on System Restore Windows 7 via command line
- Supplementary protection for your computer
- Conclusion
Overview of System Restore in Windows 7
System Restore is a built-Windows System Restore is a feature in Microsoft Windows that allows users to revert their computer's state, including system files, installed applications, Windows Registry, and system settings, to a previous point in time, helping to restore the computer to an earlier state if issues arise.
System Restore is enabled by default in all versions of Windows 7, including Home Premium, Ultimate, and Professional. However, you may encounter an issue where System Restore is greyed out or disabled, preventing you from turning it on. To resolve this issue and turn on System Restore in Windows 7, you'll need to address the underlying problem first.
How to fix System Restore greyed out in Windows 7
One possible reason why your system restore is not working is that it may be disabled by your system administrator. To resolve this issue, you can try the methods below.
Turn on system restore Windows 7 via Group Policy Editor
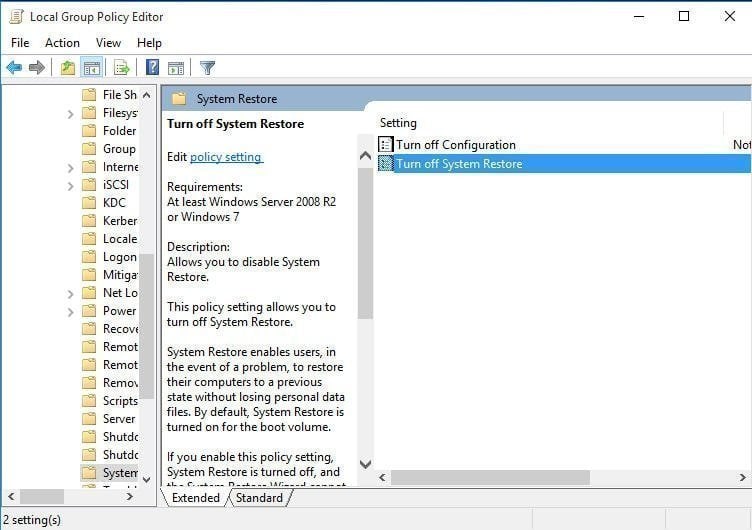
1. To access the Group Policy Editor, type "gpedit.msc" in the Search box and press Enter. This will open the Group Policy Editor, allowing you to navigate to the desired setting.
- Computer Configuration > Administrative Templates > System > System Restore.
2. Go to the "Turn Off System Restore" setting, double-click on it and set it to either Not configured or Disabled.
3. Click on Apply and exit.
4. The System Restore feature has been enabled, and you can find it in the System Protection settings.
Turn on system restore Windows 7 via Registry Editor
1. To open the Registry Editor, press the Windows key + R to bring up the Run dialog box, type regedit.exe, and press Enter.
2. To add a new value to the Registry Editor, navigate to the key `HKEY_CURRENT_USER\Software\Microsoft\Office\16.0\Outlook\Preferences` in the left pane of the Registry Editor window.
- HKEY_LOCAL_MACHINE \ Software \ Policies \ Microsoft \ Windows NT \ SystemRestore.
3. Delete the value DisableConfig and DisableSR.

How to turn on System Restore in Windows 7?
After resolving the System Restore won't turn on issue in Windows 7, you can proceed to see if you can enable System Restore in Windows 7.
1. To access System Protection, go to the Control Panel, click System, and then choose System Protection.
2. Here comes to System Properties interface. Click the System Protection tab.
3. To turn on system protection, click Configure, and select "Turn on system protection." Then click OK.
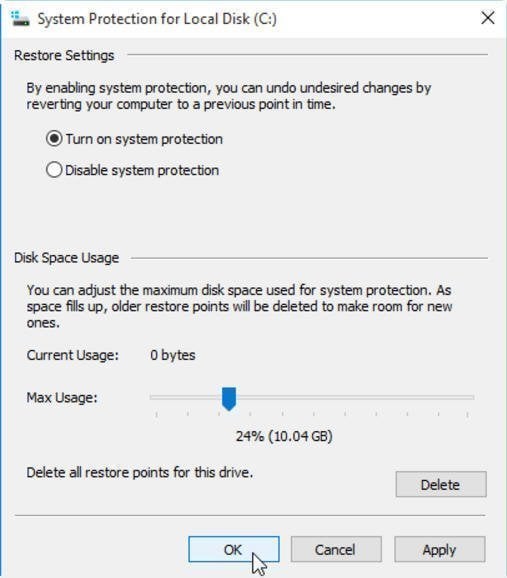
🎇 Note: To prevent low disk space issues, adjust the maximum disk space used for system protection, allowing older restore points to be deleted automatically to make room for new ones.
How to turn on System Restore Windows 7 via command line
You can enable system restore from the Windows command line by modifying the relevant registry keys.
- To enable System Restore from the command line, you can run the command `sc config srservice start= Auto` to configure the System Restore service to start automatically.
- To disable System Restore in Windows 7 via the command line, you can run the command `sc config srservice start= disabled` to stop the System Restore service. This will prevent System Restore from running on your system.
Supplementary protection for your computer
To comprehensively protect your computer, simply enabling System Restore in Windows 7 is insufficient, as it only protects system settings and does not safeguard personal files or data. Additionally, restore points are stored on the same volume, making them vulnerable to loss if that volume becomes corrupted, and system protection is only available for NTFS-formatted drives.
To have supplementary protection for your computer, create a full system image backup, which will safeguard your entire computer system in case of any data loss or system crash.
Qiling Disk Master Standard Clonezilla is a free backup and restore software that allows you to create a full system image backup, protecting everything on your C drive, including personal files and data. It supports backing up to a safer place like an external hard drive, NAS, or cloud drive, and can detect and protect any file system, not just NTFS.
With Qiling Disk Master, you can create incremental or differential backups to keep your data up-to-date without using much disk space, and its user-friendly interface makes it easy to operate, even for beginners. To create an image backup, follow these steps for supplementary protection of your computer.
Step 1. Free download, install and run Qiling Disk Master. At the main interface, click System Backup under Backup tab.

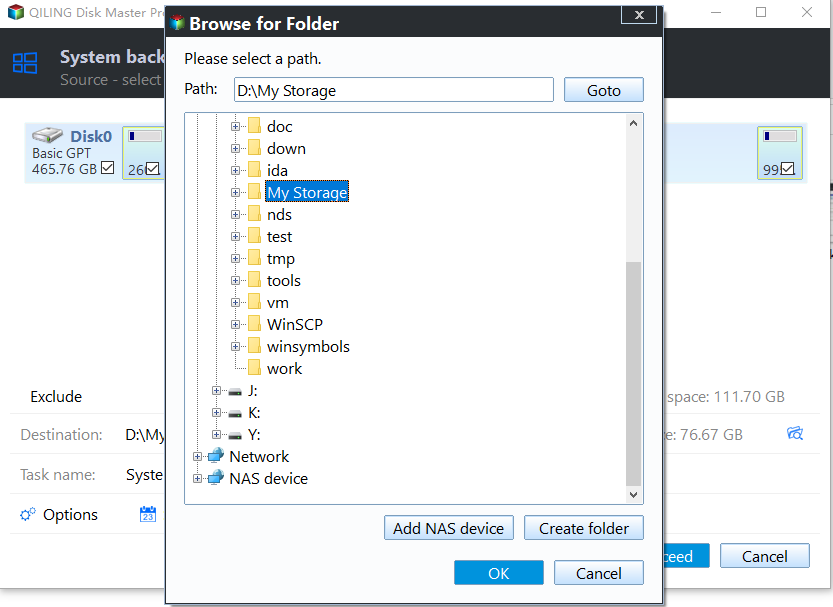
Step 2. For system image backup, the source path will be automatically selected, and you only need to choose a destination path.
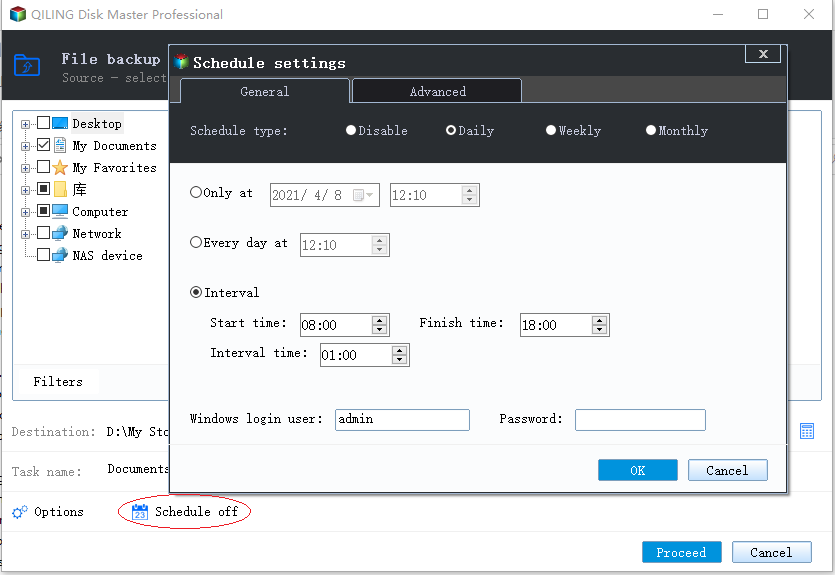
Step 3. You can click Option to enable encryption and email notification, and set the compression level for your backup, or click Schedule to set automatic backup.
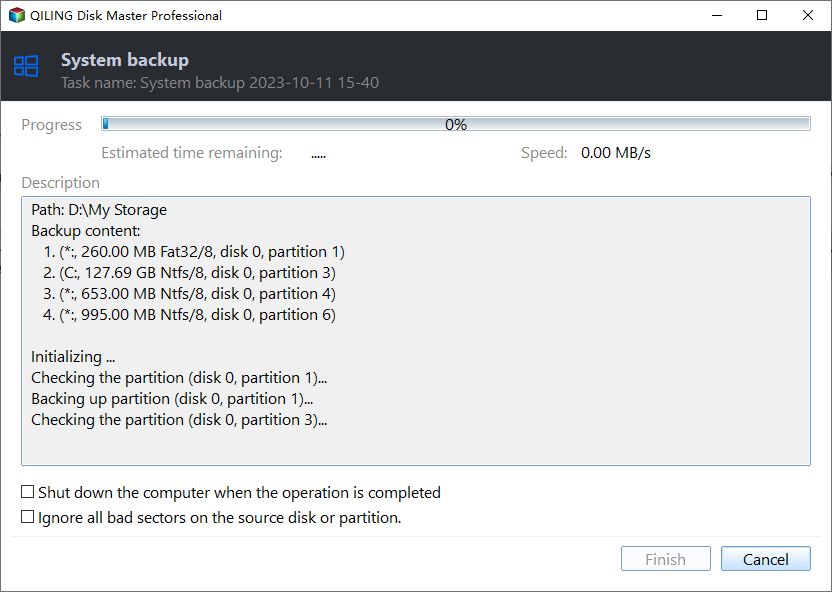
Step 4. After all this done, Click Proceed.
After creating a system backup, you can restore your system to its previous state if needed by clicking Restore at the Qiling Disk Master main interface. Alternatively, if you need to deploy your system image to multiple computers within a LAN, you'll require the Qiling Image Deploy (AID) software.
Conclusion
To protect your Windows 7 computer, simply enabling System Restore is not enough, as it only protects against changes made to the system, not against hardware failures or malware infections. Qiling Disk Master provides a more comprehensive solution by creating system image backups, allowing you to restore your computer to a previous state, even if it becomes unbootable. This supplementary protection ensures your computer is safeguarded against a wider range of potential issues.
In addition to system backup, you also have other flexible backup options such as disk backup, partition backup, and file backup. If you want to protect your entire disk, creating a disk backup can be a suitable choice.
Related Articles
- Solved: You Must Enable System Protection on This Drive
You may get the error "You must enable system protection on this drive" when performing system restore in Windows 10/8/7. This page tells why it emerges and how to fix the error via CMD. Better way to protect Windows is provided as well. - Turn off System Restore Windows 10 | Use Better Way
Sometimes, due to different reasons, you need to turn off system restore in Windows 10/8/7, but you still need a way to protect your computer. All of them will be included below. - Solved: No System Restore Points in Windows 7
Are you frustrated by no system restore points in Windows 7? Don't worry about it. Here, I will show you why and how to solve no system restore points in Windows 7? - 3 Methods to Fix The Mounted Backup Volume Is Inaccessible
Encountered "the mounted backup volume is inaccessible"? You can refer to this article and find solutions here. - How to Save Game on FIFA 23 Career Mode
This guide explains How to Save Game on FIFA 23 Career Mode and provides practical steps, tips, or recovery options to help you complete the task safely. - File History vs. Backup and Restore | Which Is Better?
Windows has two inbuilt backup and recovery utilities: File History and Backup. Both tools offer benefits and drawbacks, and a comparison between them is warranted.