Windows Server 2019 Legacy Boot: Install & Change Boot Mode
Does Windows Server 2019 support Legacy boot?
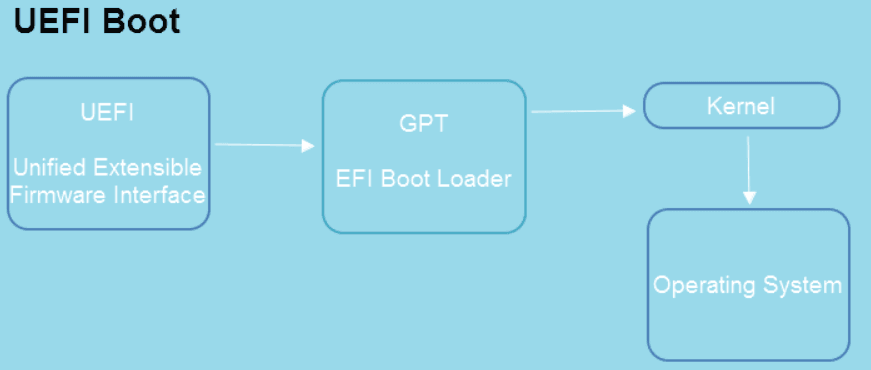
Windows Server 2019 is built on the foundation of Windows Server 2016, bringing innovations in Hybrid Cloud, Security, Application Platform, and Hyper-Converged Infrastructure. It supports both Legacy and UEFI boot modes, allowing for larger boot drives and enhanced features.
This article provides a step-by-step guide to installing Windows Server 2019 on a legacy BIOS computer, making it easy to get started. If you have a newer Windows device that supports UEFI, you can also convert your BIOS to UEFI to take advantage of advanced features. The guide will walk you through the process of installing Windows Server 2019 on your legacy BIOS computer, making it a seamless experience.
How to install Server 2019 on a Legacy BIOS computer
To install Windows Server 2019 on a legacy BIOS computer, download the Windows Server 2019 ISO file from Microsoft's website and burn it to a USB drive that's over 8 GB in size, then follow the installation guide.
1. To install the operating system, you need to insert the USB installation media and start your PC into BIOS. From there, choose the USB as the first boot option to continue the installation process.
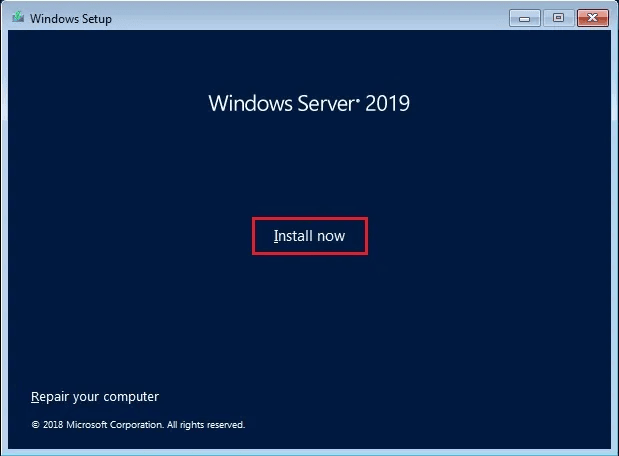
2. In the Windows Setup page, enter your language and other preferences, then click "Next" and "Install Now" to start the Windows Server 2019 installation.
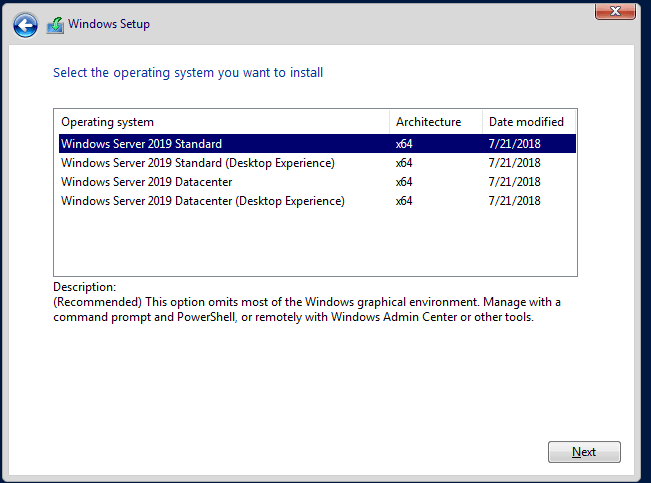
3. Select the version of Windows Server 2019 you want to install and click Next.
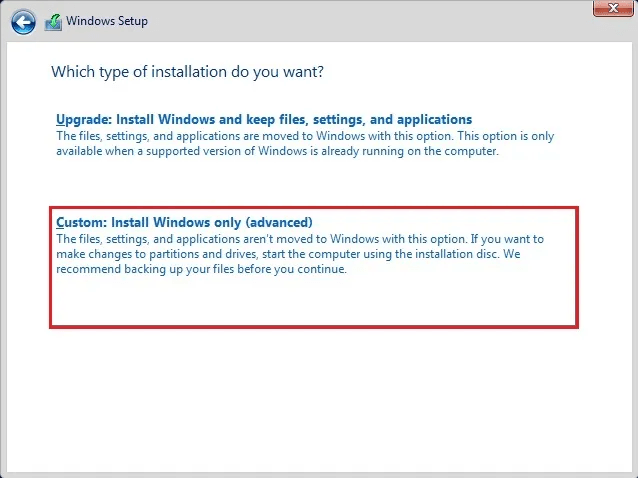
4. Select the Custom: Install Windows only (advanced) option to perform a fresh install of Windows. This will allow you to choose the installation location and configure the installation settings.
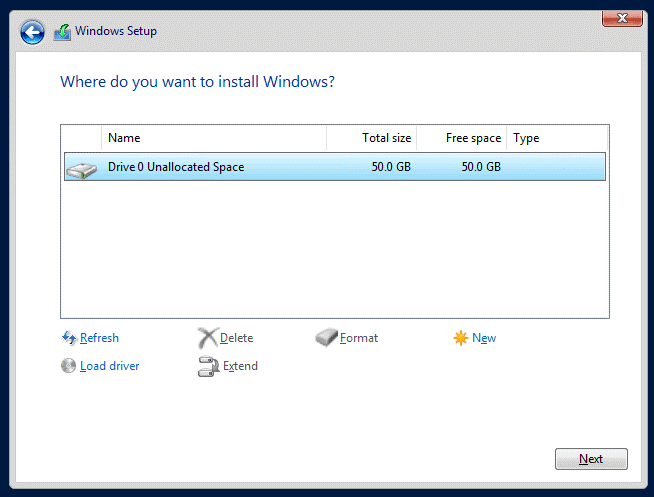
5. Select the destination to install Windows Server and click Next.
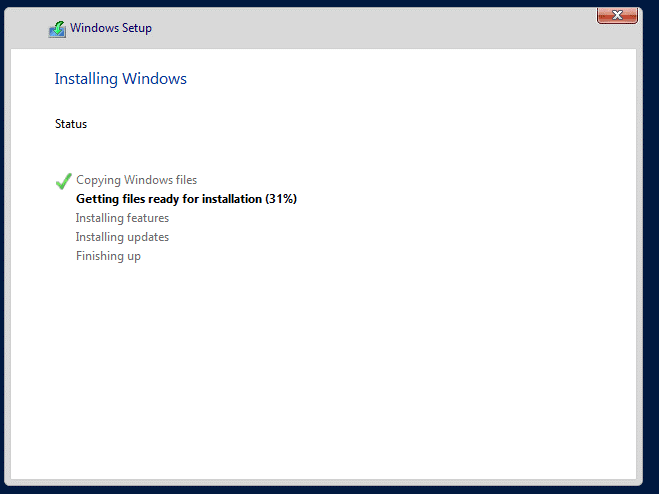
6. The installation process will initiate, and once it's finished, the system will automatically restart.
How to change boot mode on Windows Server 2019
Windows Server 2019 requires UEFI-enabled devices to utilize its security features. If your newer Windows device supports UEFI but is currently using legacy BIOS, you may need to switch to UEFI boot mode to use USB boot functionality. This change can enable the use of USB boot for Windows Server 2019.
To enable more advanced options like Secure Boot, UEFI Optimized Boot, Generic USB Boot, etc., it's recommended to switch your BIOS to UEFI boot mode when upgrading your OS to a new version. This will require a GPT disk to boot, so before making the switch, you'll need to convert your MBR to GPT.
Note: Converting a disk from MBR to GPT or vice versa will erase all data on the disk, so make sure all data is backed up before proceeding.
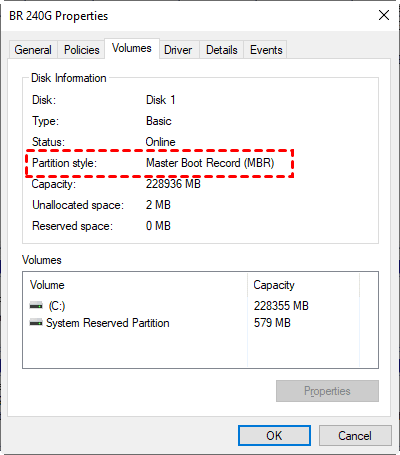
If you're unsure about the disk type, you can simply go to Windows Disk Management, right-click the OS disk, select Properties, then go to the Volume tab to check the partition style.
Warm tip: If the boot mode conversion process fails, it may prevent your Windows Server 2019 from booting, putting your data at risk of loss. To avoid this, create a full backup of Windows Server 2019 so you can recover your computer after a failed boot mode conversion.
To boot from a Windows Server 2019 UEFI bootable USB on a Dell Server computer, you can enable UEFI boot mode by entering the BIOS settings, selecting the USB drive as the first boot device, and saving the changes. This will allow you to boot from the USB drive in UEFI mode and start the installation process for Windows Server 2019.
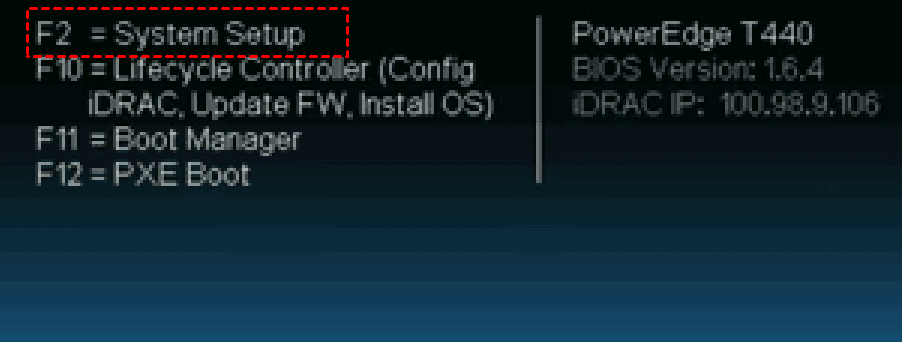
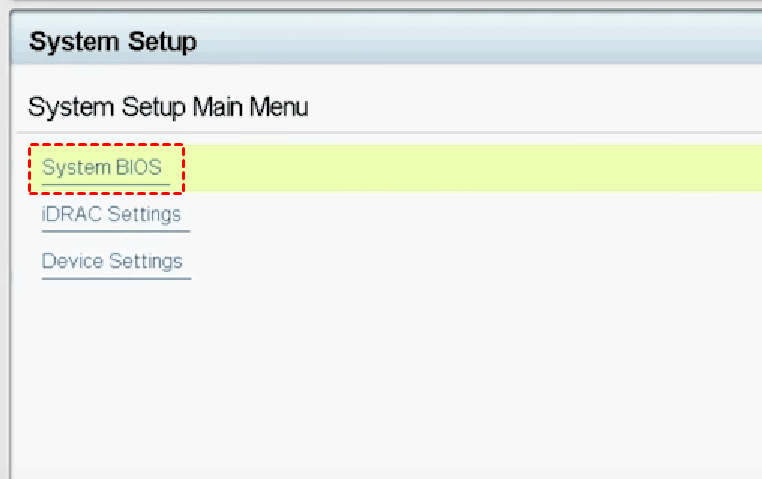
1. Power on your computer and tap the F2 or other function keys (depending on your computer manufacturer) to open System Setup.
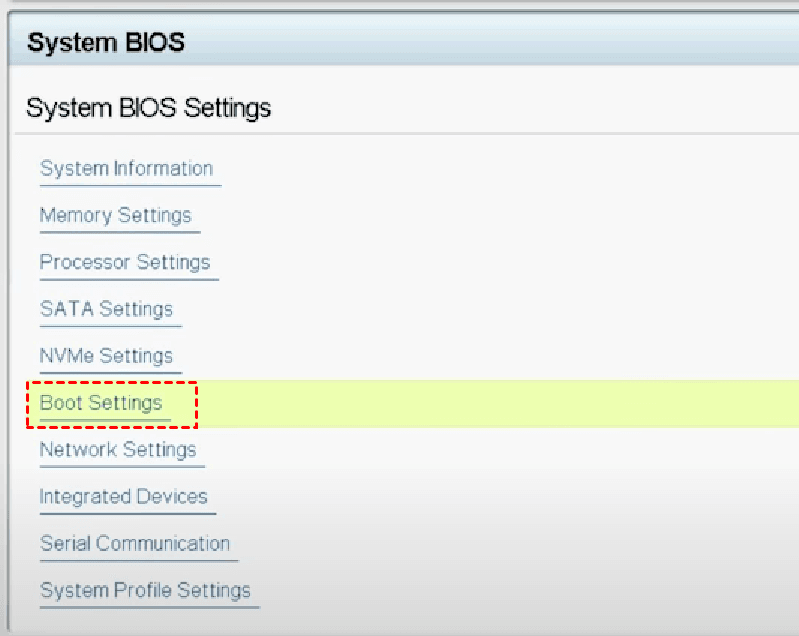
2. On the System Setup window, enter System BIOS.
3. Select Boot Settings.
4. In the pop-up window, select the UEFI Boot Mode.
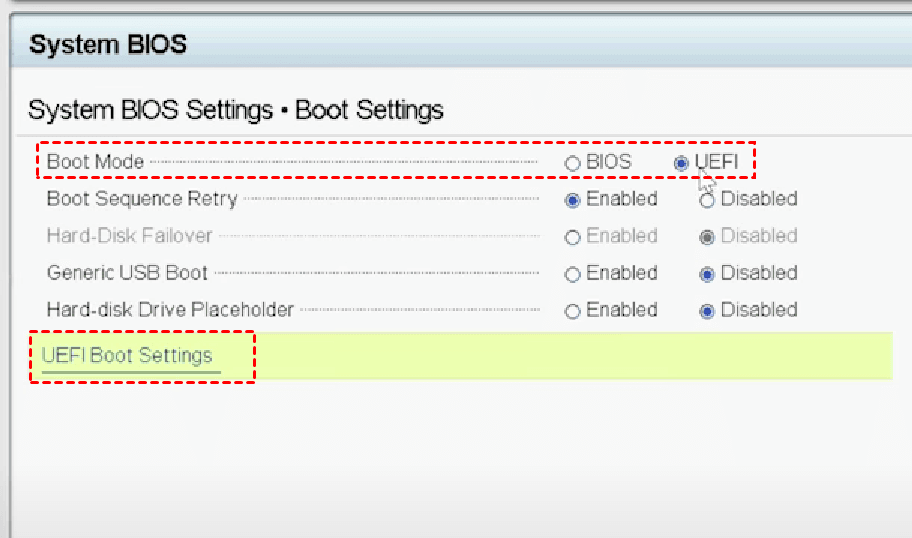
5. To access the UEFI Boot Settings, look for the UEFI Boot Sequence list, which should include the bootable USB drive you previously connected.
6. When the Change Order window appears, you can use the +/– buttons to position the boot item in the list, then click OK.
7. After confirming changes, click "Yes" to exit and reboot, then start your computer in UEFI mode using the bootable USB.

Notes: New installations of Windows should use UEFI, but existing installations should not be converted to UEFI, as this can cause a blue screen and require significant work to resolve.
Best way to make bootable Windows Server 2019 USB
Now you know how to enable Windows Server legacy boot and boot Windows Server 2019 from USB in UEFI mode. The basic steps are similar, with subtle differences from device to device, but you can complete the process with ease. To change the boot mode, you'll need to create a bootable Windows Server 2019 USB in hand, which is the prerequisite for making these changes.
I recommend using Qiling Disk Master Server, the best server media creator, on all Windows PCs, including Windows Server 2022/2019/2016/2012/2008/2003, to create bootable USB, CD/DVD, or ISO files that can boot both BIOS and UEFI modes without file system limitations.
Also, as a comprehensive backup and restore solution, Qiling Disk Master Server allows you to backup files, disks, partitions, and even the entire system to a USB drive, external hard drive, network share, or cloud storage, at customizable frequencies such as daily, weekly, and monthly.
Follow the steps below to create Windows Server 2019 bootable USB with Qiling Disk Master:
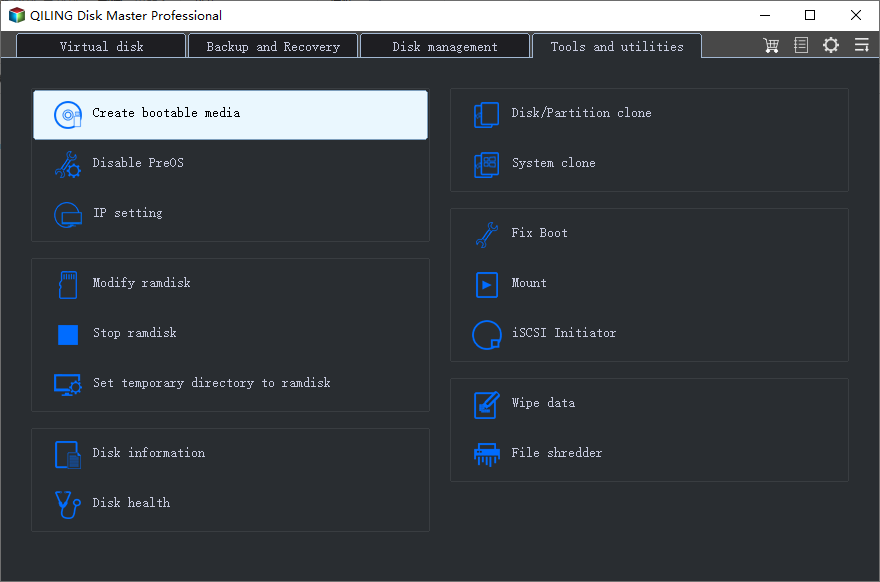
Step 1. To create a bootable USB drive, format a USB drive of at least 8GB in FAT32 and download Qiling Disk Master to your PC. After installing and launching it, click "Create Bootable Media" under the "Tools" tab.
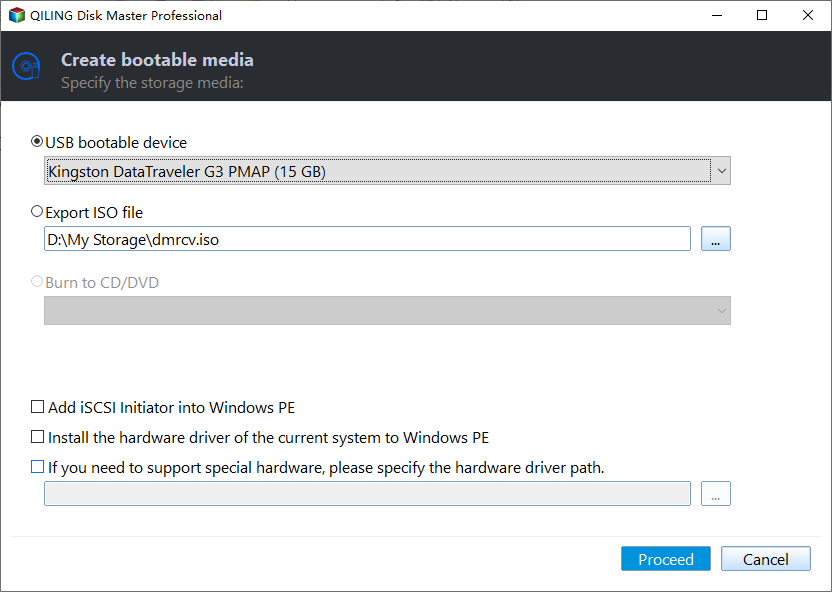
Step 2. Tick the USB Boot Device option and click Proceed to move on.
Step 3. Wait for the process to complete and click Finish.
Tip: If you don't have a USB or CD/DVD, you can enable the Qiling recovery environment boot option on your current computer.
The bootable USB is created successfully, allowing you to use the USB to boot Windows Server 2019 in UEFI mode.
Final thoughts
You've mastered the complete guide to enable Windows Server 2019 Legacy boot, and can now switch to UEFI mode, enjoying more advanced features, if your computer supports UEFI.
To create a Windows Server 2019 bootable media using Qiling Disk Master, the process is straightforward. You can easily make a bootable USB drive that can be used to repair Windows Server 2019 UEFI boot issues with ease.
With Qiling Disk Master, you can also create bootable media for various Windows Server versions, making it a versatile tool for system recovery tasks. Try it now!
Related Articles
- Easy | Create Server 2019 Bootable USB for System Recovery
Do you want to create a bootable USB in Windows Server 2019 so as to recover from a system crash? Follow this article to find the easiest way. - Windows Server Backup Bare Metal Recovery to Different Hardware
It's easy to create a Windows Server Backup for Bare Metal Recovery, but can you restore it to another machine with different hardware? How to do it without boot errors? - How to Change Steam Install Location in Windows 10?
Learn how to change Steam install location on Windows 10/11. Step-by-step guide to move Steam games to another drive or external hard drive without re-downloading, saving disk space on your C drive. - How to Clear A USB Stick on Windows 10/8/7 Permanently?
In this post, you will know how to clear a USB stick on Windows 10 via Command Prompt, or a free partition manager. Choose a proper method to wipe clean your USB stick now. - How to Convert GPT to MBR without Operating System (No Data Loss)
How to convert GPT to MBR without operating system? Here you can convert GPT disk to MBR disk without data loss having no access to an OS. - How to Copy Windows Operating System to USB Flash Drive Easily
Looking for a way to copy Windows operating system to flash drive? This guide gives a simple way to copy OS to USB drive in Windows 11, 10, 8, or 7.