Best Bootable Hard Drive Eraser for Windows 11/10/8/7
Need of bootable drive wiper
To securely erase your personal data from your old computer, you can use a data eraser software or physically destroy the hard drive. This will prevent others from accessing your sensitive information. It's a crucial step before recycling or giving away your old PC to protect your privacy.
The most direct way to remove personal files is to delete them and then empty the Recycle Bin, but this can often be reversed with data recovery software. Alternatively, you can reset Windows with the "Reset this PC" feature in Windows 10, which makes it more difficult for someone to recover your removed files, but it's still not foolproof.
If you want a stronger and more secure method of data erasure, consider using a bootable drive wiper. This tool will overwrite your data on the hard drive, making it virtually impossible for software-based file recovery methods to recover deleted files. This approach provides an added layer of security and ensures that your sensitive information is thoroughly erased.
Prime bootable hard drive eraser - Qiling Disk Master
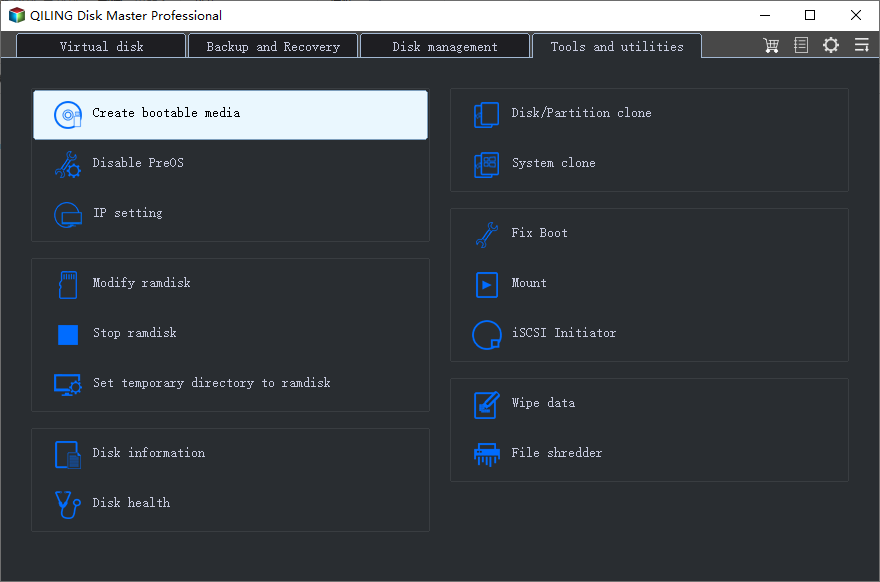
I recommend using Qiling Disk Master Professional for bootable hard drive eraser, which runs smoothly on all Windows editions from XP to Windows 11. Its main features include .
- The software allows you to erase an internal or external hard drive, USB flash drive, or SD card with the "Wipe disk" feature.
- The software allows you to securely erase all data on a chosen partition or unallocated space by utilizing the "Wipe partition(s) or unallocated space on the disk" feature.
- You can use a bootable disk to create a new operating system on a hard drive, effectively wiping it, without the need for Windows.
Qiling Disk Master is a disk management software that allows users to create, edit, and manage disk partitions, as well as clone and backup disks. With its user-friendly interface, users can easily resize, move, and merge partitions, and even clone entire disks for data recovery or migration.
How to perform bootable disk wipe in Windows 11/10/8/7 easily
Qiling Disk Master allows you to securely wipe a hard drive either within Windows or without it, and I'll show you how to use a bootable USB to do so. This process involves two main stages:
Note: To avoid losing important files, back up any data you want to keep before wiping your device. This way, you can restore your files if needed.
Stage 1: Create a bootable USB
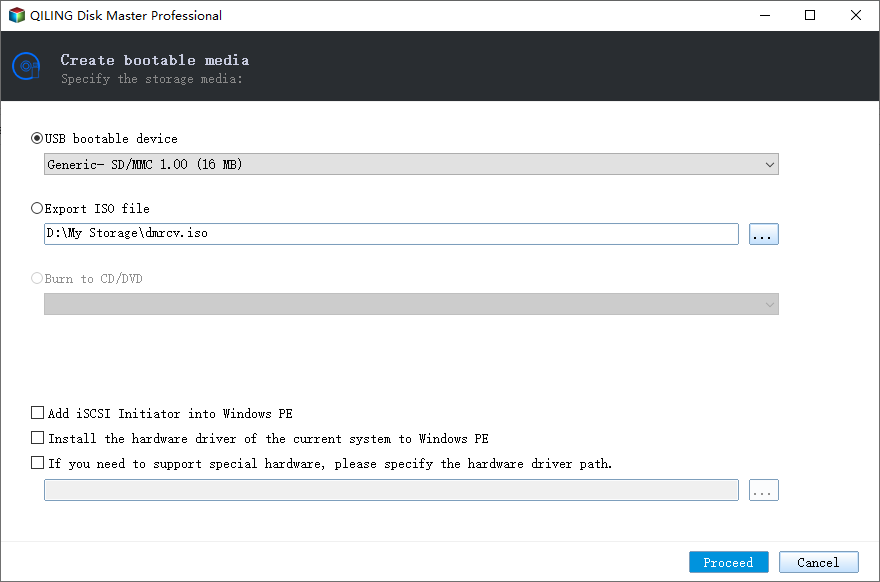
Step 1. Connect a USB drive to your computer, then launch Qiling Disk Master, click Tools and select Create Bootable Media.
Step 2. Select the USB Boot Device option and click Next. You will be prompted to format the USB drive, at which point you should click Yes to begin creating the bootable media, provided you have already backed up any important files.
Stage 2: Wipe a disk from the bootable USB
Step 1. To enter the BIOS and set the bootable USB as the first boot device, follow these steps: Enter the BIOS settings by pressing the designated key (usually F2, F12, or Del) as the computer boots up. Navigate to the boot order settings, select the USB drive as the first boot device, and save the changes.
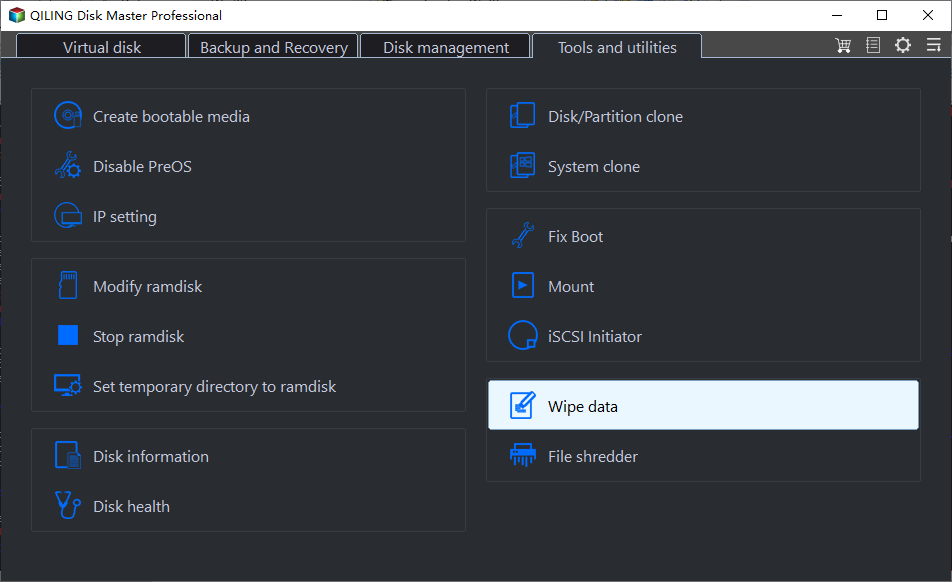
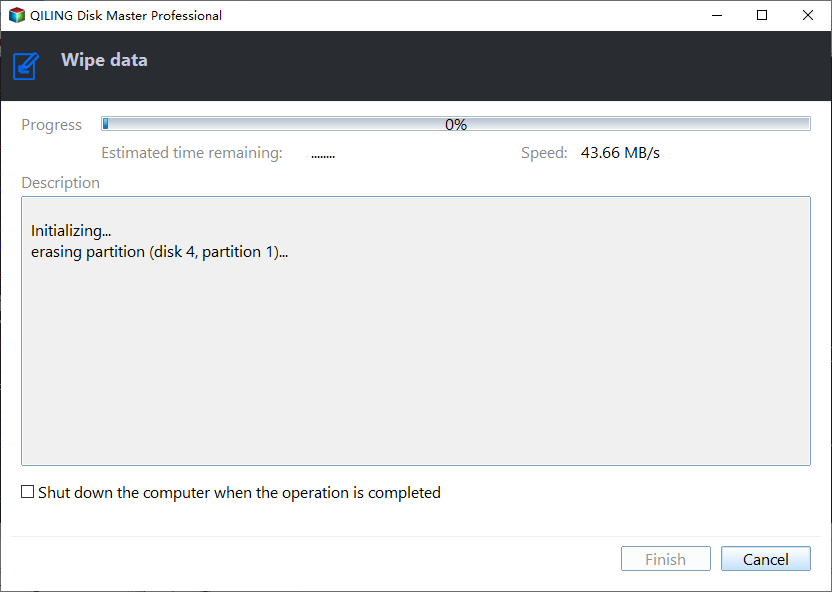
Step 2. Once your computer boots up, click on "Tools" and select "Disk Wipe" in Qiling Disk Master.
Step 3. Select the disk you want to wipe, you can choose more than one disk to be wiped.
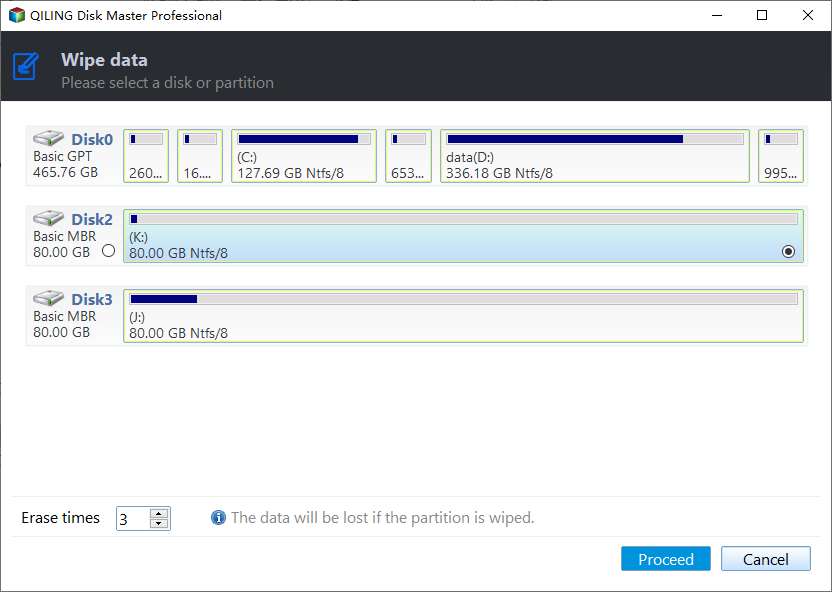
Step 4. To securely erase a bootable disk, select the first wiping method, which is to fill sectors with zero, and then click proceed to initiate the bootable disk wipe process.
✎For higher security, you can use methods like filling sectors with random data, DoD 5220.22-M, or Gutmann, but these are more complicated and take longer.
● If your computer is using a traditional hard drive, you can follow the steps mentioned above to wipe it. However, if your computer is using a solid-state drive (SSD), you'll need to follow different steps to erase it. To wipe an SSD, you'll need to use a specialized tool or software, such as DBAN or a third-party disk wipe utility, to securely erase the drive.
Conclusion
If you're looking for a reliable bootable hard drive eraser, Qiling Disk Master is a great choice. It offers both a "Create Bootable Media" feature and a "Disk Wipe" feature, allowing you to erase a hard drive without loading Windows. Additionally, it's a professional backup and sync software for Windows 10/8/7. Try it out for yourself!
Related Articles
- Perform Bootable Disk Wipe with Two Easy Ways
- Free Software to Write Zeros to Hard Drive Safely
- 4 Ways to Clean a Hard Drive in Windows 10 (Wipe or Cleanup)
- Best Free Cloning Software for Windows 11 (No Boot Issues)
This tutorial provides you with free Windows 11 clone software and tells you how to clone a hard drive on Windows 11 and boot from it safely. - Backup Outlook Emails with Attachments: A How-To Guide
How to back up Outlook emails with attachments? We will give you a detailed introduction on how to complete this with Outlook built-in function. There is also a simpler method in the article. If you are interested, read on! - 2 Effective Ways to Backup Outlook PST Files Automatically
Learn 2 ways to back up Outlook PST files automatically: use the Outlook backup add-in or Qiling Disk Master for scheduled PST and email backups.