How to Resize Dynamic Disk Volume in Windows 2012 (R2)?
- Overview of dynamic disk volumes
- When do you need to resize a dynamic disk?
- Windows native Disk Management: resize dynamic disk free (limited)
- Qiling Disk Master Server: resize dynamic disk volume flexibly
- Conclusion
Overview of dynamic disk volumes
On Windows, a disk can use either the basic disk type or the dynamic disk type. A basic disk is the standard choice for most users and works well for common partitions. A dynamic disk supports advanced volume types such as simple, spanned, striped, mirrored, and RAID-5 volumes, making it useful for flexible storage and fault tolerance.
▶Windows 2000 All Editions
▶Windows 2003 All Editions
▶Windows 2008 All Editions
▶Windows XP Professional Edition
▶Windows Vista Business, Ultimate, Enterprise Edition
▶Windows 7 Professional, Ultimate, Enterprise Edition
Dynamic disks allow you to span volumes across multiple disks, which is useful when a data volume is running low on space. You can also create a striped volume to distribute data across several hard drives and improve I/O performance. For example, a striped volume made of four disks can read data from all disks at the same time, which may greatly improve performance for demanding tasks.
Dynamic disks can also provide fault tolerance for data protection. Mirroring writes the same data to two disks so the volume can continue working if one disk fails. RAID-5 requires at least three disks and combines striping with parity to balance usable capacity, performance, and fault tolerance.
When do you need to resize a dynamic disk?
Similar to a basic disk, it's sometimes necessary to resize a dynamic disk volume, such as when adding more free space to a volume, especially a system partition, to address low disk space issues. To make efficient use of disk space, users may also need to reduce large or unused volumes to free up unallocated space for smaller partitions. In either case, understanding how to resize a dynamic disk volume is crucial.
Windows native Disk Management: resize dynamic disk free (limited)
To shrink or extend a dynamic disk volume for free in Windows, use the Disk Management Console, which can be launched by pressing WIN + R and entering "diskmgmt.msc". This console allows you to view and configure both basic and dynamic disks.
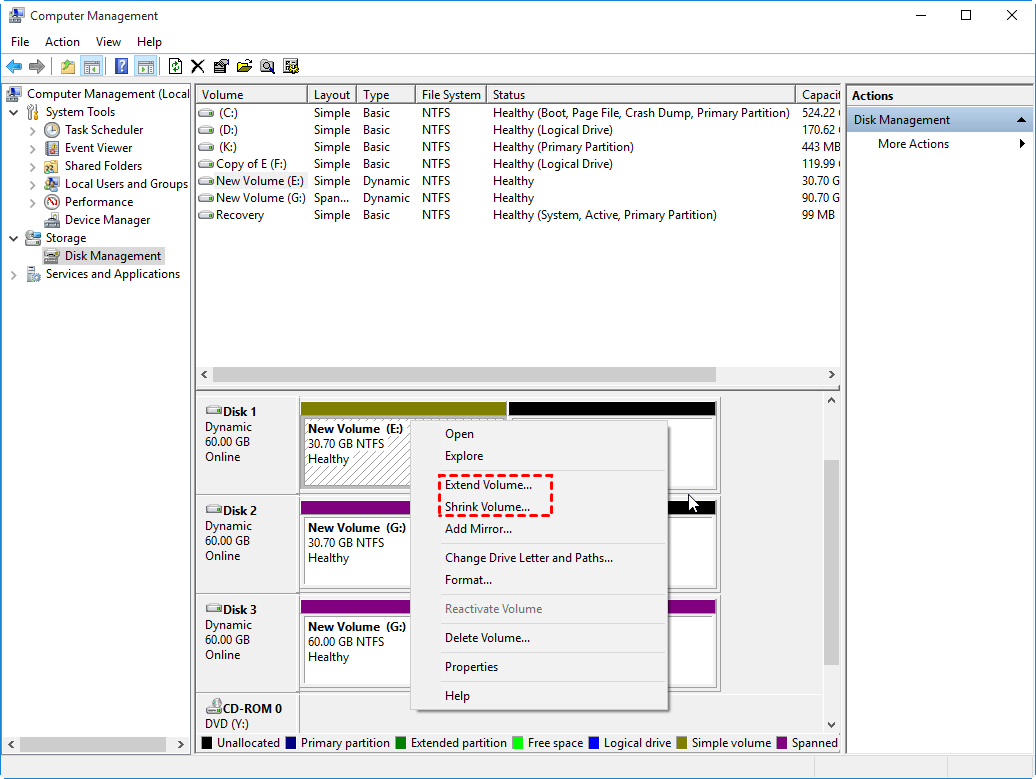
To resize a dynamic disk volume, right-click the volume and select "Extend Volume" or "Shrink Volume". These options are mainly available for simple and spanned volumes. For striped, mirrored, and RAID-5 volumes, Windows Disk Management offers limited options and may require deleting or recreating volumes. Next, the process of extending a simple dynamic volume is demonstrated step by step.
Step 1. Right-click the dynamic simple volume and select "Extend Volume".
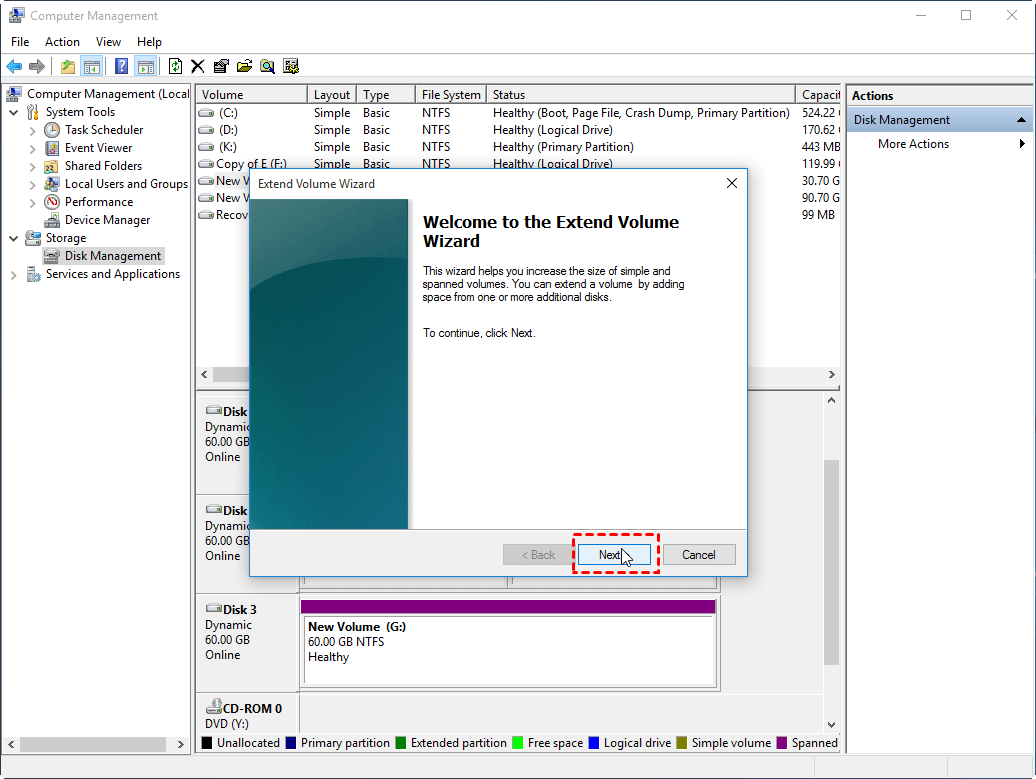
Step 2. Click "Next" in the Wizard window.
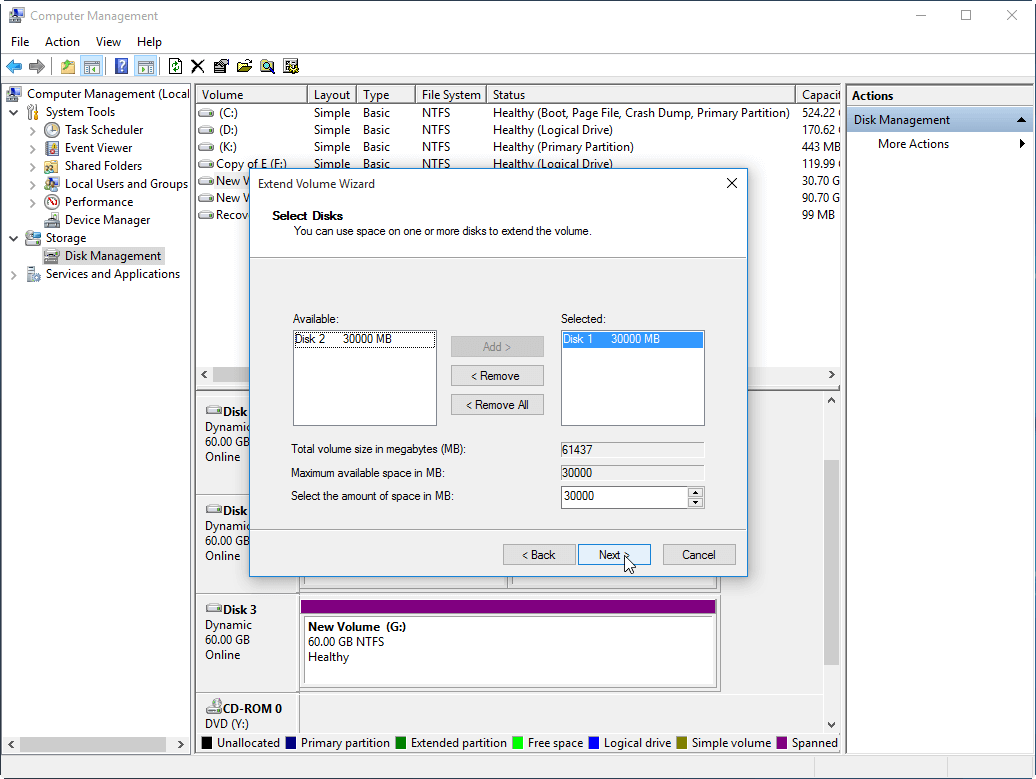
Step 3. Select the disk which contains the free space you want to add into the simple volume and click "Next".
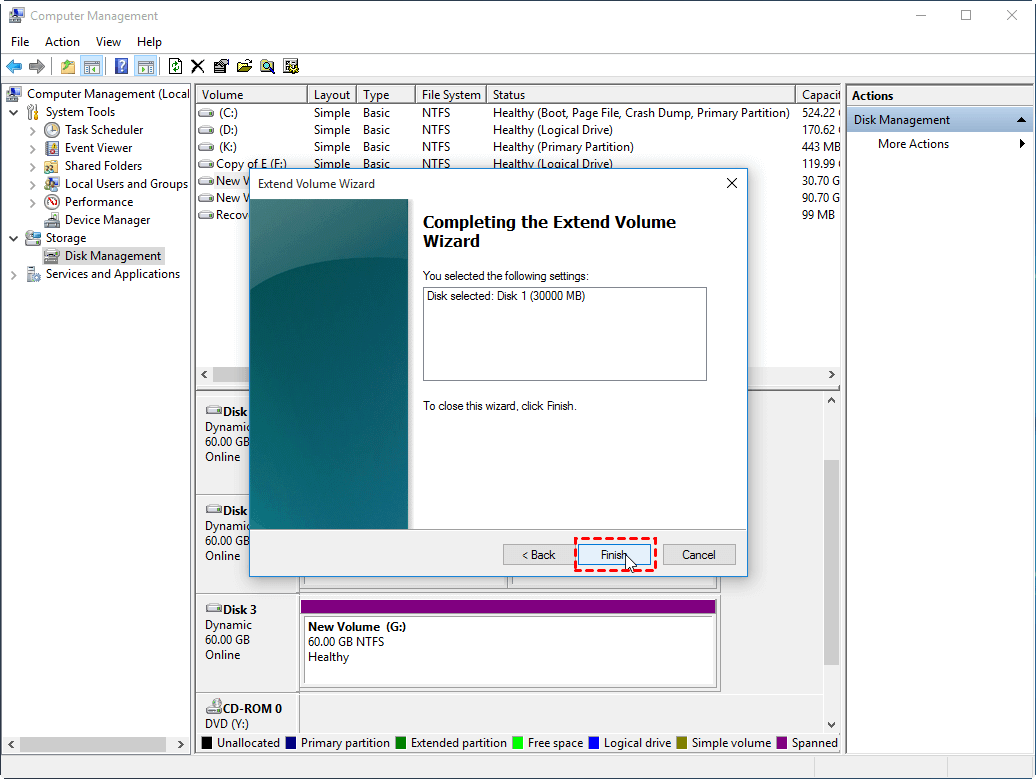
Step 4. Click "Finish" to extend the dynamic disk volume. Then you will see the simple volume has been extended.
To shrink a dynamic disk volume, select the target volume, click "Shrink Volume", enter the amount of space to shrink, and follow the wizard to complete the process.

Qiling Disk Master Server: resize dynamic disk volume flexibly
With the Disk Management tool, you can resize dynamic disks in Windows 10, 8, 7, and Windows Server 2003, 2008, 2012, 2016, and 2019, but only for simple and spanned volumes. A more powerful dynamic disk manager, Qiling Disk Master Server, offers additional capabilities.
- Extend and shrink striped volume, mirrored volume, and RAID-5.
- Extend dynamic system/boot volume in Windows 2000/XP/2003.
- Convert a dynamic disk containing dynamic volumes to basic without deleting any volumes by using Qiling Disk Master Server.
- Move dynamic volume from one location to another disk.
- Repair unreadable or invalid dynamic disk.
To extend a mirrored volume, follow these steps. Note that there must be an adjacent unallocated space next to the volume you wish to extend. A demo version of the software is available for a free trial, and it is compatible with all Windows Server operating systems and Windows 10/8/7/XP/Vista.
Conclusion
If you need to resize simple or spanned dynamic volumes, Windows Disk Management can help with basic tasks. For more flexibility across dynamic volume types, Qiling Disk Master Server is a better option. It also offers an Unlimited Edition for enterprise users and a Technician Edition for IT service providers.
Related Articles
- Fix Dynamic Disk Missing/Offline in Windows 10/8.1/8/7 [Case Study]
If the dynamic disk shows as missing or offline in Disk Management, read this post to find an easy and effective solution. - How to Copy or Clone Dynamic Disk in Windows 7, 8,10?
Learn how to Copy or Clone Dynamic Disk in Windows 7, 8,10 with clear steps, key checks, and practical tips. - How to Convert Dynamic Disk to Basic Disk without Losing Data?
Learn how to convert dynamic disk to basic because some older systems do not support dynamic disks. Read this guide for detailed steps. - How to Resize Dynamic Disk Volume in Windows 2012 (R2)?
Here you can learn how to resize dynamic disk, especially extend dynamic disk partition in Windows 10, 8, 7 or Windows Server 2008 (R2), 2012 (R2), 2016 and 2019. - How to Convert Simple Volume to Primary Partition
Qiling Partition Master can convert and change simple volume to primary partition without data loss, compatible with Windows 10/8/7, 2000/XP/2003/Vista/2008 32-bit and 64-bit systems. - SmartDisk FAT32 Format Utility Free Download [2022 Updated]
This guide explains SmartDisk FAT32 Format Utility Free Download with clear steps, key checks, and practical tips.
Products
Articles & Tutorials
- Data Recovery
- Data Backup
- File Recovery
- File Backup
- File synchronize
- System Backup and Restore
- Disk and Partition Clone
- Technical articles
- Disk Master Help
- Windows Deleted File and Disk Recovery Tutorials
- Windows File and Data Recovery Tutorials
- More Windows Tutorials for Install, Security, Files, and PC Tips
- Windows Boot, Repair, and Recovery Environment Tutorials
- Windows Backup Tutorials
- Windows Restore Tutorials
- Windows Clone and Migration Tutorials
- Windows Server Backup, Recovery, and Management Tutorials
- Windows Disk, Partition, and Storage Management Tutorials