WD My Cloud Windows 10 Cannot Access? Try These Fixes
Why Windows 10 cannot access WD My Cloud
WD My Cloud is a network storage device. If Windows 10 cannot access it, the cause may be network discovery, SMB settings, incorrect credentials, a changed IP address, firewall rules, outdated firmware, or a disconnected network share.
Basic checks
Step 1. Make sure the PC and WD My Cloud are on the same router or network.
Step 2. Restart the router and WD device.
Step 3. Check the device LED and WD dashboard.
Step 4. Try opening the device IP address in a browser.
Fix 1. Turn on network discovery
Step 1. Open Control Panel > Network and Sharing Center.
Step 2. Click Change advanced sharing settings.
Step 3. Enable Turn on network discovery and Turn on file and printer sharing.
Step 4. Save changes and reopen File Explorer.
Fix 2. Connect by IP address
Step 1. Find the WD My Cloud IP address from your router or WD dashboard.
Step 2. Press Win + R.
Step 3. Type \\192.168.1.xxx and press Enter.
Step 4. Enter the WD account and password if prompted.
Fix 3. Remove old Windows credentials
Step 1. Open Control Panel > Credential Manager.
Step 2. Choose Windows Credentials.
Step 3. Remove old entries related to WD My Cloud.
Step 4. Reconnect and enter the correct username and password.
Fix 4. Map WD My Cloud as a network drive
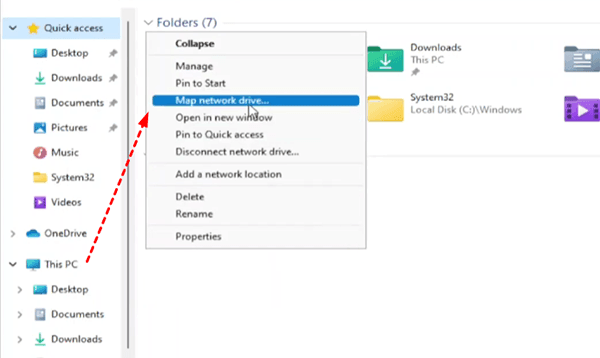
Step 1. Open File Explorer and click This PC.
Step 2. Click Map network drive.
Step 3. Enter the folder path, such as \\WDMyCloud\Public or the IP path.
Step 4. Select Reconnect at sign-in and finish the wizard.
Fix 5. Check SMB and firewall settings
Older NAS devices may require SMB compatibility. Open Windows Features and check whether SMB options are needed for your device. Use SMB 1.0 only when required and only on a trusted private network. Also allow File and Printer Sharing through Windows Defender Firewall.
Automatically sync files to WD My Cloud
 Qiling Disk Master
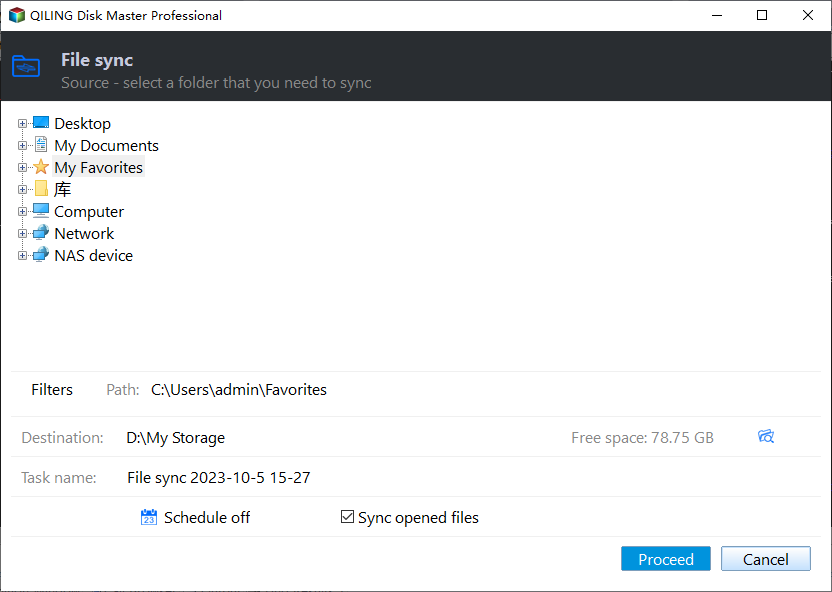
After access is restored, use Qiling Disk Master to create scheduled file sync tasks from Windows 10 folders to WD My Cloud.
Step 1. Open Qiling Disk Master and choose file sync.
Step 2. Add folders you want to protect.
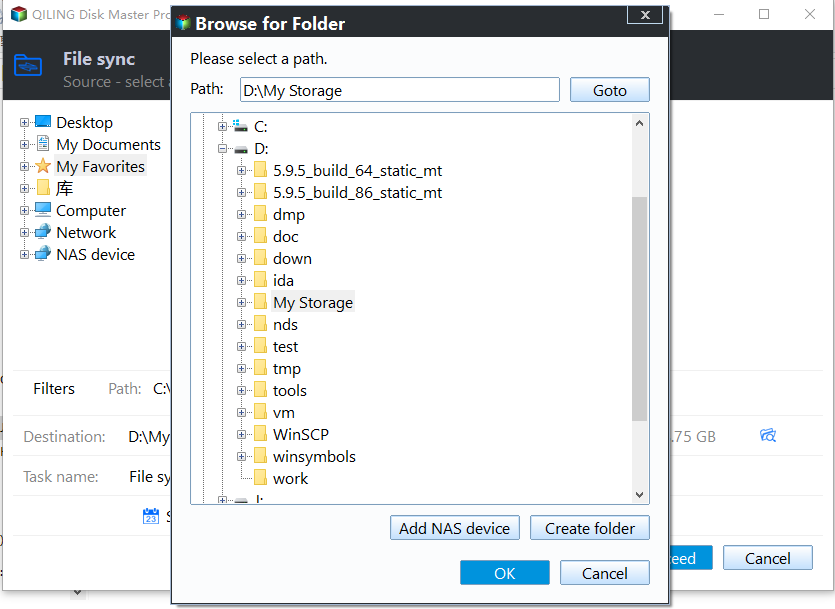
Step 3. Select the mapped WD My Cloud folder as destination.
Step 4. Set a schedule and start the sync task.
Conclusion
Most WD My Cloud access problems in Windows 10 are caused by network discovery, credentials, IP changes, or SMB compatibility. Restore access first, then set up regular sync or backup to avoid data loss.
Related Articles
-
BitLocker Data Recovery: Recover Data from BitLocker Encrypted Drives
Find practical ways to unlock BitLocker drives, locate a recovery key, and protect encrypted data before formatting. -
Download, Install, Set up Google Backup and Sync Tool
Learn how cloud sync works and how to keep files synchronized between Windows and cloud storage. -
Best Way to Backup Windows 7/8/10/11 to WD My Cloud
Back up Windows files to WD My Cloud and keep important data protected on network storage. -
How to Backup Laptop Windows 10 Safely and Completely
Protect files with a separate local backup when a network storage device is unavailable.
Products
Articles & Tutorials
- Data Recovery
- Data Backup
- File Recovery
- File Backup
- File synchronize
- System Backup and Restore
- Disk and Partition Clone
- Technical articles
- Disk Master Help
- Windows Deleted File and Disk Recovery Tutorials
- Windows File and Data Recovery Tutorials
- More Windows Tutorials for Install, Security, Files, and PC Tips
- Windows Boot, Repair, and Recovery Environment Tutorials
- Windows Backup Tutorials
- Windows Restore Tutorials
- Windows Clone and Migration Tutorials
- Windows Server Backup, Recovery, and Management Tutorials
- Windows Disk, Partition, and Storage Management Tutorials