Wipe Hard Drive for Clean Install Windows 11 Safely and Easily (3 Ways)
Reasons for Wiping Hard Drive
The reasons for wiping a hard drive vary from user to user, but common motivations include.
- Prevent data leakage: When you need to replace, transfer, or dispose of a disk, it's essential to wipe the data to prevent sensitive information from being leaked. This ensures your personal and confidential data remains secure.
- Free up storage space: If you want to free up storage space on your device, you should consider deleting some files or data to free up space, not wiping the disk. Wiping the disk would erase all data and files, including the ones you want to keep.
- Clean install Windows system: To clean install a system, you would first wipe the disk to erase all existing data, and then install the system on the wiped disk, effectively starting with a fresh slate.

What to Do before Wiping a Hard Drive?
Before wiping a hard drive for a clean install of Windows 11, prepare by backing up important files, disabling BitLocker (if enabled), and disconnecting any external devices. This ensures a smooth erase process and prevents data loss.
- To prevent data loss, make sure to back up the entire contents of the hard drive to another location.
- To wipe the hard drive on a laptop, it's recommended to connect the laptop to power, as some wiping methods may take a long time.
- Closing any programs or files that are currently running on the hard drive you're attempting to wipe.
How to Wipe Hard Drive for Clean Install Windows 11
To erase the disk, you can use the built-in tool, installation media, or professional third-party software, depending on your needs and preferences.
Method 1. Wipe Hard Drive using Built-in Tool
To erase a disk, you can use the Windows built-in tool Disk Management. Follow the graphic tutorial to learn how to erase the disk using this method. This is the first method to erase a disk.
Step 1. Open the Start menu and type Disk Management. Then click the search result or Open button.
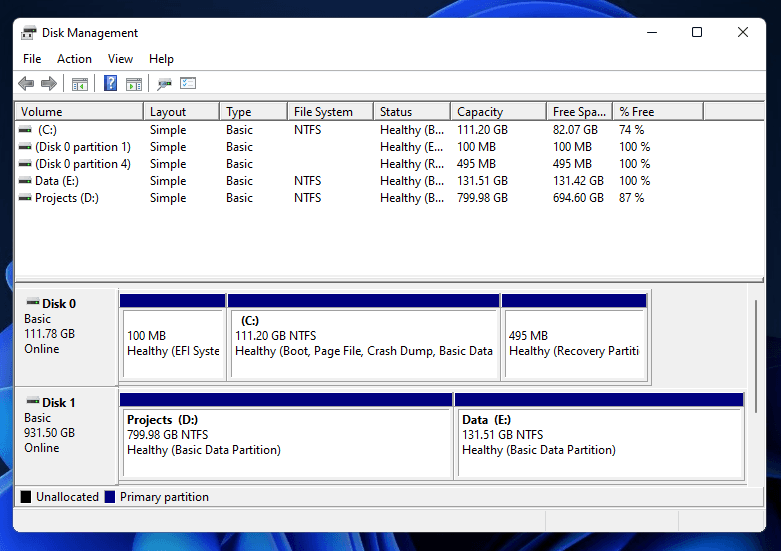
Step 2. You will see the screen below.
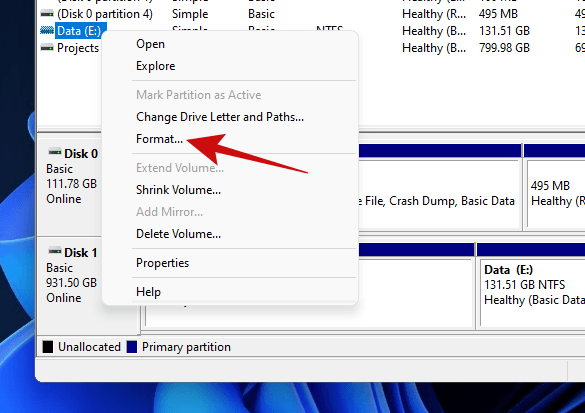
Step 3. Right-click on the volume you want to wipe, and click on Format.
Step 4. On the next popup, you'll see options to change the volume name, file systems, etc. You can tick the "Perform a quick format" option to speed up the wipe process, but untick it for a thorough wipe.
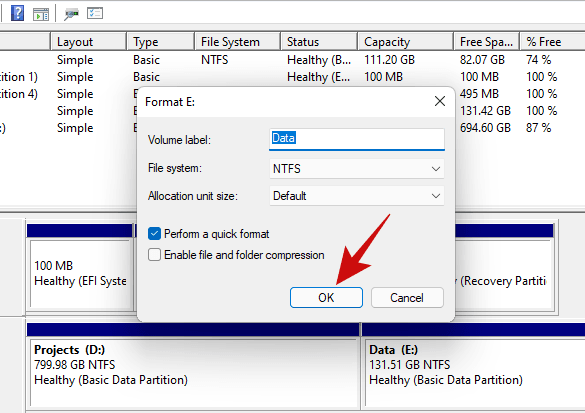
Step 5. Then confirm your operations and click OK to start wiping your drive.
Method 2. Wipe Hard Drive using Windows Installation Media
To wipe the disk with Windows installation media, start by downloading the Media Creation Tool and using it to create a Windows 11 ISO file on a USB drive. Then, boot your computer from this bootable USB and follow the on-screen instructions to perform a clean install. You can find a tutorial below to guide you through the process.
Create Windows 11 Installation Media
Step 1. Download Windows 11 Media Creation Tool and open it.
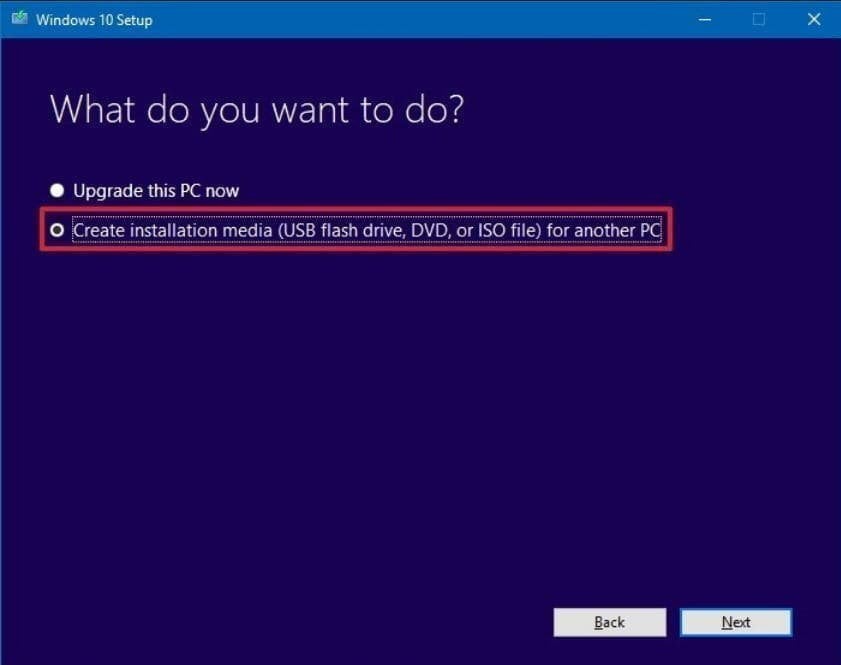
Step 2. Select Create installation media (USB flash drive, DVD, or ISO file) for another PC and click Next.
Step 3. Set Language, Windows Edition, and Architecture, then click Next.
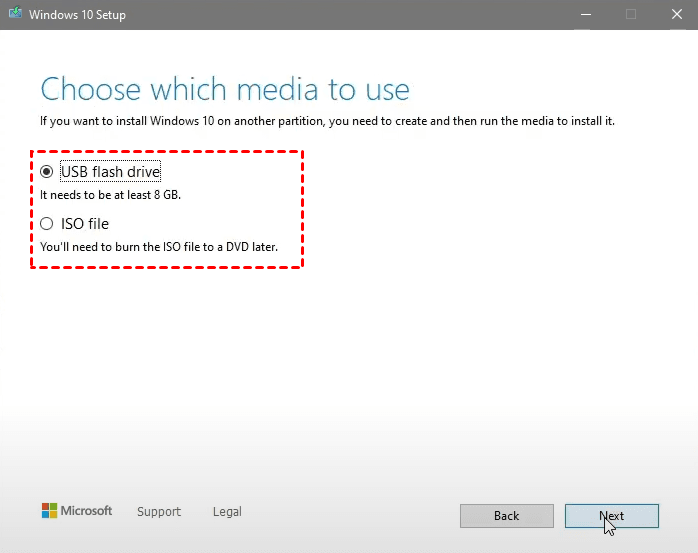
Step 4. Choose USB flash drive and click Next.
Step 5. Choose the removable drive from the list, and click Next. Then it will download Windows 10 to the USB drive and make it bootable.
Step 6. Click Finish to exit when the downloading process has finished.
Install Windows 11 on Your Computer
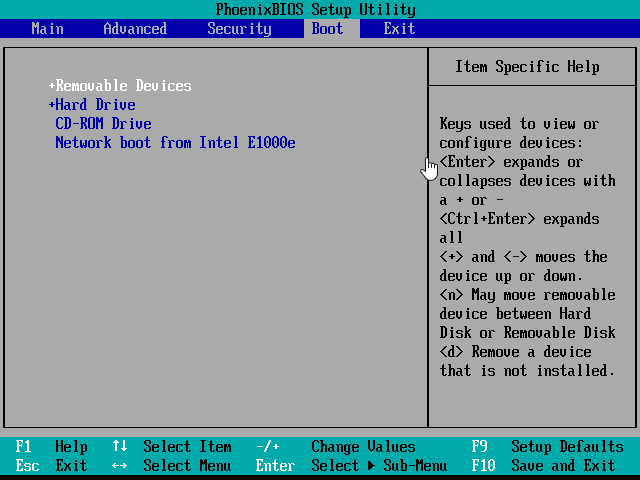
Step 1. Insert the bootable USB drive into your computer, restart it, and press F2 or F12 to enter the BIOS. From there, select the USB drive as the first boot option and exit by pressing F10 or Enter to reboot the computer.
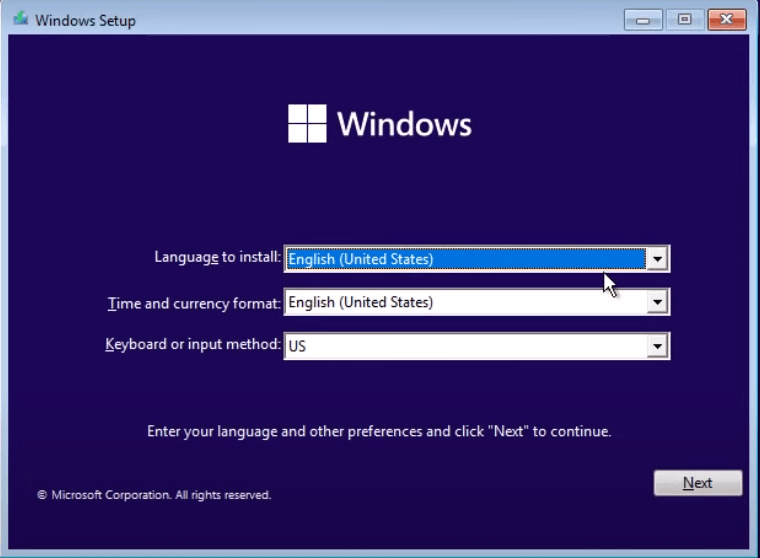
Step 2. Choose your language and other preferences and click Next. Then, click Install Now.
Step 3. There will pop up a notice asking you to activate Windows, enter your product key or choose I don't have a product key if you're reinstalling Windows.
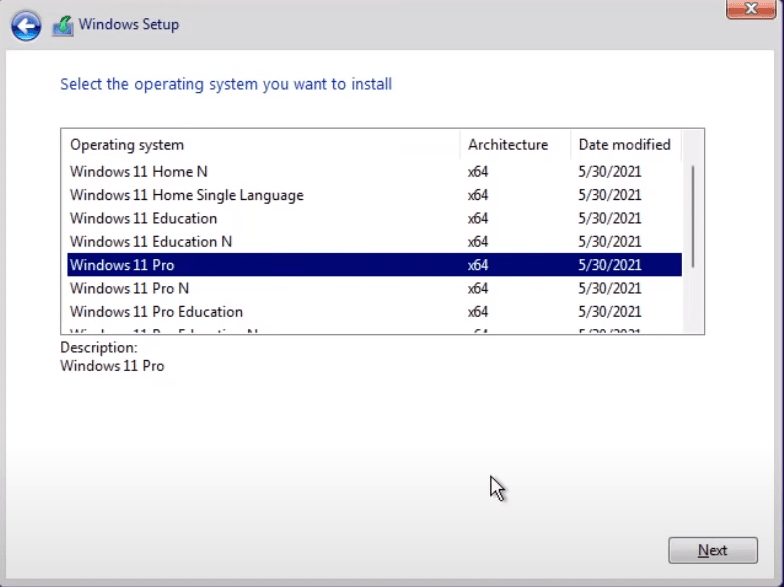
Step 4. Choose the version that corresponds to your current operating system and click Next.
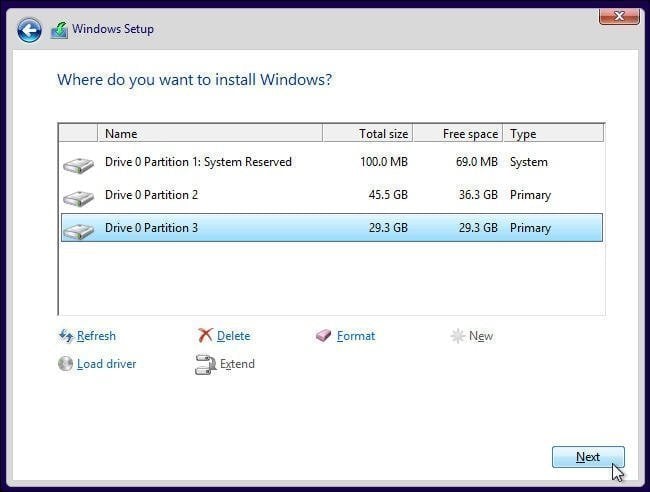
Step 5. Select Custom: Install Windows only (advanced).

Step 6. To install Windows 11, delete all partitions on the hard drive you want to install it on, until the drive shows only as Unallocated Space. This can be done by selecting the partition you want to delete, clicking "Delete" or "Format", and then clicking "Next". The installation process will then run automatically, prompting you to set a username, password, and other settings once it's complete.
Method 3. Wipe Hard Drive using a Reliable Third-party Software
If you find the previous methods too troublesome or difficult, consider using a powerful and reliable third-party wiping software. A good option is Qiling Disk Master Professional, which can wipe not only entire disks but also partitions and unallocated space, making it a versatile tool for a clean Windows 11 install.
As a professional disk wiping software, it offers 4 wiping methods: Fill sectors with Zero, Fill sectors with random data, DoD 52220.22-M, and Gutmann. Before starting the wiping process, please backup your important files, as all data on the disk will be erased. Once you're ready, follow the steps.
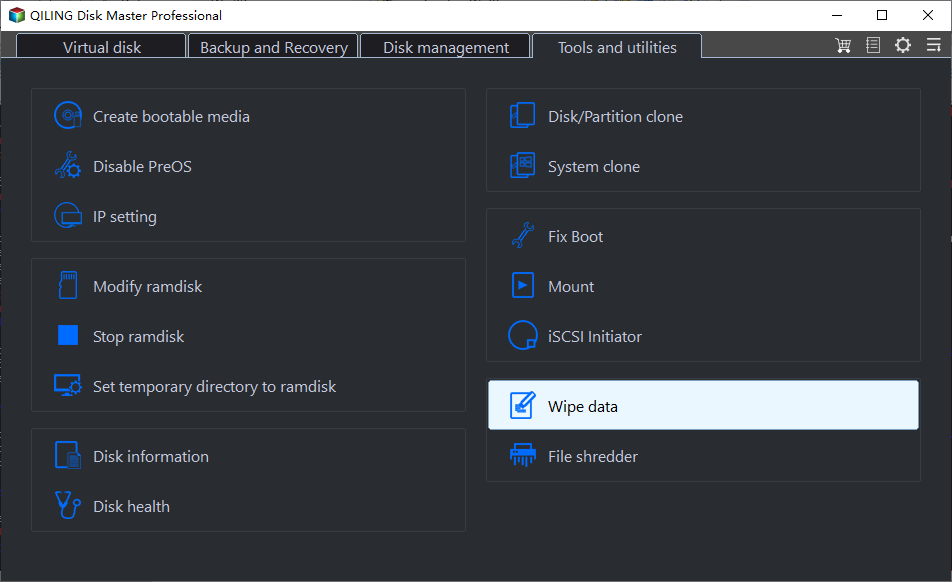
Step 1. Download Qiling Disk Master, install, and launch it. Then click Tools > Disk Wipe.
Step 2. Select the hard drive you want to wipe.
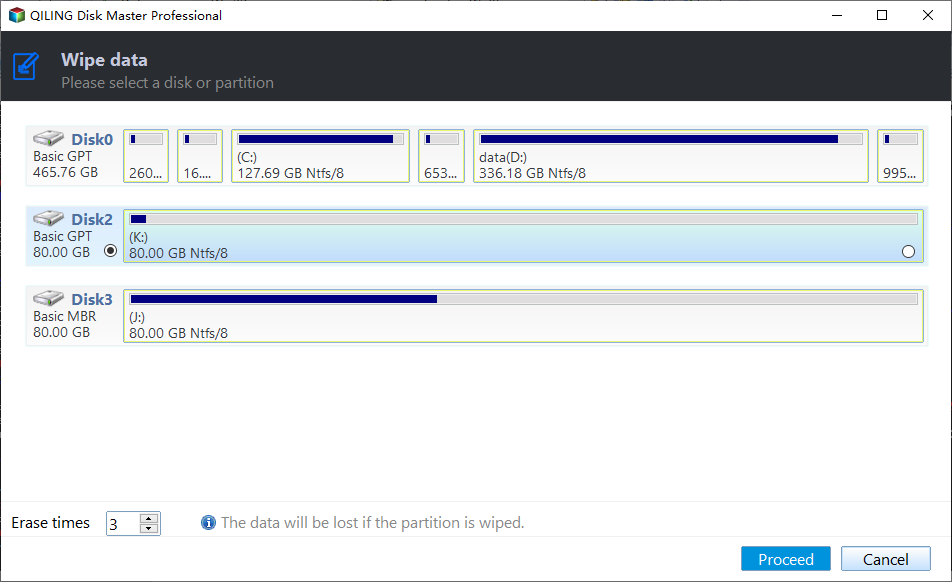
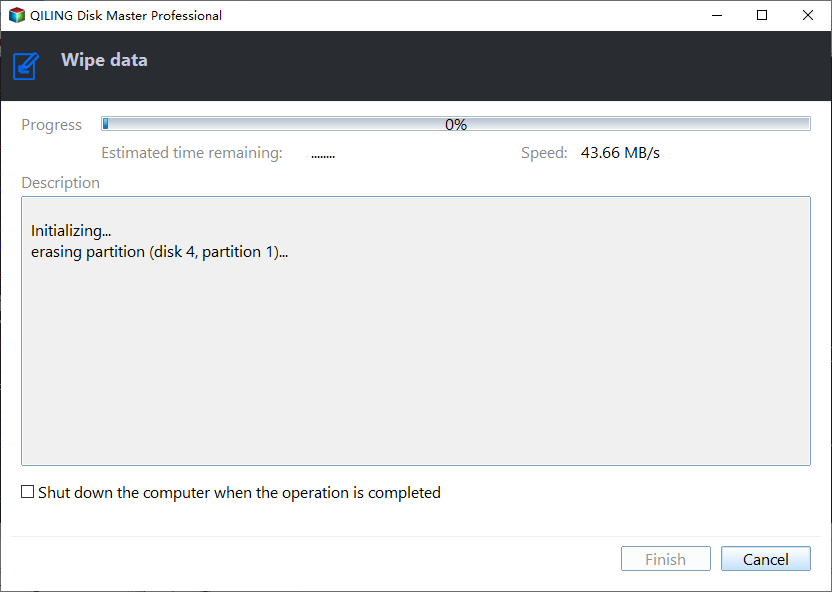
Step 3. Click Fill sectors with Zero and then click the Proceed to wipe hard drive for clean install Windows 11.
- Notes: If you want a more thorough way, you can choose the following three methods.
- Fill sectors with random data: The wiping method will overwrite the disk with random numbers, providing a more thorough approach than the first method.
- DoD 52220.22-M: It allows you to set the wiping times by yourself, ranging from 3 to 7 minutes.
- Gutmann: This method is the most thorough way to wipe your hard drive, capable of deleting data 35 times.
Tip:
You can create a system backup on another computer with Windows 11, then use Universal Restore to restore the backup to your current computer.
Summary
You can wipe a hard drive to clean install Windows 11 using three methods: the built-in tool, installation media, or reliable third-party software such as Qiling Disk Master.
I prefer the last method because it allows for the erasure of disks, partitions, and unallocated space, offering a more comprehensive data protection. It also enables the selection of different wiping methods based on specific needs, and allows for the combination of multiple methods to maximize data security.
You can use the software to clone your Windows 11 to an external hard drive with the system clone feature, allowing you to use your new system everywhere without carrying your laptop. Download Qiling Disk Master to explore more useful functions.
Related Articles
- Top Two Ways to Help You Install Windows 11 to SSD
This article will show you how to set up new SSD on Windows 11 and install Windows 11 to another drive. After that, you can enjoy a faster speed and more effective system without any limits. - Install Windows 10, 11 on SSD Effortlessly with 2 Ways
How do you install Windows 10 on new SSD? Usually you can perform clean installation via USB or installation CD, or migrate OS from the old system drive. Keep reading. - 3 Free & Easy Ways to Transfer Windows 11, 10 to New Hard Drive
Here you can transfer Windows 10, 11 to new hard drive to replace or upgrade hard drive with Qiling Disk Master, clean install, or built-in Backup and Restore (Windows 7). Swipe to learn specific steps. - How to Set up Automatically Backup in Windows 10
Setup backup is quite necessary in case of any problem happened to system or data. If there is a system crash, you can simply restore it with backup. - How to Restore VHD File in Windows 2008 (R2) Server
If you want to restore VHD file in Windows 2008 (R2) server, but Microsoft does not find the backup image on network, please continue to see below and this article offers you 2 helpful methods. - How to Restore Windows Server 2003 System Image Backup (Secure Boot)?
Learn how to restore Windows Server 2003, 2008, 2012 (R2) system image backup to previous state or on different hardware with the help of Qiling Disk Master Server.