Top 6 Ways to Fix Windows 7 Offline Files Not Working Problem
- Windows 7 Offline Files Sync Problems You May Meet
- Solutions to Windows 7 Offline Files Sync Problems
- Solution 1. Fix Offline Files cannot be activated in Windows
- Solution 2. Fix Offline files access denied
- Solution 3. Fix Offline Folders cannot sync
- Solution 4. Fix cannot see the content of a network folder
- Solution 5. Fix Windows 7 Offline Files not syncing automatically
- Solution 6. Fix Windows 7 Offline Files Sync Problems with free file sync software
- Conclusion
Windows 7 Offline Files Sync Problems You May Meet
The Offline Files sync feature allows you to copy network files and folders to your computer, enabling you to access them even when disconnected from the network.
Many users experience issues with Windows 7 Offline Files, including sync problems, where the feature fails to work as expected, causing inconvenience and frustration. These issues can arise due to various reasons, such as corrupted cache, incorrect configuration, or conflicts with other system components. Users may find that their Offline Files are not synchronizing properly, leading to inconsistencies between the local cache and the network files. This can result in errors, data loss, or even system crashes.
- Offline Files cannot be activated in Windows.
- Offline files access denied.
- Offline folders that cannot sync.
- Cannot see the content of a network folder.
- Windows 7 offline files not syncing automatically.
Which of the above problems do you meet? Just keep reading to get the exact solution to fix the Windows 7 Offline Files not syncing/working problem.
Solutions to Windows 7 Offline Files Sync Problems
Try solutions one by one, or use a file sync software to avoid the issue in the future.
Solution 1. Fix Offline Files cannot be activated in Windows
When enabling offline files, a message indicates that they are enabled but not yet active, requiring a computer restart to activate them, yet the issue persists even after multiple restarts.
Here's the method to fix this Windows 7 offline files not working problem. Click Disable offline files > Restart your computer > Delete the CSC folder (C:/Windows/CSC) > Click Enable offline files > Restart your PC.
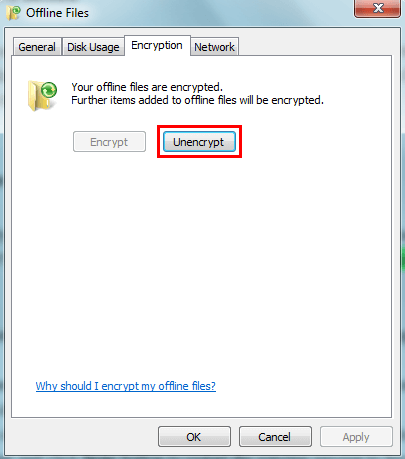
Solution 2. Fix Offline files access denied
To resolve the "Access is denied on almost every file" error, go to Start, type Sync Center, and click it. Then, select Manage offline files on the left side, click Encryption, choose Unencrypt, and click OK. This should fix the issue.
Solution 3. Fix Offline Folders cannot sync
If you're experiencing issues with Windows 7 offline files not syncing, you may encounter an error message stating that another process is accessing the files, preventing syncing from continuing. To resolve this problem, follow these steps.
Step 1. To ensure all the user's data on the server is backed up, specifically the data that isn't syncing, a process can be initiated to securely copy and store the non-syncing data. This process involves identifying the data that hasn't been synced, compressing it to save storage space, and then transferring the compressed data to a secure backup location. The backup location can be a separate server, a cloud storage service, or an external hard drive, depending on the user's preferences and the server's capabilities.
Step 2. Backup all the user's data on the client device. Also, it's the data that is not syncing.
Step 3. Delete the user's data (the data that is not syncing) on the server.
Step 4. Copy the backup data from the client to the server. And then delete the data from the client.
Step 5. Go to Sync Center and click the Sync button to restart the syncing process to have a try.
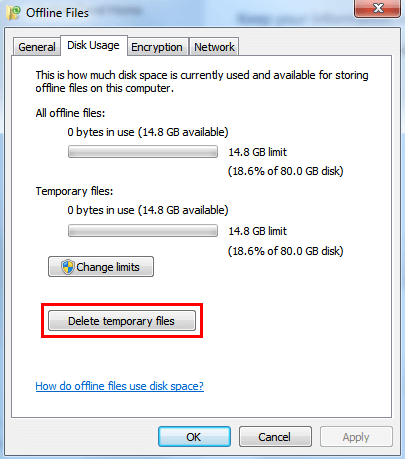
Solution 4. Fix cannot see the content of a network folder
If the Windows 7 offline files are not syncing due to not being able to see the content of a network folder, which is only displaying partially, here are the detailed steps to fix it. To resolve this issue, you can try the following steps: First, check if the network folder is accessible by trying to open it from the File Explorer. If it's not accessible, check the network connection and ensure that the folder is shared correctly. Next, check the Offline Files settings to see if the folder is included in the synchronization.
Step 1. Go to Start and type Sync Center in the search bar and click it.
Step 2. Click Manage Offline Files > Select Disk Usage > Choose Delete temporary files option.
Solution 5. Fix Windows 7 Offline Files not syncing automatically
The folder is not syncing with the network folder when logging back in due to a failure in background synchronization.
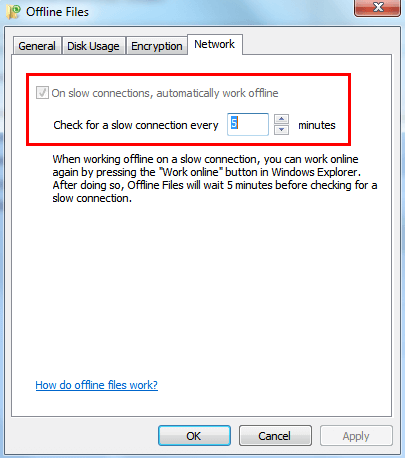
To fix the Windows 7 offline files not syncing automatically issue, check for network issues and restrictive NTFS permissions on the server, then review the Offline Files settings, specifically the network settings, to ensure they are configured correctly.
Step 1. Go to Control Panel > Type Sync Center in the search bar and open it.
Step 2. Click Manage offline files > Choose Network option.
Step 3. Confirm the On slow connections, automatically work offline box is checked.
Solution 6. Fix Windows 7 Offline Files Sync Problems with free file sync software
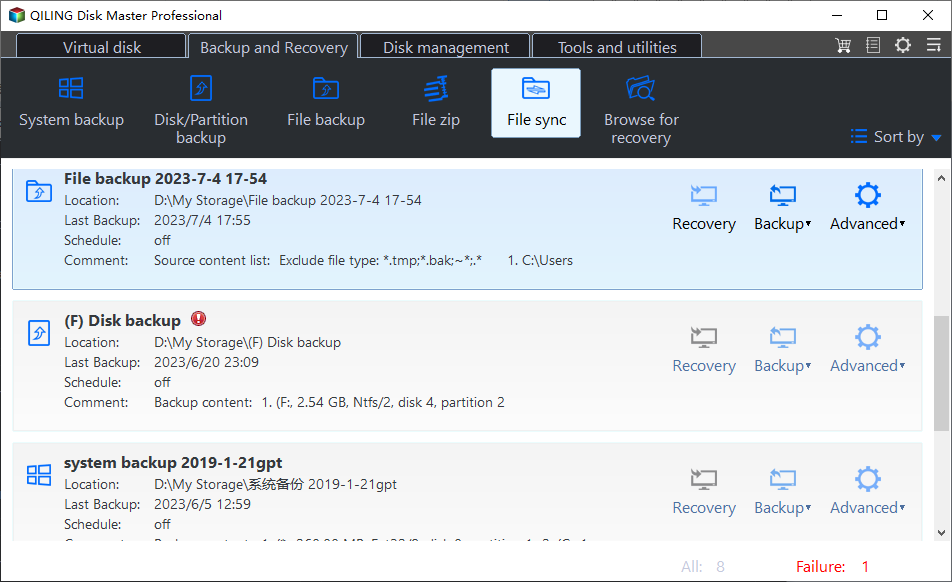
If all the above methods cannot help you fix the Windows 7 Offline Files not working problem, you can try using a free file sync tool like Qiling Disk Master Standard to help you sync files.
Here are the detailed steps to sync files from network to the computer.
Step 1. Download Qiling Disk Master, install and launch it.
Step 2. Click Backup and then choose File Sync.
Step 3. Name the task, Click Folder or Share/NAS To sync files from your Google Drive to your computer, select the folders or files you want to sync by checking the box next to them. You can choose specific files or entire folders, depending on your needs.
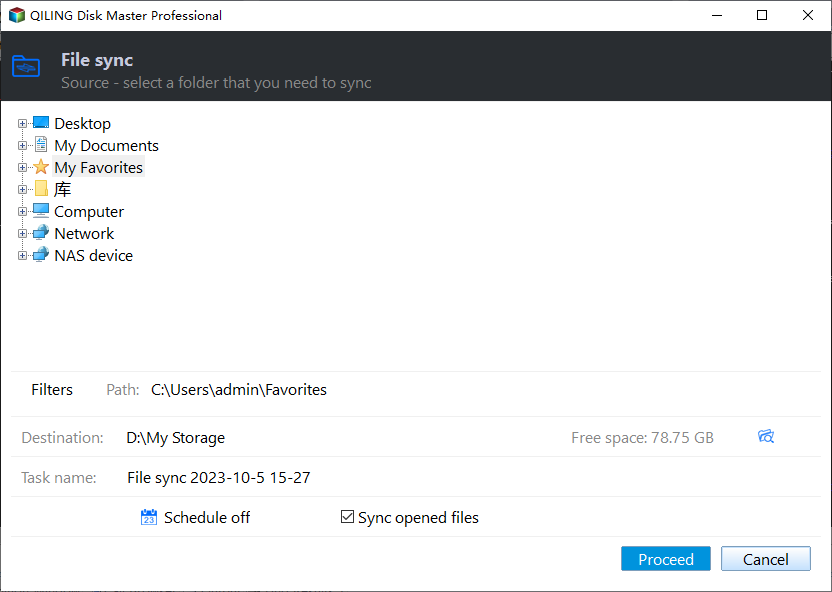
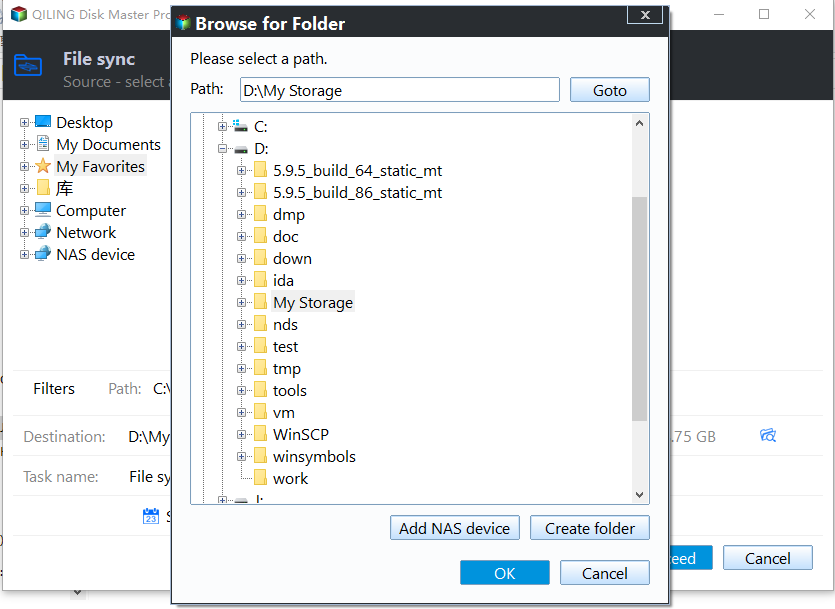
Step 4. Choose the destination and click Schedule Sync to create a scheduled task. Click Proceed to confirm.
Notes:
1. To set up email notifications for sync task completion, click on the Options tab.
2. In Qiling Disk Master Professional, there are additional features called Event triggers and USB plug in available in the Schedule section. Users can explore these features by downloading the free trial version.
3. If you want to create a file image backup, consider using file backup or cloud backup services. The latter often comes with a cloud drive, such as Qiling Cloud, which offers 1TB of free storage for 15 days after registration.
Conclusion
If you're experiencing sync problems with Windows 7's Offline Files feature, there are steps you can take to resolve the issue. However, if these solutions don't work, you may want to consider using Qiling Disk Master Standard, which can help sync files in Windows 7 without effort, and also provides additional features like disk backup and system backup to keep your data safe.
- Solution 1. Fix Offline Files cannot be activated in Windows
- Solution 2. Fix Offline files access denied
- Solution 3. Fix Offline Folders cannot sync
- Solution 4. Fix cannot see the content of a network folder
- To fix Windows 7 Offline Files not syncing automatically, you can try the following steps. First, go to Control Panel and click on "Sync Center". Then, click on "Manage Offline Files" and select the option to "Sync all offline files" or "Sync selected offline files".
- Solution 6. Fix Windows 7 Offline Files Sync Problems with free file sync software
- This tool helps sync files from a network to a local computer, and also sync files to a network share, internal hard drive, or external storage device.
- It allows users to schedule automatic backups of their files at specified intervals, such as daily, weekly, or monthly.
Related Articles
- Top 4 Solutions to Fix Startup Repair Loop in Windows 7
How to fix start repair loop Windows 7? This article offers you 4 solutions to solve Windows 7 stuck in start repair infinite loop safely. - Top 10 Ways to Fix Windows 7 Task Manager Not Responding
How to fix Task Manager not responding or opening in Windows 7? This guide will tell you 10 methods to fix the problem. - How to Create Restore Point in Windows 7 Automatically?
If you don't know how to create a system restore point in Windows 7, continue to read below and learn 2 practical methods as well as how to use it. - How to Do Windows 7 Differential Backup Safely and Quickly
This article introduces you to Windows 7 incremental or differential backup and reliable software to create Windows 7 differential backup step by step. - Can I Change Program Files Location & How to do it?
This guide explains Can I Change Program Files Location & How to do it? and provides practical steps, tips, or recovery options to help you complete the task safely. - 4 Easy Ways to Change Program Files to D Drive Quickly
What's the best way to change Program Files to D drive without data loss? Still plan to do it in the copy method? Don't be innocent! In this article, 4 easier ways will be provided to help you get it done effortlessly.