The Windows RE Image Was Not Found - Fix It Right Now!
- Need help: the Windows RE image was not found
- How to fix "reagentc the Windows RE image was not found" error
- Method 1: Create Windows recovery environment from scratch (Recommended)
- Method 2: Enable recovery environment
- Method 3: Check and set path for winre.wim file
- Method 4: Copy winre.wim file manually
- Method 5: Restore winre.wim file using installation disc
- How to factory reset or restore your Windows 10 computer
- Method 1: Restore Window 10 from Windows Recovery Environment
- Method 2: Restore Window 11/10/8/7 from 3rd party Recovery Environment
- What exactly is a winre.wim file?
- Wrapping things up
Need help: the Windows RE image was not found
"I'm trying to factory reset my computer, but It does not allow me (Recovery environment not found). I've tried various methods but it seems that I'm always missing something. I tried using "reagentc /enable" but I was hit with a Windows RE image not found. When I tried advance startup my troubleshoot was missing options and only contained UEFI Firmware settings, and startup settings. Please help for I am struggling on my own, Thank you."
You're in the right place to learn about the error and find effective solutions. This error typically occurs when the recovery partition or the winre.wim file is accidentally deleted, or when the system reserved partition is too small to accommodate the winre.wim file.
Learn more about the winre.wim file and how it's used by Windows to create a system repair environment. If you're experiencing the "The Windows RE image was not found" error, don't worry - there are 5 potential solutions to fix the issue.
How to fix "reagentc the Windows RE image was not found" error
After getting the possible causes, you can fix the error by trying the following 5 solutions, with the first method being the recommended approach. This professional software is simple, convenient, and fast to use, and you can also try the second method to enable Windows recovery environment and then others. The simplest reason for this error is that the Windows RE image was not found, which is often due to the WinRE being disabled in Windows Settings.
Method 1: Create Windows recovery environment from scratch (Recommended)
If you're unable to fix the reagentc.exe error, you can create a Windows recovery environment using a third-party software like Qiling Disk Master Professional. This will allow you to restore your computer and make it bootable.
Then, let's start to create Windows 10 recovery environment as an example. And the following steps are applicable to Windows 7/8/8.1/11.
Step 1. Download Qiling Disk Master Professional, install, and launch it.
Easiest Windows RE image creator for personal use.
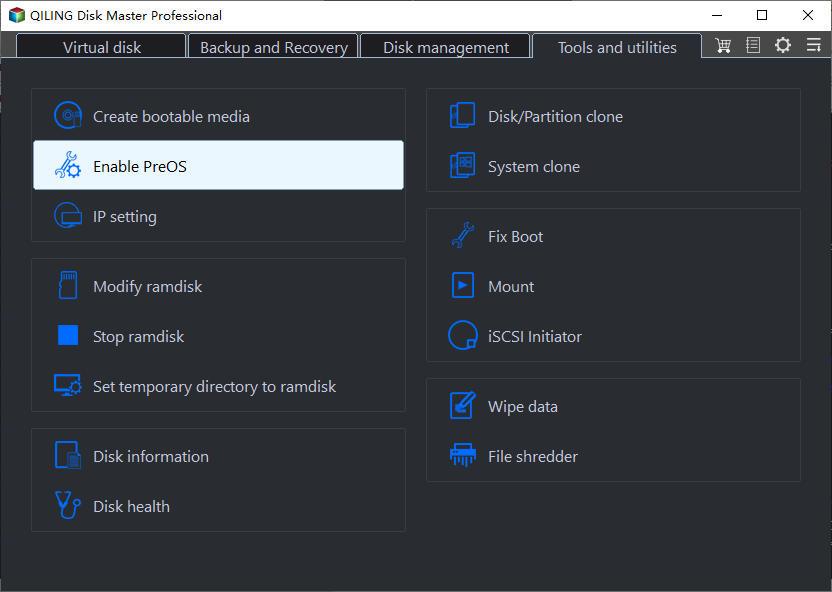
Step 2. Then, click Tools and select Recovery Environment under the Common Tools line.
Step 3. In the Recovery Environment Settings window, tick the option Enable the boot option of Qiling Disk Master recovery environment.
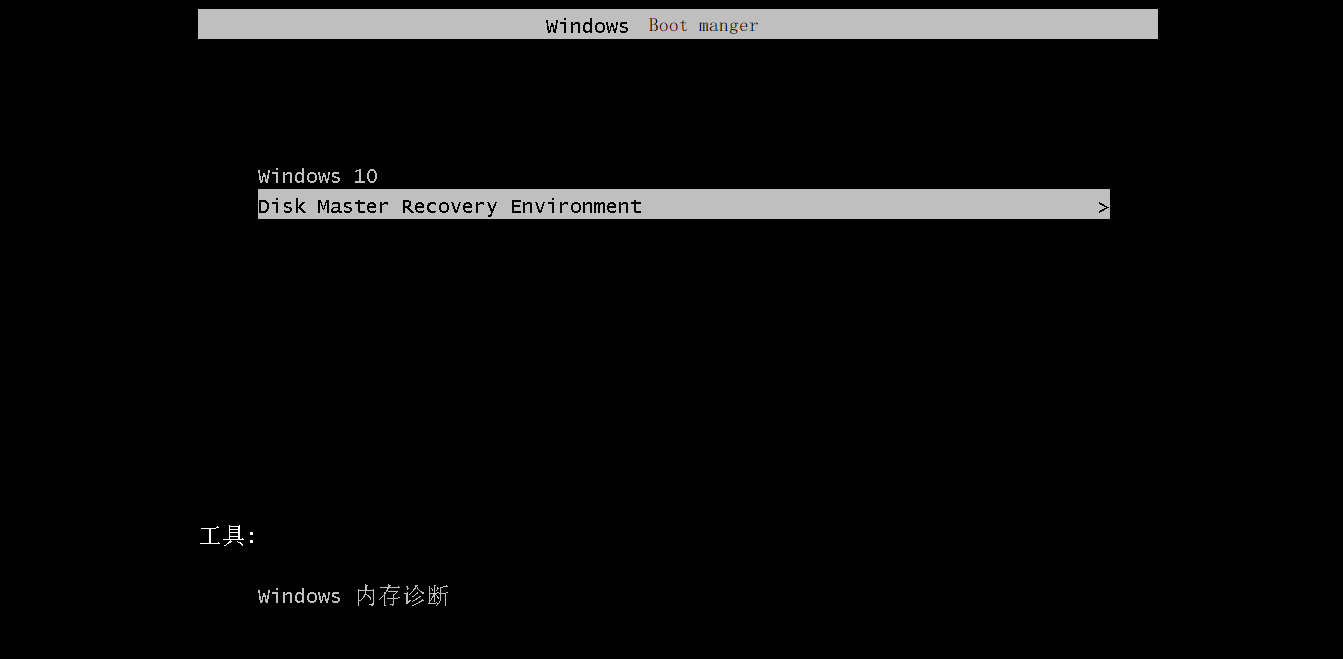
Step 4. Restart your computer and then you will see two boot options. One is the operating system of your computer, the other is Enter into Qiling Disk Master.
Notes:
❤ The tool currently does not support systems before Windows 7.
❤ The tool currently does not support a dynamic system.
❤ The recovery environment created by Qiling Disk Master is kept under the path C:\Qiling Recovery. If your C drive is wiped or damaged, it will not work. You could choose to create a bootable USB to ensure you always have a way to boot your computer when it's unbootable.
You can create a recovery environment for your computer, then make a system image or disk image that can help restore Windows 10 backup to a new hard drive in case of a disaster. It's a good idea to schedule automatic backups of your system or disk, which will keep track of changes made later. This way, you'll be prepared for any unexpected issues.
✿ Note: If your system has gone wrong and you don't have any prior backup, you can create a bootable media and system image on another working computer as the last resort. However, to restore system image created with different hardware, you will need the support of its professional edition.

Method 2: Enable recovery environment
Step 1. Run cmd as administrator. Then, type reagentc /info get the Window RE status.
Step 2. If it's disabled, type reagentc /enable to enable recovery environment.

Method 3: Check and set path for winre.wim file
The Boot Configuration Data Store (BCD) does not contain entries to boot in recovery mode, so check the BCD entries to confirm.
Step 1. Run cmd with priority permission. Then, type bcdedit /enum all to access the current BCD entries.
Step 2. In the Windows Boot Loader section, find the identifier with the current value and the recovery sequence, then note down the GUID value of the recovery sequence attribute.
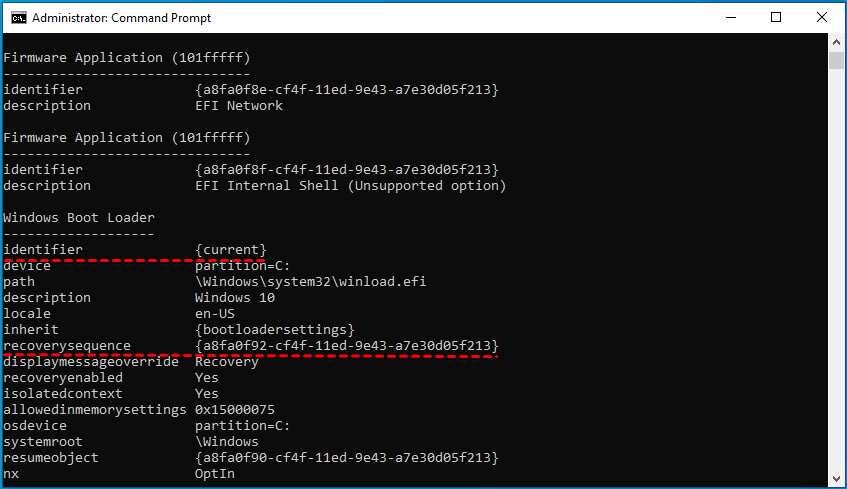
Step 3. Find the Windows Boot Loader with an identifier value that matches the GUID of the recovery sequence attribute, and ensure its description is "Windows Recovery Environment". Additionally, confirm that the device and OSdevice attributes are identical.
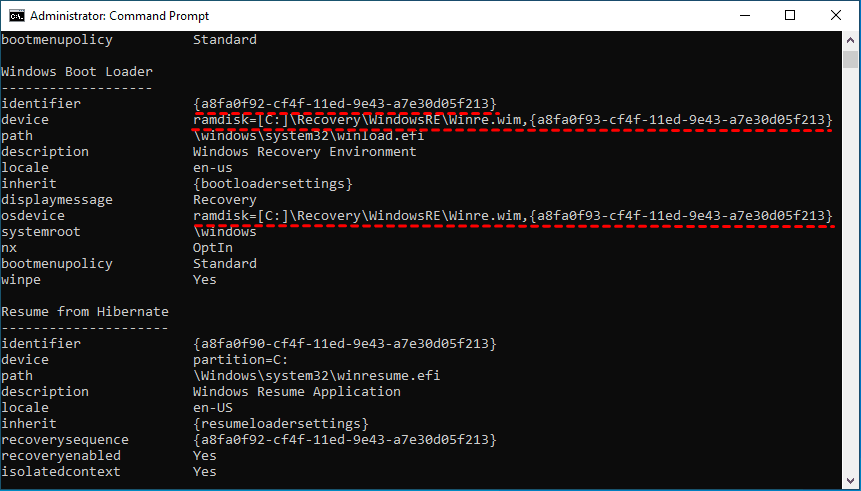
The device and OSdevice attributes refer to the path to the Winre.wim file on your computer. This file is used to create a system repair environment that can be used to troubleshoot and repair issues with your Windows operating system.
Step 4. If the device and OS device do not have the same path, you need to set the path for this file and boot WinRE as the recovery environment. Type the following command and hit Enter to execute.
bcdedit /set {current} recoverysequence {FoundGUID}
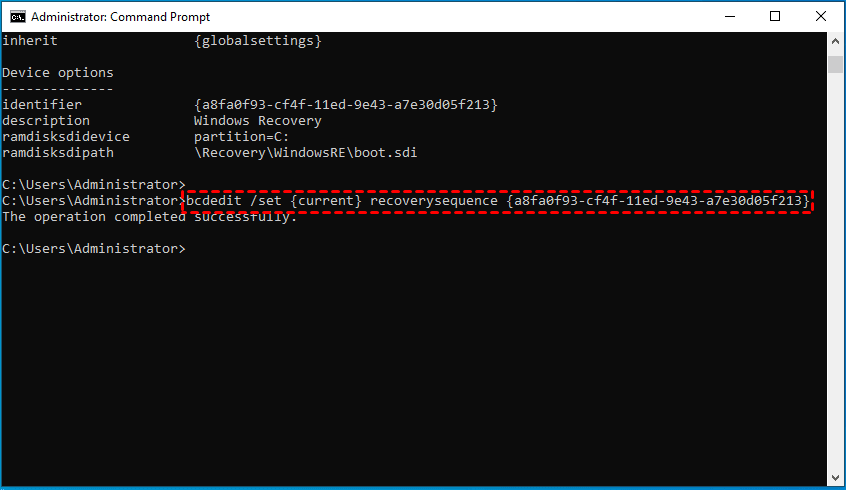
Note: The FoundGUID refers to the identifier value you found in step 2. Please replace it with the one you found.
Method 4: Copy winre.wim file manually
Step 1. Locate the wine.wim file on your computer. Run cmd with administrator priority, type dir /a /s c:\winre.wim and hit Enter.

If the partition isn't on the system partition, you can assign a drive letter to the hidden system reserved partition or factory made OEM recovery partition, then try again.
Step 2. To access the file located in the C: drive and copy it to a default location, you can use the command `copy C:\path\to\file.txt D:\default\location\`.
- attrib -h -s c:\Recovery\3b09be7c-2b1f-11e0-b06a-be7a471d71d6\winre.wim
- xcopy /h c:\Recovery\3b09be7c-2b1f-11e0-b06a-be7a471d71d6\winre.wim c:\Windows\System32\Recovery
Step 3. Replace the winre.wim file path with the one in the recovery agent configuration. Copy and past the following command line into command prompt window.
- reagentc /setreimage /path C:\windows\system32\recovery
Step 4. Enable recovery environment and check its status. You can type the following command line and make it effective.
- reagentc /enable
- reagentc /info
Method 5: Restore winre.wim file using installation disc
Step 1. To make hidden and system files available, go to Folder Options, show hidden files, folders, and drives, uncheck "Hide extensions for known file types," and uncheck "Hide protected operating system files" (recommended).
In Windows, you can access Folder Options by searching for it in the Start menu or by typing "Folder Options" in the address bar of File Explorer. In Windows 10, you can also access it by right-clicking on an empty area of the desktop and selecting "Personalize" followed by "Themes" and then "Related settings" and finally "File Explorer options".
In Windows 7, go to Computer -> Tools -> Folder Options.
To access Folder Options in Windows 8/8.1/10, go to This PC, click on View, then select Options from the dropdown menu, which will open the Folder Options window.
Step 2. To copy the full path of the winre.wim file, go to the installation disc's Source folder, right-click the winre.wim file while holding the Shift key, and select "Copy as path." This will copy the full path of the file to your clipboard.
Step 3. To create a folder named "test" on the C: drive, open the Command Prompt as an administrator, type "md c:\test\" and press Enter. This will create the folder.
Step 4. Mount the image file to the created folder.
In Windows 7:
- dism /mount-The command to mount the Windows image file "D:\sources\install.wim" from the index 2 is: `D:\sources\install.wim /index:2 /mountdir:C:\test\ /readonly`
In Windows 8/8.1/10:
- dism /mount-image /imagefile:"D:\sources\install.wim" /index:1 /mountdir:C:\test\ /readonly

Step 5. Copy the winre.wim file from the created folder to C:\Windows\System32\Recovery folder. If prompted, authorize the folder by clicking Continue.
Step 6. Set the path for winre.wim file. Type the following cmd and run it in the command prompt window.
- reagentc /setreimage /path C:\windows\system32\recovery
Step 7. Unmount the install.wim image file using the following command line.
In Windows 7:
- dism /unmount-wim /mountdir:C:\test\ /discard
In Windows 8/8.1/10:
- dism /unmount-image /mountdir:C:\test\ /discard
Step 8. Enable the recovery environment and check its status.
★ Tip on testing out the recovery environment:
To boot directly into the Windows Recovery Environment, type `reagentc /boottore` in the Command Prompt and then restart your computer. This will only happen once after using this command.
How to factory reset or restore your Windows 10 computer
After fixing the "re image was not found in windows 10" error, you can proceed with a factory reset or restore your computer using System Image Recovery, a tool provided by Windows. If you're unable to resolve the issue, you can use a reliable software to create a system image instead.
You can still use the Windows installation media to repair your computer via Command Prompt, System Restore, Startup Repair, etc. For example, you can use system image recovery to restore your computer to a previous state without deleting everything, if possible. Check the steps for each method.
Method 1: Restore Window 10 from Windows Recovery Environment
Step 1. Before proceeding, ensure you have a working backup created using the built-in Backup and Restore tool in Windows 7, and connect it to your computer. If you don't have one, create a complete system backup in Windows 10 with a working computer.
Step 2. Go to the Settings icon -> Update & security -> Recovery. Then, click Restart now under the Advanced startup section.

Step 3. To access the recovery environment, you'll first see a blue Choose an option screen. From there, click Troubleshoot, then Advanced Options, and finally System Image Recovery.

Step 4. To restore your computer using the latest available system image, go to the Re-image your computer window, select the "Use the latest available system image" option, and click Next. From there, follow the on-screen instructions to complete the process step by step.

This method works well, but you may still receive the system image restore failed error in two situations.
- The target disk is smaller than original hard drive.
- If you're trying to restore a system image to a new computer with different hardware (e.g.
If your computer is unable to boot up normally due to a system file corruption, you can use a third-party recovery environment to restore your computer to an earlier date. To do this, you can create a bootable USB drive with a recovery environment, such as Qiling Disk Master, and then boot your computer from the USB drive. From there, you can select the point in time you want to restore your computer to and follow the on-screen instructions to complete the process.
Method 2: Restore Window 11/10/8/7 from 3rd party Recovery Environment
Step 1. Connect the backup drive containing the system image and the new hard drive to your computer, ensuring they can be detected.
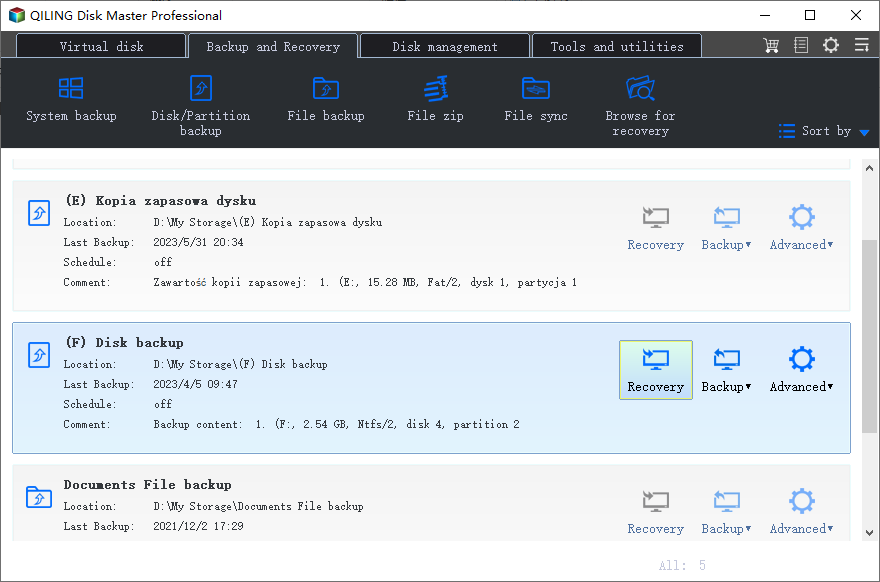
Step 2. To access the recovery environment, restart your computer. Once restarted, click on "Enter into Qiling Disk Master" to access its main page.
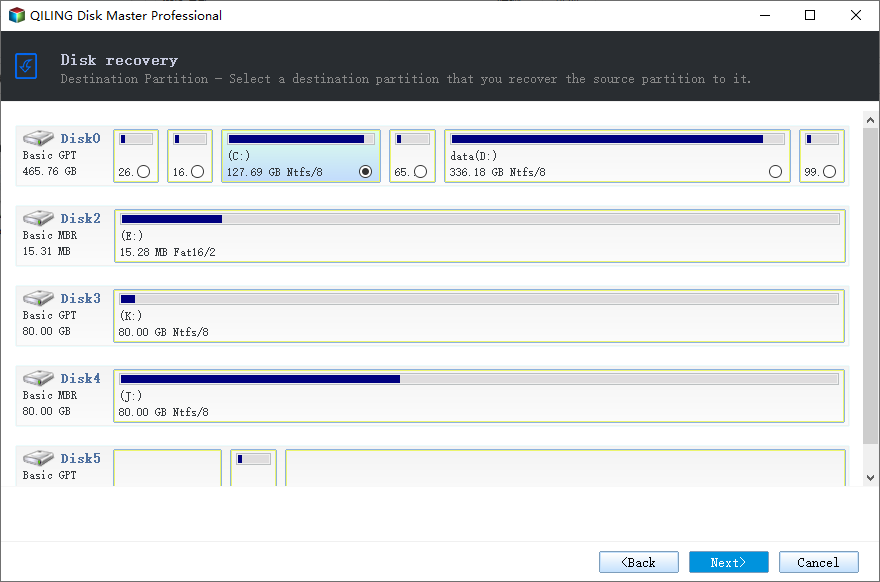
Step 3. Click Restore -> Select Task to find your system image and choose it.
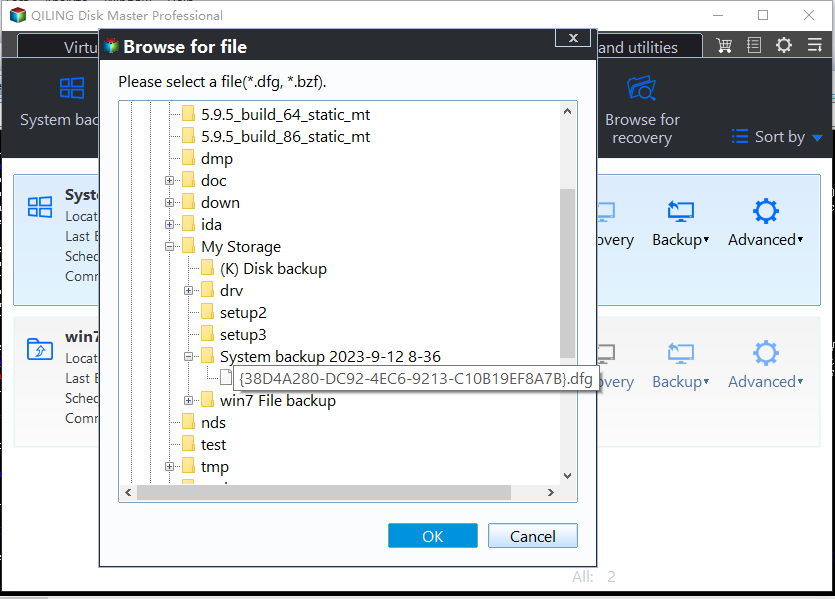
Step 4. Select the system backup of your computer and click Next. If no backup image is found, click Back and choose "Select Image File" instead.
Step 5. To restore a system backup, select "Restore this system backup" and then choose "Restore system to other location". Click Next. If you have scheduled full, incremental, or differential backups, you can specify which backup image you want to restore.
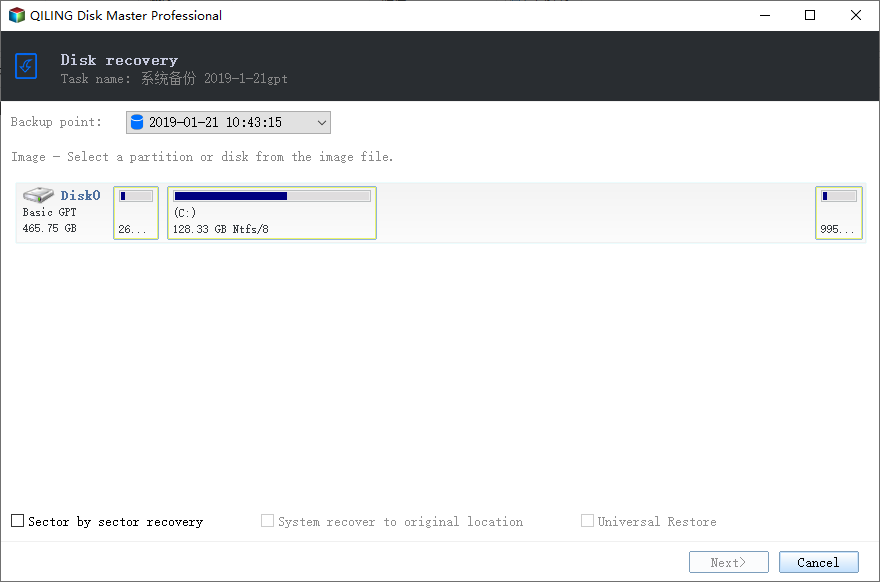
Step 6. Select the new hard drive as backup destination and click Next. After that, click Proceed to perform this task.
❤ SSD Alignement: The option allows the software to accelerate the reading and writing speed of an SSD disk, making it suitable for use with SSDs.
❤ Universal Restore: Restoring a system image to dissimilar hardware with secure boot is an advanced feature for specific system recovery scenarios. For instance, if your computer crashes without any prior preparation, you can restore it with an image created on another computer, effectively recovering your system.
What exactly is a winre.wim file?
The winre.wim file is a recovery environment stored on the hard drive or SSD, typically located at C:\Windows\System32\Recovery in Windows 7 or the system reserved partition/OEM recovery partition in Windows 8/8.1/10. It allows you to upgrade, repair, or factory reset your computer as needed.
The Windows RE image was not found error occurs when you try to enable reagentc.exe, which is a protected operating system file that can lead to many potential errors, including the inability to see the file in the recovery folder.
When creating a recovery drive in Windows 8/8.1/10, users may encounter an error message "We can't create a recovery drive on this PC" or be unable to enable certain options, such as copying system files to the recovery drive. This issue can occur due to various reasons, including corrupted system files, incorrect user permissions, or issues with the recovery partition.
In Windows 8/8.1, trying to refresh or reset the computer may result in an error message such as "Could not find the recovery environment" or "There was a problem resetting your pc".
...
To avoid recovery environment issues, it's recommended to hide the winre.wim file, which can prevent problems if it's missing or deleted.
Wrapping things up
If you encounter the Windows RE image was not found error, you can either fix it using the provided solutions or create a new recovery environment from scratch and restore your computer using a system image or disk backup.
If you use the built-To recover a Windows system, you need a backup image created by the built-in backup utility in the recovery partition or WinRE.wim file. However, Qiling Disk Master requires a backup image created by itself, and its advanced version can also help with tasks like moving Windows 10 to a new computer with different hardware.
Related Articles
- Top 5 Ways to Windows 10 Recovery Environment Missing
Windows 10 Recovery Environment is missing? Don't worry, here we show you 5 solutions for you to fix Windows 10 could not find recovery environment error easily. - Easy Ways to Fix "Windows Cannot Find a System Image on This Computer" Issue
This passage will analyze reasons for "Windows cannot find a system image on this computer" and provide easy ways to solve this issue. - How to Refresh or Reset Windows 10 from Command Prompt
You will learn how to reset or refresh Windows 10 from command prompt step by step. And the best way to prevent this from happening again. - How to Recover System If No Dell Factory Image Restore Option
If you have problems fixing the "no Dell Factory Restore option" issue, please continue to read below and learn the reasons & solutions. And the methods to factory reset a Dell laptop is also included. - [6 Ways] How to Free up Space on Windows 11
Are you struggling to find a solution when your computer has run out of space? Don't worry, this tutorial will share you with 6 ways to free up space on Windows 11. - [Stepwise] How to Burn Windows 11 ISO to USB?
If you're unsure about how to burn a Windows 11 ISO to a USB drive, this post provides a detailed tutorial to guide you through the process.