How to Fix 'Error 0xc1900101' on Windows 11 Installation Assistant
With the release of Windows 11, many users are upgrading from Windows 10 to the new operating system using the Windows 11 Installation Assistant. While the process is generally smooth, some users may encounter issues during installation, leading to errors that can be frustrating to resolve.
The error code 0xC1900101 is a common Windows 11 installation error that typically occurs when there are issues with the system's hardware or software configuration. This error code can be caused by a variety of factors, including outdated drivers, corrupted system files, or conflicts with other software.
- Quick Navigation
- Part 1. What causes the error code 0xC1900101 in Windows 11
- Part 2. How to Fix error 0xC1900101
- Part 3. Best Data Recovery for Windows 11 to Recover Lost Files
Part 1. What causes the error code 0xC1900101 in Windows 11
1. Driver Error
The most frequent cause of the error code is due to drivers that are incompatible with the operating system, damaged, outdated, or faulty. This is the primary reason why the code pops up in most cases.
2. Presence of a third party antivirus
Sometimes, the presence of a third-party antivirus can completely prevent the Windows 11 Installation Assistant from working properly, resulting in error code 0xC1900101 during the installation process.
3. Low Disk Space
When your storage space is almost full, upgrading Windows may not have enough space to complete, resulting in error code 0xC1900101. It's recommended not to overfill your storage space to avoid this issue.
4. Outdated BIOS
The Windows 11 Installation Assistant is prevented from installing Windows 11 due to outdated BIOS, which is one of the prerequisites that need to be fulfilled before the process can proceed, causing error 0xC1900101.
5. Hardware and Software conflict
The error may be caused by the presence of other connected hardware or newly installed software, which can interfere with the installation of Windows 11. If you had recently connected a new hardware device to your computer or installed new software, this could be the source of the issue.
6. Presence of False System files
These files can cause errors if they remain after a previous Windows uninstallation, an interrupted Windows 11 installation, or improper hardware and application deletion.
0xC1900101 errors are usually caused by driver or file system problems. To solve these errors, you can try the same approach listed below, which includes checking for driver updates, running a System File Checker (SFC), and checking for corrupted system files. Some related errors include 0xC1900101, 0xC1900101, and 0xC1900101.
- 0xC1900101 - 0x2000c
- 0xC1900101 - 0x20017
- 0xC1900101 - 0x30018
- 0xC1900101 - 0x3000D
- 0xC1900101 - 0x4000D
- 0xC1900101 - 0x40017
Part 2. How to Fix error 0xC1900101
To resolve the error 0xC1900101 during Windows 11 installation, you can try troubleshooting by checking for corrupted system files, updating drivers, and ensuring the system is up-to-date. If the issue persists, consider reinstalling Windows 11 or seeking professional assistance. Additionally, running a System File Checker (SFC) scan and a DISM scan can help identify and fix any corrupted system files.
It's recommended to put your computer in safe mode before trying out solutions in case an error occurs during the process.
1. Provide Enough storage space for Windows 11
Windows 11 requires a minimum of 64GB of free space to install. If you're getting the error 0xC1900101, ensure you have at least 64GB of available space. To resolve this, you can free up space by deleting unnecessary files, emptying the Recycle Bin, and uninstalling unused applications. This will give you the necessary space to install Windows 11 without any issues.
- Uninstall useless applications
- To free up internal space, consider replacing a smaller storage device (HDD or SSD) with a larger one. This will give you more storage capacity for your files, programs, and operating system, allowing you to remove clutter and optimize your device's performance.
- Perform a partition extension on your HDD or SDD
- Delete temporary files.
The error will not occur once you have enough free space on your device.
2. Run Windows update troubleshooter
In some situations, it's more effective to seek assistance from Windows directly. Running a Windows update troubleshooter can help resolve issues, particularly those related to hardware problems, by providing a straightforward solution to the issue at hand.
To run Windows update troubleshooter,
1. To access settings, go to the Start menu and click on it, then select Settings from the list of available options.
2. Once the Settings page appears, click on Update & Security
3. Click on Troubleshoot
4. The Windows Update troubleshooter is a built-in tool that helps resolve issues with Windows Update. To run the troubleshooter, go to the Settings app, then click on Update & Security, and then click on Troubleshoot.
5. Finally, Click on Run the troubleshooting
The troubleshooter will run a series of tests to identify any hardware issues and display the results once complete. You can then select the problems you want to fix.
If no problem is detected, this means your hardware is in good condition and the issue doesn't come from there.
3. Update faulty drives
To update your drivers before installing Windows 11, you can use the built-in Windows Update feature or a third-party driver update tool. This will ensure that your system has the latest drivers compatible with Windows 11, reducing the likelihood of errors during installation. You can also check the manufacturer's website for any specific updates required for your hardware. By updating your drivers, you can create a smoother and more reliable installation experience.
1. To find My PC, open File Explorer on your computer, which is usually located on the Start menu or taskbar. If you can't find it on your desktop or Start menu, you can type "File Explorer" in the Windows search bar and press Enter.
2. Right Click This PC and click on Manage
3. Then select Device Manager under System Tools to proceed.
4. Right-click on the disk device under the Disk Drive option, and choose between updating or uninstalling the drivers.
If you're experiencing issues with your drivers after updating them, you may need to uninstall them before completing the installation. You can then easily re-install them once you've finished the installation process.
4. Run SFC command
The System File Checker (SFC) utility can help resolve errors caused by corrupted or missing system files. To use it, you can follow the process of running the SFC utility, which will scan and restore corrupted or missing system files, potentially resolving the error.
1. To open the Power Menu on your keyboard, press the combination of keys Win + X. This will bring up the Power Menu, allowing you to access various system settings and options.
2. From the Power menu, Click on Run
3. To run Command Prompt (CMD) as an administrator, type CMD in the search bar, press Ctrl + Shift + Enter, and click "Yes" in the dialog box that appears. This will enable you to run CMD with elevated privileges.
4. Once CMD opens up, type: sfc/scannow and press Enter.
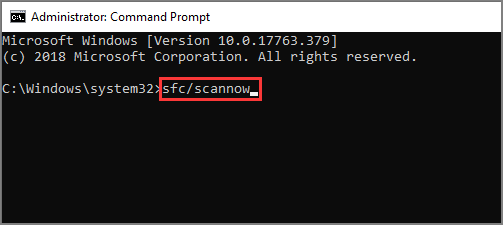
Wait for the process to reach 100%, then restart your computer and try installing Windows 11 again.
5. Uninstall recently installed application
If you recently installed an app on your computer, it might be causing the error, so try uninstalling it. On Windows 10/11, go to the Start menu, click on Settings, then Apps, and find the problematic app. Click on it and select Uninstall to remove it.
1. Open Control Panel
2. To uninstall a program, go to the Control Panel and click on "Programs and Features" (in Windows 7) or "Add or Remove Programs" (in Windows XP). This will display a list of all installed programs on your computer. Simply select the program you want to uninstall and click "Uninstall" or "Remove" to initiate the uninstallation process.
3. Go through the list and find the recently installed application.
4. If you're encountering an error while installing Windows 11, try uninstalling any recently installed applications, as they may be interfering with the installation process. To do this, go to the Control Panel, click on Programs and Features, find the recently installed applications, click on them, and select Uninstall. A confirmation window will be displayed, then click Uninstall again. Repeat this process for all recently installed applications and then retry installing Windows 11. This should resolve the issue.
1) Open the Start menu and click on the Settings icon. 2) Click on the "Update & Security" option. 3) Click on the "Troubleshoot" option.
1. Launch the power menu by clicking on Win + X.
2. Select Apps & Features
3. To uninstall an application, go through the list of installed applications and click on the one you want to remove, then click on the "Uninstall" button.
6. Disable network adapter
Users who encountered the error reported that disabling all wizards under the Network adapter category was an effective solution. To do this, they went to Device Manager, expanded the Network adapters section, right-clicked on the adapter, and selected Properties. From there, they unchecked the boxes for all wizards, such as the IPv4 and IPv6 wizards, and then clicked OK to apply the changes.
1. Press Win + R to launch the Run dialog.
2. To open the Device Manager, enter the command "devmgmt.msc" in the Run dialog box and press Ok or press Enter. This will open the Device Manager window, where you can view and manage the devices connected to your computer.
3. Then find Network Adapters among the listed options.
4. Click on it to open drop-down menu.
5. Disable every device listed in the Device Manager to troubleshoot issues with your computer. This involves right-clicking on each entry and selecting "Disable Device" to ensure all devices are disabled.
Once this is done, you can restart the installation process.
7. Clear CMO
When all other methods have failed, the next step is to clear the BIOS, which is a relatively easy process on a desktop computer. However, this method can be more challenging on a laptop, as it requires accessing the hardware components, which can be more difficult to access on a laptop. Clearing the BIOS is a straightforward process that can resolve the issue and is a viable option when other methods have not worked.
If you're not comfortable with the process or feel that you might damage your computer, it's best to seek help from an expert. They can guide you through the process and ensure that everything is done correctly and safely. This will help prevent any potential damage to your computer and ensure that the process is completed successfully.
1. First, turn off the power supply, then disconnect all power cords connecting to your computer.
2. To replace the battery, proceed by opening the computer's casing and locating a flat battery connected to the motherboard, taking care not to damage any surrounding components or cables.
3. Remove the battery from its position and wait for a time frame of 5 minutes.
4. To reassemble the computer, insert the battery back into its original position, and then you can reattach the computer casing.
5. Unplug all power cords from devices such as computers, televisions, and kitchen appliances to ensure safety during the process.
6. You can now turn on your computer and try installing Windows 11 again.
Part 3. Best Data Recovery for Windows 11 to Recover Lost Files
Our files are precious and we don't want to lose them. Sometimes, they get deleted or go missing due to system updates or daily computer use. Fortunately, data recovery software for Windows 11 can help recover lost data.
Recover Lost and Deleted Files on PC – Deep Data Recovery
- This software is highly compatible with various storage devices and Windows 11, making it a reliable choice for users.
- This tool can recover data lost from a wide range of scenarios, including deletion, partition loss, formatting, raw drive recovery, system errors, and even virus attacks, offering a solution to over 500+ possible data loss situations.
- 3 simple steps to recover deleted/lost files from Windows 11: install a file recovery software, scan your hard drive to locate the deleted files, and preview and recover the files you need.
Related Articles
- How to Fix Windows 10 Update Error Code 0x80070002
- How to Fix IRQL_Not_Less_OR_EQUAL Error in Windows 11
- How to Fix a Windows 11 Installation Error 0x8007007f
- Fix Windows 10/11 Keeps Freezing Up Randomly
- Recover Lost Files after the Upgrade to Windows 11
- Free Data Recovery Software for Windows 11
- External Hard Drive Not Recognized