How to Fix a Windows 11 Installation Error 0x8007007f
When upgrading to Windows 11 using the Installation Assistant, some users encounter the error code 0x8007007f. This error can be caused by various reasons, such as corrupted system files, issues with the Windows Update service, or problems with the Installation Assistant itself. Symptoms of this error may include a failed installation, a blue screen of death, or a message indicating that the update failed. To resolve the issue, users can try restarting the Installation Assistant, running the System File Checker tool, or checking for any pending Windows updates. If the problem persists, further troubleshooting steps may be necessary.
So, what is error code 0x8007007f?
The error code appears when an issue arises when using the Windows 11 Installation Assistant, preventing a successful upgrade of a Windows device to Windows 11, often halting at around 70% during the upgrade process with the Installation Assistant software.
The Windows 11 update process may get stuck, displaying a "Something went wrong" message with a menu to try again or contact Microsoft support for help, error code 0x8007007f. This error can occur due to various reasons such as a corrupted system file, a problem with the Windows Update service, or an issue with the Windows Update cache. The error code 0x8007007f may also be caused by a conflict with a third-party security software, a problem with the Windows Update database, or a hardware issue. To resolve this issue, users can try restarting their computer, running a System File Checker, or using the Windows Update Troubleshooter.
- Lack of adequate storage space
- Absence of appropriate permissions
- Driver incompatibility
- Third-party antivirus
- Damaged or corrupted system files
- Part 1. How to Fix Windows 11 Update Error Code 0x8007007f
- Part 2. How to Recover Files Lost after Windows 11 Installation/Upgrade
How to Fix Windows 11 Update Error Code 0x8007007f
To resolve the error code 0x8007007f when using Windows 11 Installation Assistant, you can try restarting the installation process, checking for corrupted system files, running the Windows Update troubleshooter, resetting Windows Update components, or using the Media Creation Tool to create a bootable media and install Windows 11 from there. Additionally, you can also try running the System File Checker (SFC) tool to scan and replace corrupted system files, or using the DISM tool to repair the Windows image. If none of these methods work, you can also try seeking help from Microsoft Support or a professional computer technician for further assistance.
Way #1. Reboot Windows 11 PC
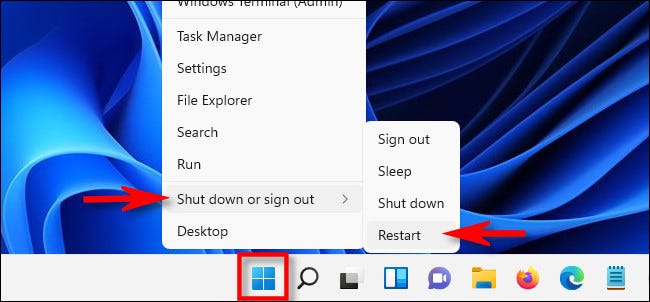
When you receive the error code Windows 11 Update Error Code 0x8007007f, try rebooting your PC, which may resolve the issue, by clicking on the "Windows" button on your taskbar and clicking "Restart".
If the update installation fails, try shutting down your computer, waiting for it to fully power down, and then rebooting again. Once your computer has restarted, attempt to reinstall the update to see if the issue has been resolved. If this method doesn't work, you can move on to other troubleshooting steps outlined in this post.
Way #2. Run the Windows 11 Installation Assistant as Admin
The reason you may be experiencing the error code may be because the Installation Assistant is not able to rewrite or download the Windows 11 files to the system directory. This can be because the existing operating system is blocking its access. If you try to open any folders in your system files, it will request admin access.
To ensure the Windows 11 Installation Assistant can modify system files, run it as an Administrator. This is a security measure to protect files and folders, and there is nothing wrong with it. It's a standard protocol to prevent unauthorized access.
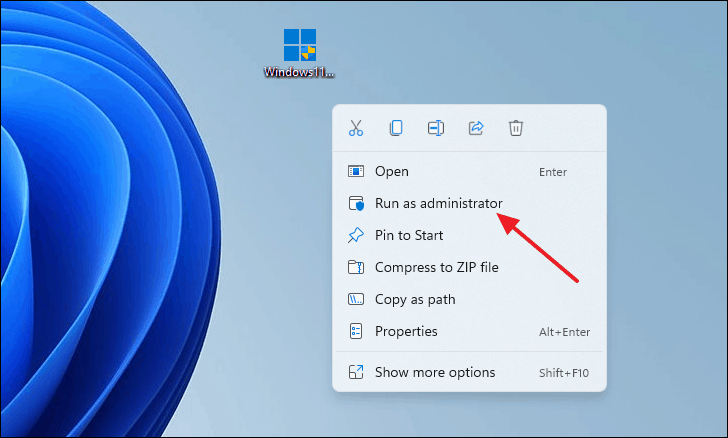
- Right-click on the Windows 11 Installation Assistant executable file.
- To proceed, select the "Run as Administrator" option from the menu, which will prompt a dialogue box.
- Click "Yes" and continue with the normal installation process.
Running the Windows 11 upgrade assistant as an administrator can help bypass permission restrictions that cause Windows 11 Update Error Code 0x8007007f, potentially resolving the issue.
Way #3. Update Graphics Drivers
If the error code is caused by an incompatible or outdated graphics driver, you need to update the drivers to resolve the issue. Different manufacturers of Graphics cards have released Windows 11 supported graphics drivers, so updating the drivers may resolve the problem. To update the graphics drivers, follow these simple steps.
- Press the "Windows" key and the "R" key at the same time to open the Run dialog box.
- To open the Device Manager, type "devmgmt.msc" in the Run box and click "Enter".
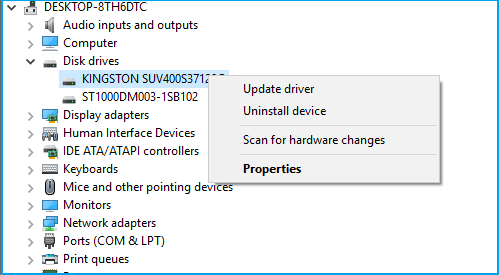
- Double-To access the Device Manager window, click on "Display Adapters" and then right-click on the specific graphics card you have on your PC.
- Select the "Uninstall Device" from the menu and check the box with "Attempt to remove the driver for this device".
- Next, click on the "Uninstall" button on the dialogue box.
After uninstalling the driver, restart your computer, which will automatically reinstall and update the graphics driver. Then, you can run the installation assistant again.
Way #4. Disable Third-party Antivirus Software
Installed third-Due to potential conflicts, it is suggested that you remove the antivirus software before running the Installation Assistant. After installing the Windows 11 update, you can reinstall the antivirus.
Check if the manufacturer has updated their third-party antivirus to support Windows 11 and uninstall it if necessary, following the manufacturer's instructions.
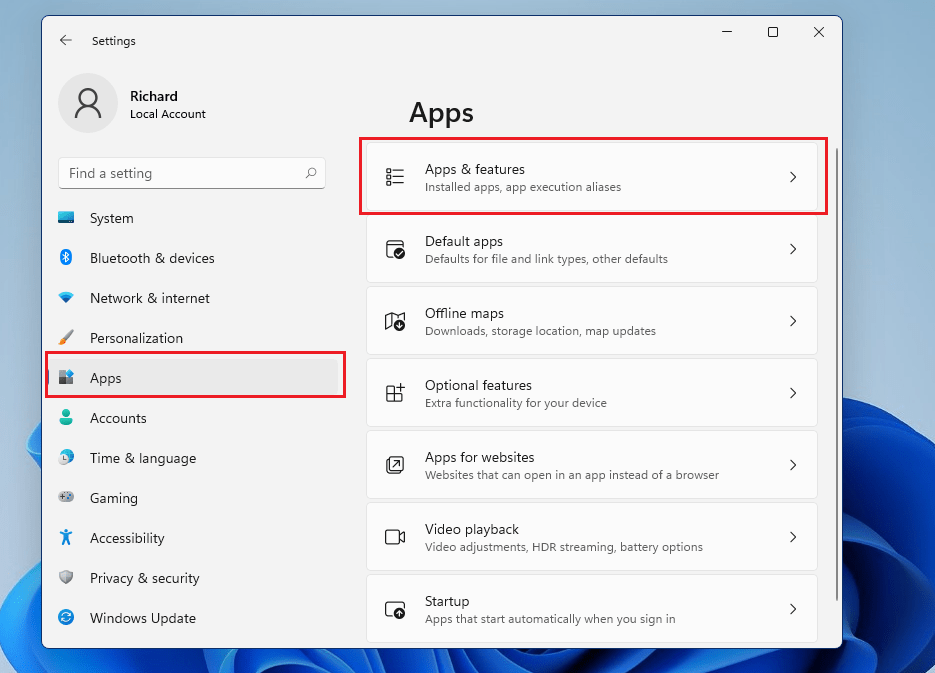
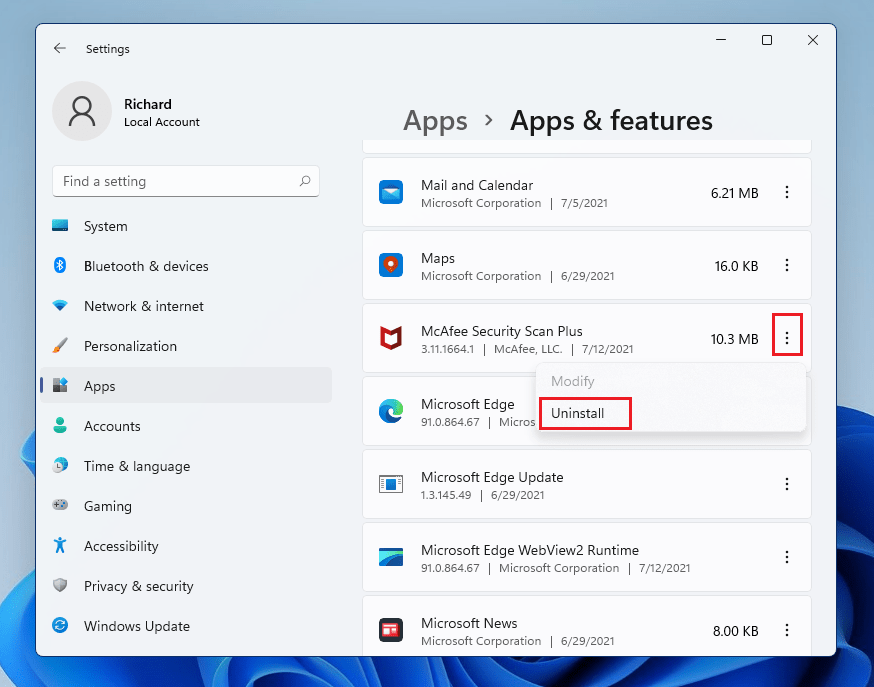
- Click on the "Start" to and select "Settings"
- To access the list of installed apps on your PC, navigate to the "Apps" section and click on the "Apps & features" option within it. This will display the list of apps that are currently installed on your device.
- To uninstall antivirus software, locate the antivirus program on your device, click on its icon, and select the "Uninstall" option from the menu. Alternatively, highlight the antivirus and click the "Uninstall" button from the toolbar. This will initiate the uninstallation process.
Wait for the uninstall process to be completed and then run the Installation Assistant to upgrade your Windows 11 again. This should resolve the problem. However, if it does not, use the next method.
Way #5. Free Up Storage Space
To resolve the issue, you can try deleting unnecessary files, uninstalling unused applications, and upgrading your storage capacity to a larger hard drive or solid-state drive. Additionally, you can use the built-in Disk Cleanup tool to remove temporary files and free up space. If the issue persists, you can try running a System File Checker (SFC) scan to identify and replace any corrupted system files. If none of these steps resolve the issue, you may need to seek further assistance from a Windows support specialist.
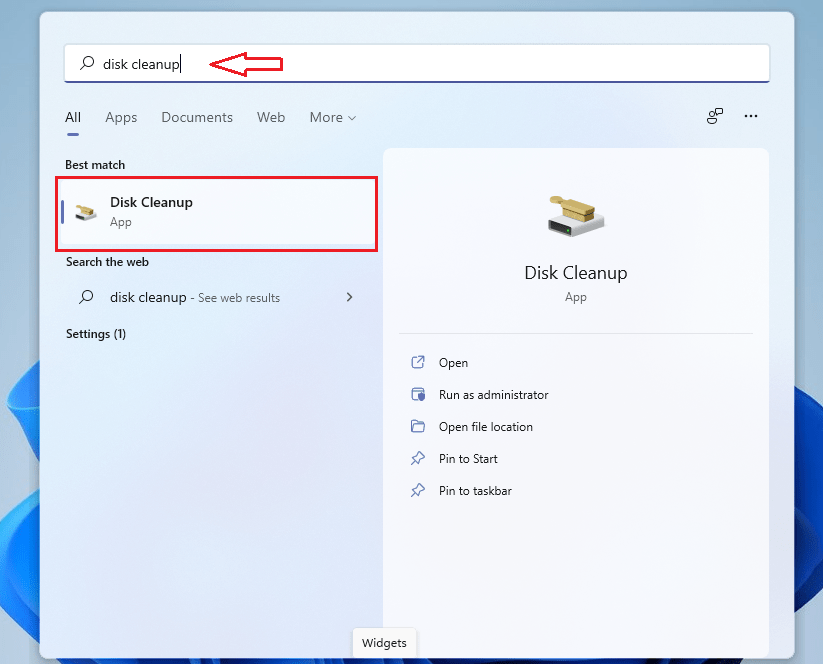
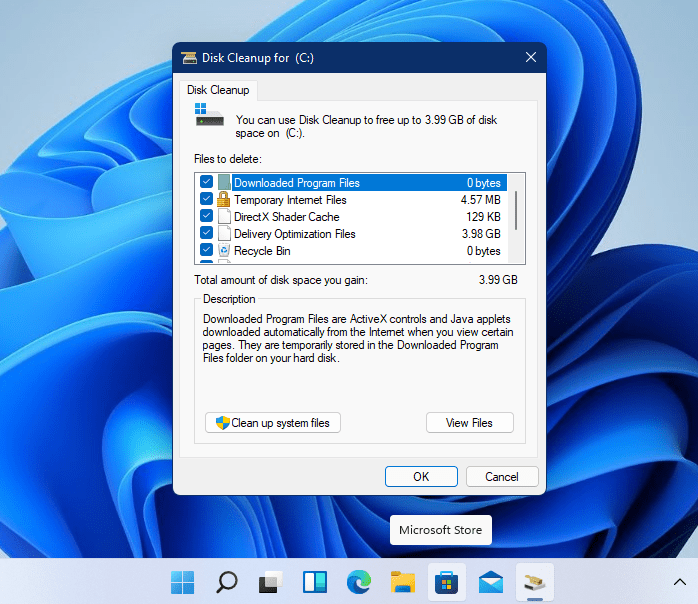
If you're experiencing the error, it's likely due to a lack of space on your Windows installation drive, which should have up to 50GB of free space. To resolve this, you can use the Disk Cleanup Tool to delete temporary files and free up space. This should help resolve the issue.
- Click "Start" and type "Disk Cleanup" in the search box.
- To delete files, select the files you want to delete, then click "OK" to confirm the deletion.
To resolve the problem of insufficient storage space during the Windows 11 upgrade, you can clear up space by removing any unnecessary files, programs, or data. To do this, go to Settings > System > Storage. Here, you can see how much space is being used by each type of file, such as apps, documents, music, and videos. You can then delete any unnecessary files or programs to free up space.
How to Recover Lost Files after Windows 11 Installation/Upgrade
If you're trying to resolve Windows 11 Update Error Code 0x800700f, you might accidentally delete important files, leading to more problems. However, you can recover lost and deleted files with a professional tool like Deep Data Recovery software, which can help you get back on track without further complications.
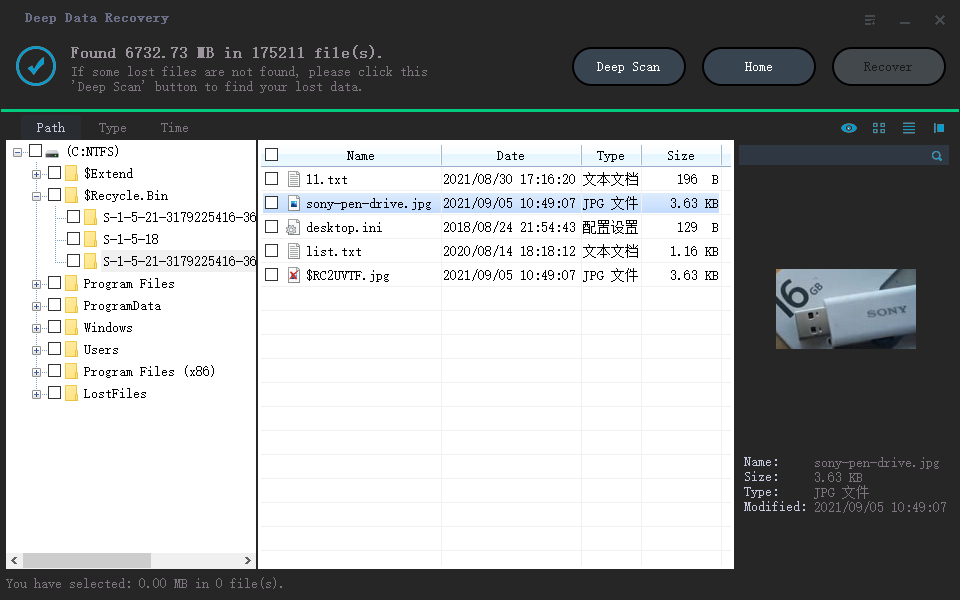
Deep Data Recovery is a data recovery software tool that helps users retrieve deleted and lost files from RAW drives, memory cards, HDD/SSD, USB drives, and other storage devices in a guided recovery process.
Your Effective File Recovery Software for Windows 11
- In Windows 11, you can recover permanently deleted files after wrong operations, accidental deletion, emptying the recycle bin, or using Shift+Del to delete data.
- Restore files lost due to various incidents such as virus attacks, hard drive or software crashes, system failures, or Windows reinstallation.
- Finds files from formatted drive and lost/deleted partition
- Supports numerous storage devices and file types.
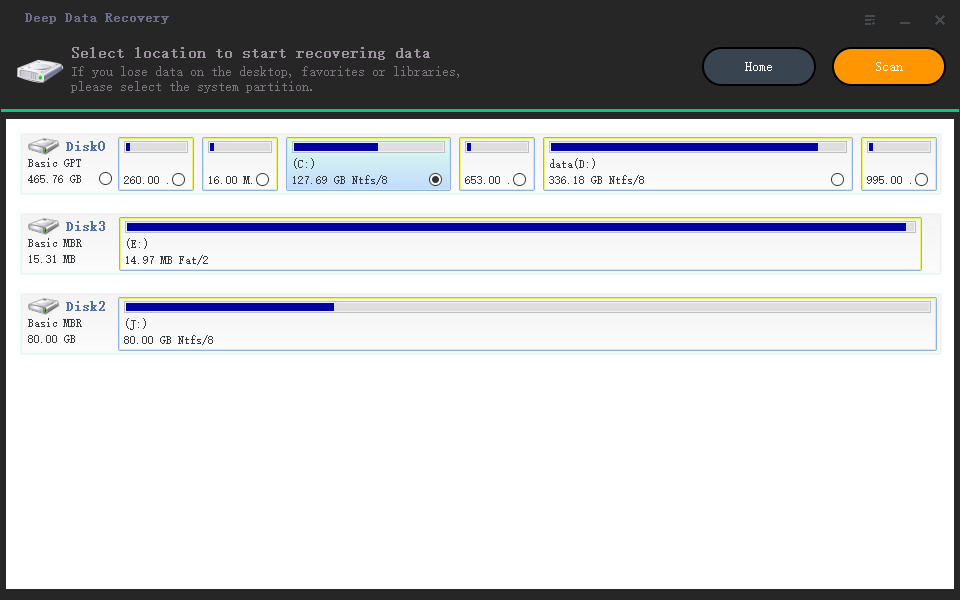
To retrieve lost files from your device, use the Deep Data Recovery tool in three simple steps. First, download the tool and install it on your device. Next, launch the tool and follow its prompts to scan your device for lost files.
- Download and install the best data recovery software for Windows 11, which can help you recover lost files and data from your computer.
- Scan for lost files on drive
- Preview the recoverable files and get the selected files back
If you're looking to recover lost data, there are several effective tools available in the market. Among them, Deep Data Recovery stands out as a highly recommended option that can help you find and retrieve your lost files.
When trying to update your device to Windows 11, you may encounter the error code 0x8007007f. Don't worry, there are five different ways to resolve this issue. If you accidentally delete some files during the process, you can recover them using a reliable data recovery tool like Deep Data Recovery software.
Related Articles
- How to Fix 'Error 0xc1900101' on Windows 11 Installation Assistant
- Recover Lost Files after the Upgrade to Windows 11
- How to Fix IRQL_Not_Less_OR_EQUAL Error in Windows 11
- Free Data Recovery Software for Windows 11
- Fix Windows 10 Keeps Freezing Up Randomly
- [Solved] Recycle Bin Not Showing Deleted Items
- Complete Guide to Upgrade Windows Server 2019 to 2022
You can learn how to upgrade Windows Server 2019 to 2022 step by step as well as protect your Windows Server 2022 in the best way. Please read on.