How to Recover Deleted/Lost Files after the Upgrade to Windows 11 [2023]
Quick Navigation:
- Step 1. Make Sure You've Signed in with a Right Profile!
- Step 2. Look for the Files using Search in Windows 11
- Tips for how to get lost files back after the Windows 11 update erased everything
- Step 3. Enable a Windows 7/10/8 Administrator Account
- Step 4. Find Upgrading to Windows 11 Deleted My Files with a Backup File
- Step 5. Recover Deleted Files after Windows 11 Upgrade with Data Recovery Software
- How to Find Windows 11 Update Deleted Files
If your files were deleted or lost after upgrading to Windows 11, try checking the Windows Update logs, System Restore points, or the Recycle Bin. You can also use file recovery software like Deep Data Recovery Wizard or Recuva to scan your system for deleted files. If you've formatted your drive, you may need to use a data recovery service or professional data recovery software like Disk Drill. Be cautious when using third-party software, as it may not guarantee file recovery.
If the upgrade removed files from user folders, this Windows 11 update lost file recovery guide provides a closely related workflow.
Upgrading to Windows 11 can be exciting, but it's even more devastating if you find that your files have been deleted during the process. you can recover your lost files with these 5 simple steps.
Step 1. Make Sure You've Signed in with a Right Profile!
If you've signed in with a different account or a temporary profile after upgrading to Windows 11, your important files may have disappeared. This is because different profiles result in separate systems, and files are saved accordingly. To find your lost files, start by checking if you're in a temporary profile. If you are, you can switch to your main profile and access your files. If not, try checking the "This PC" or "File Explorer" for your files, and also check the "Previous Windows Version" folder, which may contain your files.
- To sync your settings, click the Start button, then navigate to Settings, Accounts, and Sync your settings.
- If you see the message "You are logged on with a temporary profile. Roaming options are currently unavailable", it means you need to log out first to recover lost files after a Windows 11 update.
- After then, restart your Windows 11 PC and sign in with another account. This could be an administrator account, which is usually the one you use.
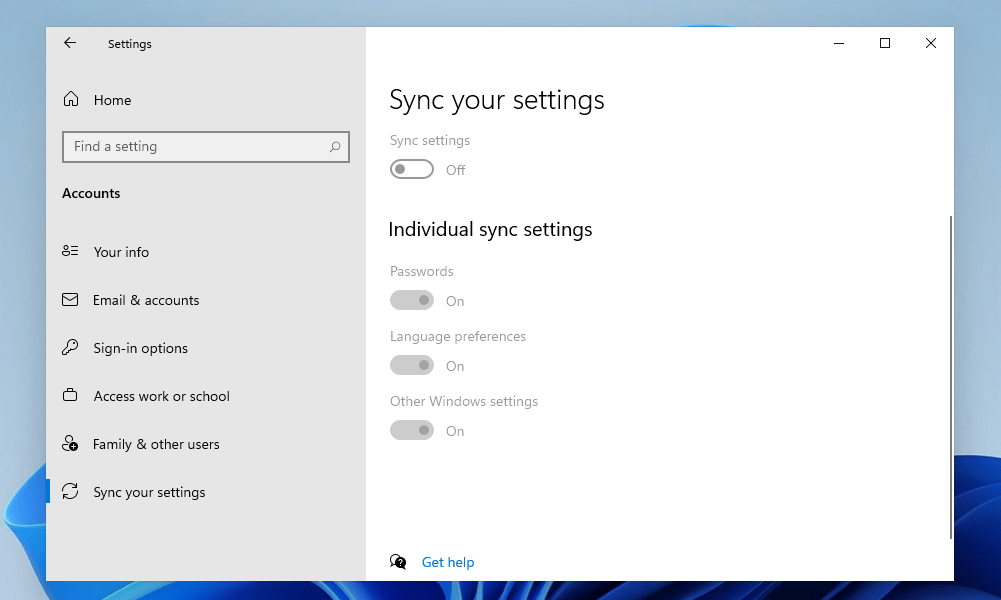
Before logging out, back up any files in the current profile system to an external hard drive to avoid data loss. If unsure about important files or the backup process is time-consuming, consider using Qiling backup to automatically back up the whole drive in the background.
Step 2. Look for the Files using Search in Windows 11
If you're in the correct user profile, you can use the search box to search for the Windows 11 update deleted files.
- Click to open My computer/This Computer/Computer.
- In the search box, type in the name of a file you've lost, letting the software look for it. This way, it will scan your computer and other connected devices to locate the file.
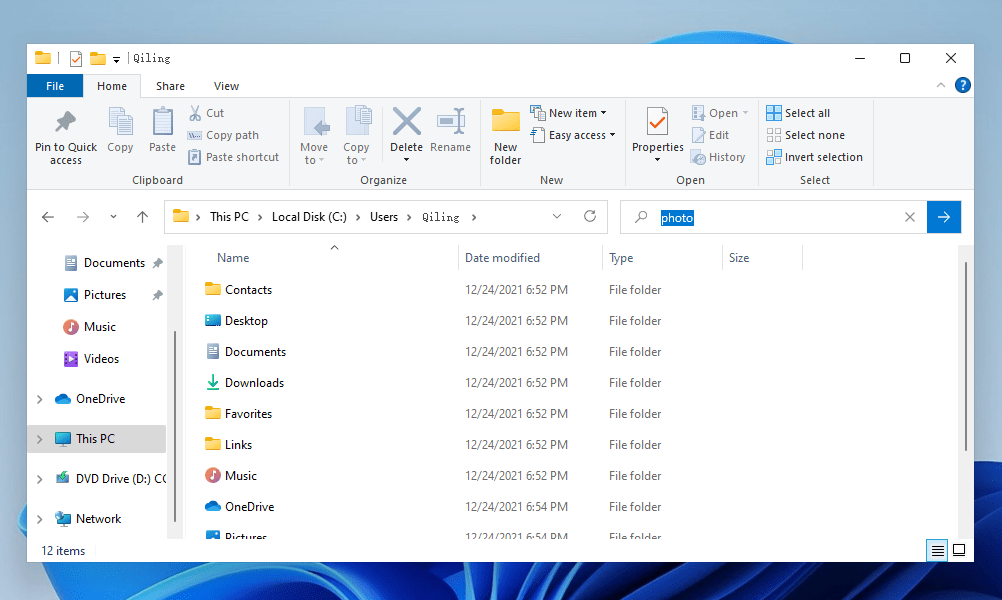
If you know where the lost files were saved before they went missing, you can simply click to open the drive where they were saved and search for them there.
Tips for how to get lost files back after the Windows 11 update erased everything
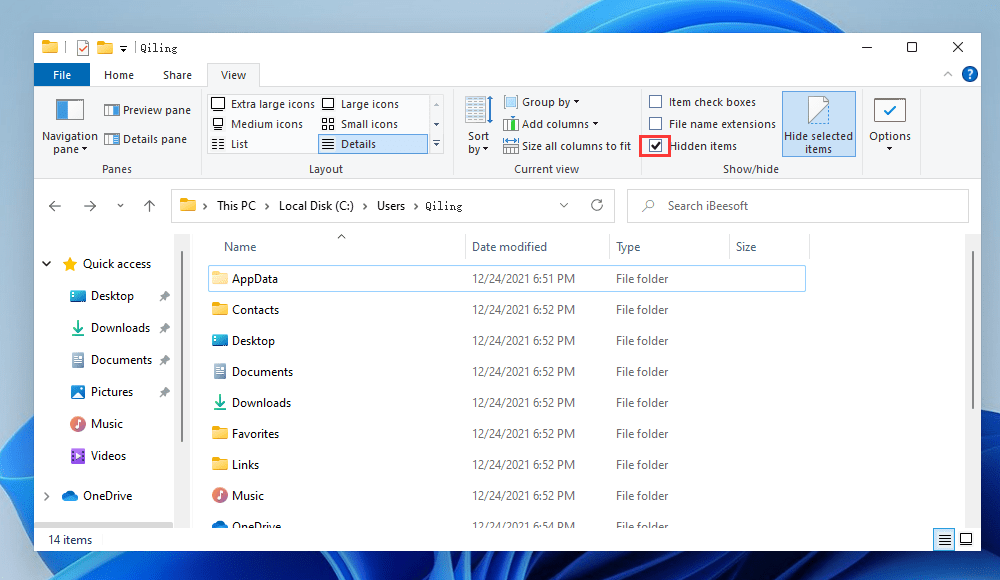
- To show hidden files on a drive where files were lost after a Windows 11 upgrade, click on the drive, go to "View", and select "Hidden items".
- Besides using file names to search for lost files after upgrading to Windows 11, you can also search by file types. For example, if you're looking for Word documents, type in *.doc in the search box, for PDF files use *.pdf, and for music songs use *.mp3.
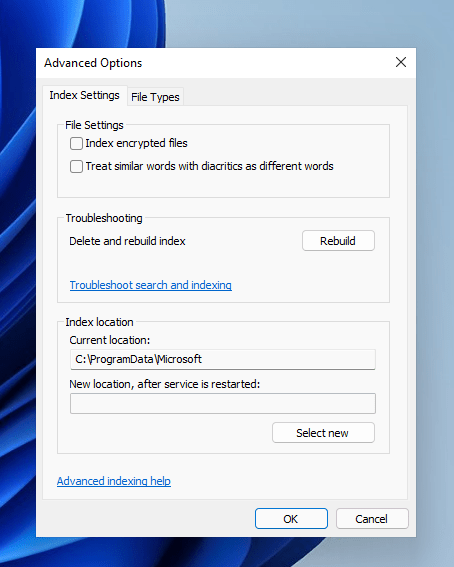
- If you're experiencing issues with the search function in Windows 11, you can resolve the problem by typing "indexing" in the search box, selecting "Indexing Options," and then navigating to the "Advanced" tab, where you can select "Troubleshoot search and indexing" to fix any issues.
Step 3. Enable a Windows 7/10/8 Administrator Account
If you upgrade to Windows 11 from Windows 7, 8, or 10, your former administrator account may be disabled, leading to potential data loss since files are stored in that account. To recover your data, you'll need to enable the disabled account, sign in, and copy the files to a USB drive before transferring them to your new Windows 11 administrator account.
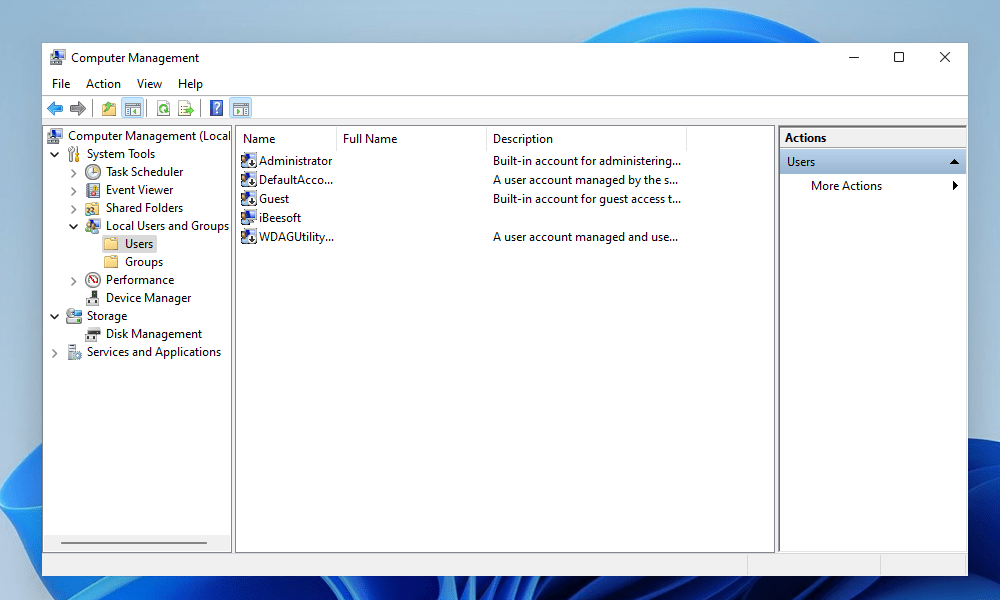
- To access Computer Management, go to the Start menu, type "computer management" in the search box, and select the "Computer Management" result. This will open the Computer Management console, where you can manage various aspects of your computer, including disk management, event logs, device manager, and more.
- In the left pane, select Local Users and Groups, then select Users. If the account is disabled, the icon should have an arrow pointing downwards.
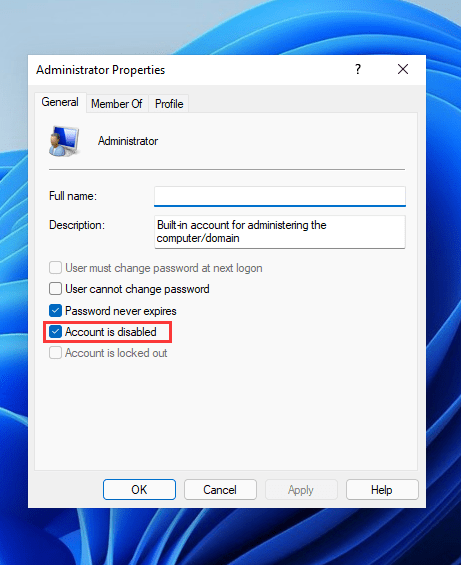
- Double-To enable your account, click the icon to open a new window, deselect the "Account is disabled" checkbox, and apply the change.
- Sign out and sign in with the previous administrator account. Connect a USB drive to your computer, then copy the files to an external hard drive.
Step 4. Find Upgrading to Windows 11 Deleted My Files with a Backup File
If you've tried the previous steps to recover deleted files after a Windows 11 upgrade and still can't recover them, you can try restoring lost files using a backup file if you have one.
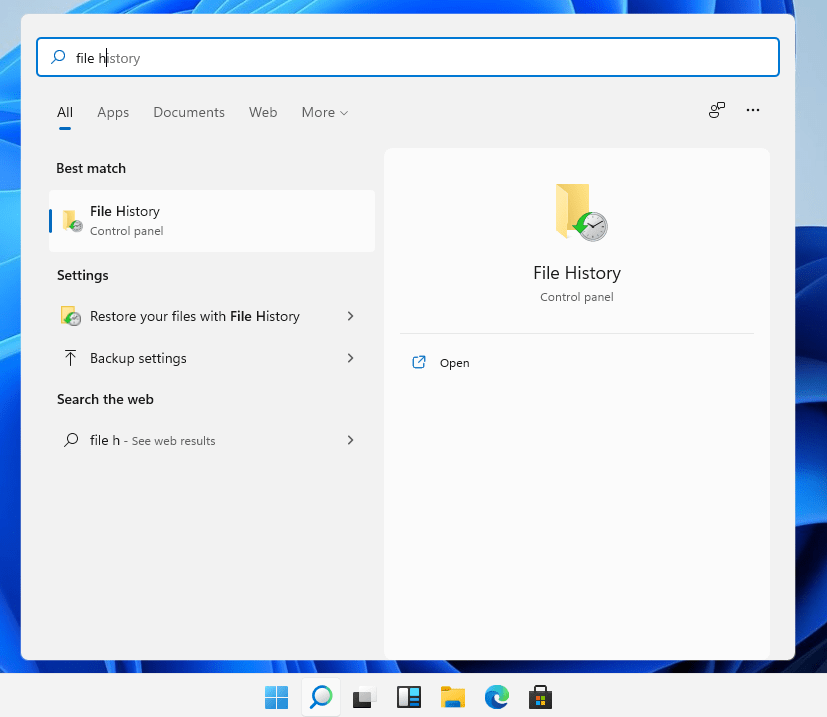
- Click the Search button and type "file history"
- Open it and follow the built-in navigation to restore Windows 11 update lost files.
Step 5. Recover Deleted Files after Windows 11 Upgrade with Data Recovery Software
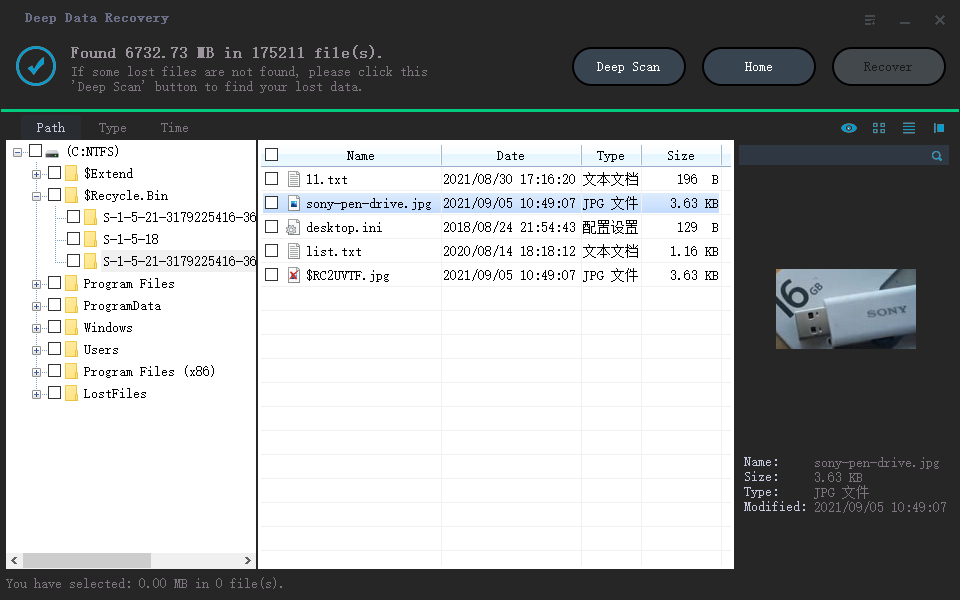
If the previous methods fail to recover lost files after upgrading to Windows 11, you can try using file recovery software, specifically Deep Data Recovery, to restore missing files. This tool can help recover different types of files that were lost during the upgrade process. To use it, follow the steps for recovering permanently deleted files in Windows 11.
How to Find Windows 11 Update Deleted Files
- Download the tool on your Windows 11 computer.
- Launch the best data recovery software for Windows 11.
- Select the drive from where the files were lost and click "Scan" to initiate the recovery process.
- Preview and select recoverable files to save
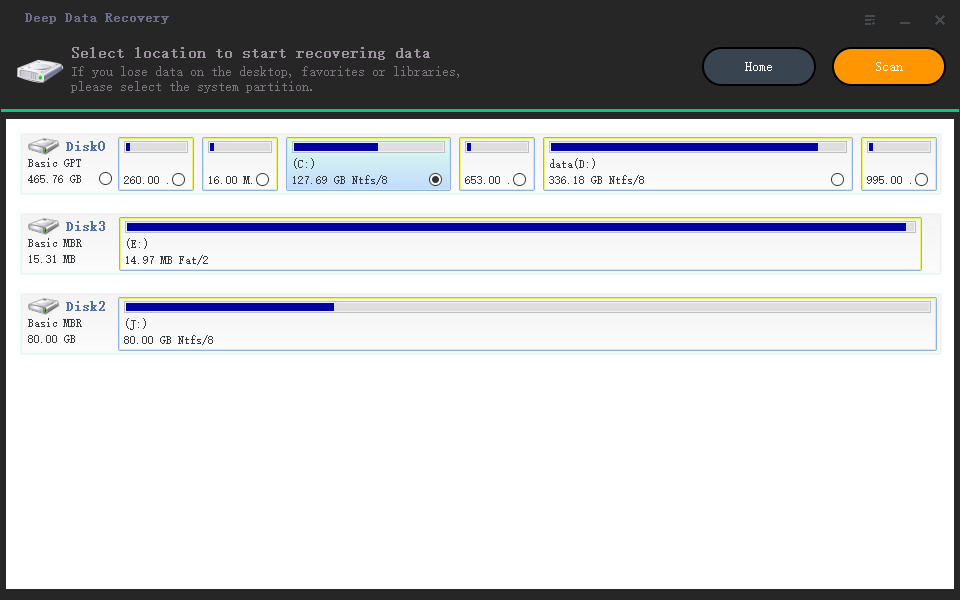
Wait for the scanning process to finish, then select the target files and click "Recover" to save them to your Windows 11 computer.
Related Articles
- Free Data Recovery Software for Windows 11
- Upgrade to Windows 11 from Windows 7/10
- Recover Lost Files after the Upgrade to Windows 11
- Fix Windows 10 Update Error Code 0x80070002
- Recover Shift Deleted Files in Windows 11/10
- How to Recover Files from Formatted Hard Drive in Windows 11
- How to Recover Deleted Zip/Rar Files in Windows 11/10
- How To Recover Data From SSD In Windows 11
- How to Recover Deleted My Documents Folder in Windows 10/11
Products
Articles & Tutorials
- Data Recovery
- Data Backup
- File Recovery
- File Backup
- File synchronize
- System Backup and Restore
- Disk and Partition Clone
- Technical articles
- Disk Master Help
- Windows Deleted File and Disk Recovery Tutorials
- Windows File and Data Recovery Tutorials
- More Windows Tutorials for Install, Security, Files, and PC Tips
- Windows Boot, Repair, and Recovery Environment Tutorials
- Windows Backup Tutorials
- Windows Restore Tutorials
- Windows Clone and Migration Tutorials
- Windows Server Backup, Recovery, and Management Tutorials
- Windows Disk, Partition, and Storage Management Tutorials