Guide: Use Dir/Attrib Command to Show Hidden Files
- How do you list hidden files in your directory?
- Part 1. What is the use of DIR command?
- Part 2. What is ATTRIB in computer?
- Part 3. Another two methods to show hidden files
- Solution 1. Show hidden files Windows 10/11 via File Explorer
- Solution 2. Show hidden files Windows 10/11 via Registry
- Further reading: How to fix the dir/attrib command not working?
- Wrapping up
How do you list hidden files in your directory?
In computing, a hidden folder or file is a directory or file that is not displayed by default when showing a directory listing.
The command to show and hide hidden files by default is `dotfiles`. It can be used in the terminal to toggle between showing and hiding hidden files. For example, you can type `dotfiles` to show hidden files and then type it again to hide them. Alternatively, you can use the `Ctrl + H` shortcut in the terminal to toggle between showing and hiding hidden files.
- A user from cPanel
Users who are familiar with PCs may use various software to modify file attributes, but those who are not tech-savvy might only need to display hidden files in Windows.
Part 1. What is the use of DIR command?
Let's begin with powerful CMD like dir command.
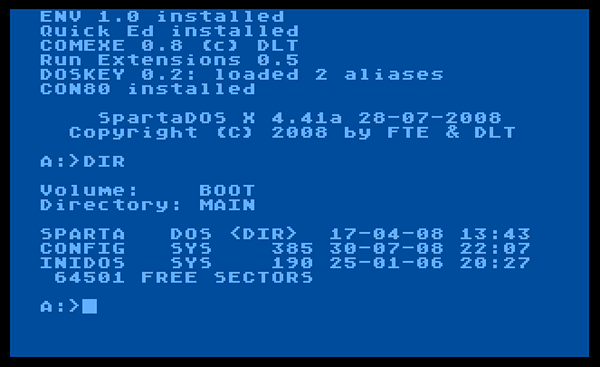
The "dir" command, short for directory, is a fundamental command in various computer operating systems that shows computer files and directories, allowing users to navigate and explore their file systems.
How to use the dir command to show hidden files?
Here's a brief overview of common dir commands to show hidden files: The `dir` command in Windows and `ls` command in Linux/macOS are used to list the files and directories in the current directory. To show hidden files, you can use the `dir /a` command in Windows or `ls -a` command in Linux/macOS. The `dir /a` command lists all files, including hidden ones, while the `ls -a` command lists all files and directories, including hidden ones.
- Notes:✎...
- dir /ah: You can use the `ls -a` command to show all hidden files and directories in the current directory. This command lists all files and directories, including those that start with a dot (`.
- dir /ah-d: To show all hidden files in the current directory but not hidden directories, you can use the following command in your terminal: `ls -a`. The `-a` flag tells the `ls` command to show all files, including hidden ones, but it will not show the contents of hidden directories.
- dir /a: To show all files and directories, including hidden files and directories, in the current directory, you can use the `ls -a` command in Linux or Unix-based systems. This command lists all files and directories, including those that start with a dot (`.
To show hidden files using the dir command, you can add the /a option followed by the letter "h" to the command. This is done by typing "dir /a:h" in the Command Prompt. This will display all files, including hidden ones, in the current directory.
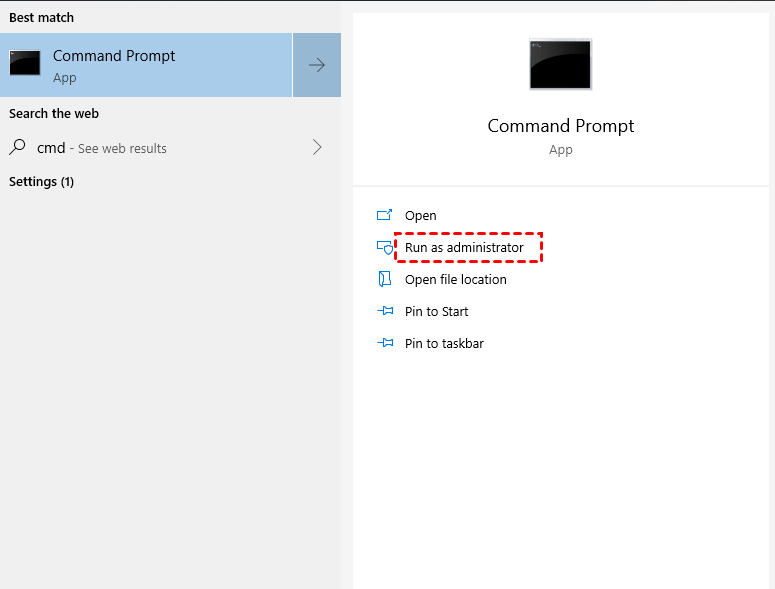
Step 1. To open the command prompt window, type "cmd" in the search bar and click "Run as administrator".
Step 2. To display hidden files in the F drive, type "dir F: /a:h /b /s" in the command prompt window and press Enter. This will show all files, including hidden ones, in the F drive.
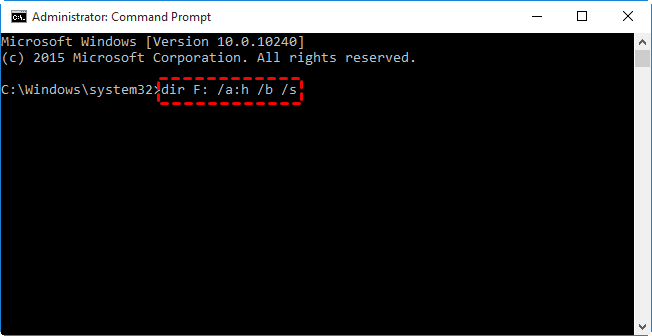
You can also replace F with your needed drive letter. After the process, you can check whether these hidden files are visible to you or not.
Part 2. What is ATTRIB in computer?
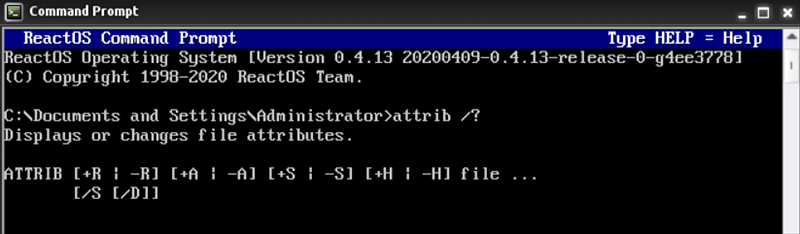
Besides the dir command, the attrib command is another practical CMD for modifying and setting the file attributes of a file/folder.
The program can be run more conveniently from the Command Prompt in all versions of Windows.
How to use the attrib command to show hidden files?
Take a closer look at the four conventional attributes, then you're ready to use the attrib command to show hidden files.
- Notes:✎...
- Ready-only (R): Users are not allowed to modify or add data to the read-only files.
- Hidden (H): In MS-DOS and Windows, commands like dir and File Explorer do not display hidden files by default.
- System (S): To designate a file/folder as an important file system and change its priority, you can use the `chattr` command in Linux. The command format is `chattr +i
`, where ` ` is the name of the file or folder you want to designate as important. The `+i` option sets the `immutable` attribute, which makes the file or folder read-only and prevents it from being deleted or modified. - Archive (A): The backup software will automatically delete the updated hosting file after making a full or incremental backup, due to changes made after the last backup.
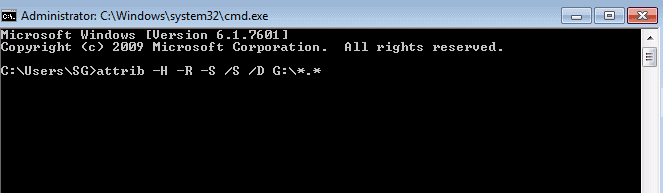
Step 1. To open the Command Prompt, type "cmd" in the search bar and click "Run as administrator" to open the Command Prompt window.
Step 2. To permanently delete all hidden and system files on a specific partition (e.g., G:\), you can use the command "attrib -h -r -s /s /d G:\*.*" in the Command Prompt. This command will remove the attributes that make files hidden, read-only, and system, and then delete all files and subfolders on the specified partition.
Step 3. After the process, you'll find a new folder with your desired files saved on your Windows PC, with the option to change formats and store them in a different path.
The attrib command is used to show hidden files, but if it doesn't work, the files might be deleted instead of hidden. If that happens, you can refer to the last section to recover the deleted files.
Part 3. Another two methods to show hidden files
To show hidden files, you can use the Command Prompt (CMD) with specific commands, or use File Explorer to enable the "Show hidden files" option. Alternatively, you can also modify the Registry to display hidden files. These methods provide different ways to make hidden files visible.
Solution 1. Show hidden files Windows 10/11 via File Explorer
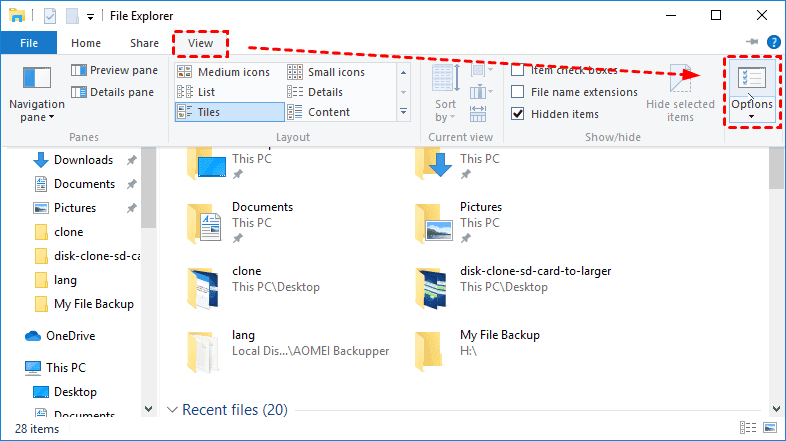
To show hidden files in Windows 10/11 using File Explorer, go to File Explorer, click on the three dots (…) at the top right corner, select “View” from the dropdown menu, and then toggle the button next to “Hidden items” to turn it on. Alternatively, you can press the “Ctrl + Shift + E” shortcut keys to quickly enable the view of hidden files.
Step 1. To open Windows File Explorer, press the keys Win + E on your keyboard. Then, navigate to the View tab and click the Options button.
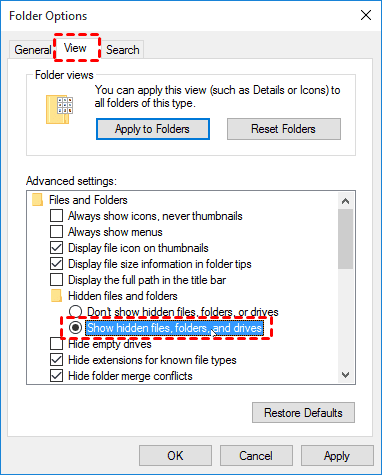
Step 2. To access Folder Options, click View > Show hidden files, folders, and drives > Apply, then click OK to close the window.
Solution 2. Show hidden files Windows 10/11 via Registry
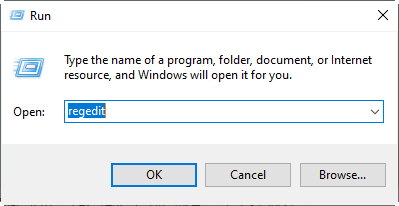
To fix the issue with Windows 10 not showing hidden files, you can modify the registry. This involves adding a specific value to the registry to override the default behavior. If you're comfortable with registry editing, you can follow these steps: Go to the Run dialog box (Windows key + R), type "regedit" and press Enter.
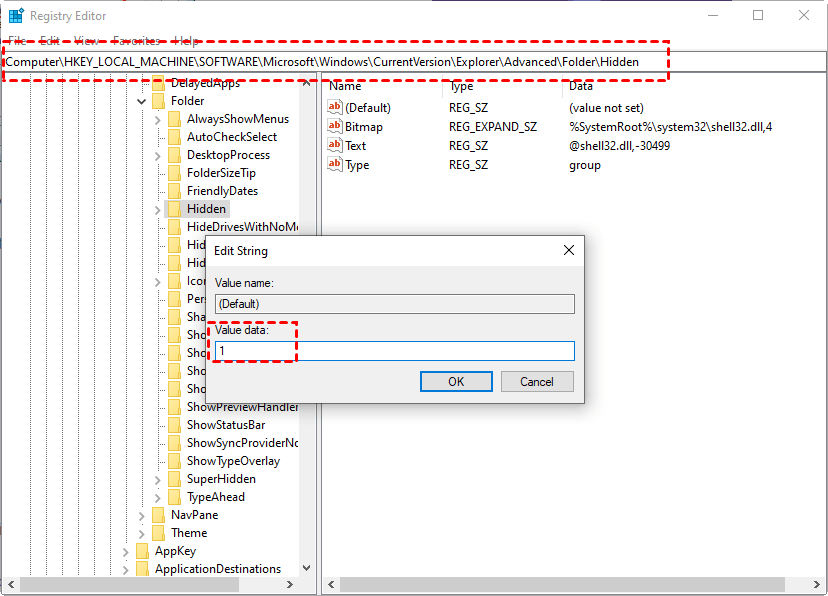
Step 1. To open the Run box, press the Windows key and the "R" key at the same time. Then, type "regedit" in the box and press Enter to open the Registry Editor.
Step 2. Go to this path:
Computer\HKEY-Local-MACHINE\SOFTWARE\Microsoft\Windows\CurrentVersion\Explorer\Advanced\Folder\Hidden. To show hidden files, folders, and drives, set the value data as "1" in the registry.
Further reading: How to fix the dir/attrib command not working?
If the dir/attrib command or Windows File Explorer fails to reappear hidden files, it's possible that the files are in a deletion state.
At this point, you'll be prompted to restore files from backups or seek help from data recovery software to recover permanently deleted files.
To recover lost data, using professional software like Deep Data Recovery is a good option, especially for those who haven't developed the habit of creating backups.
- ★Powerful features & friendly design:
- A software can recover deleted or lost data from various devices and storage media, including hard drives, USB drives, SD cards, and more. It can recover data from over 200 types of files, including Word, Excel, PPT, PDF, photos, videos, audio, and folders.
- Keep the recovered files based on their original paths, filenames, and format.
- During Quick Scan and Deep Scan, enter filenames in the search bar to quickly locate desired files or wait to find all deleted and other lost files on your PC.
- Support NTFS, exFAT, FAT32, and ReFS file systems.
Download Deep Data Recovery on your Windows computer, whether you're running Windows 7, 8, 10, 11, or even Windows Server, to easily restore permanently deleted files.
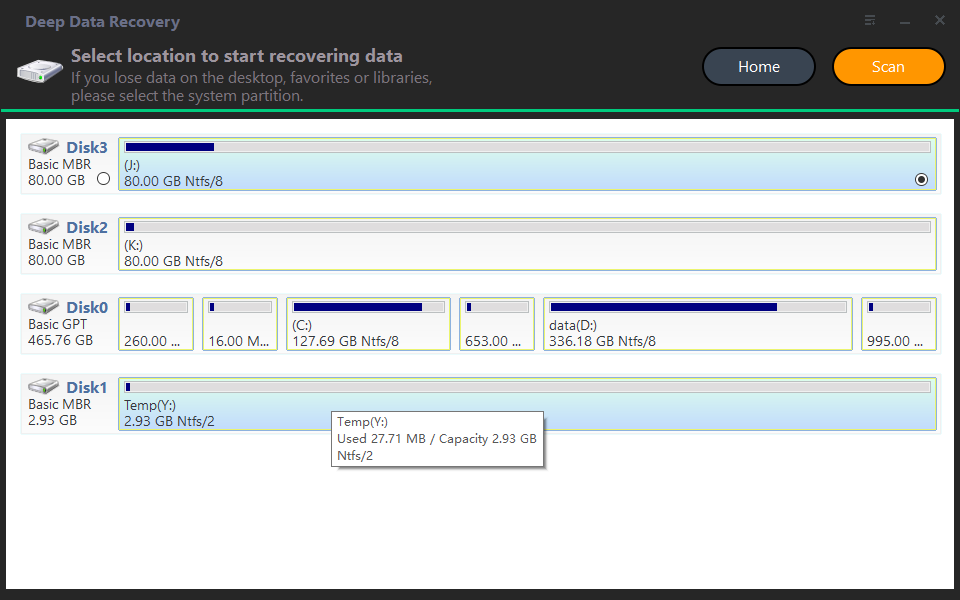
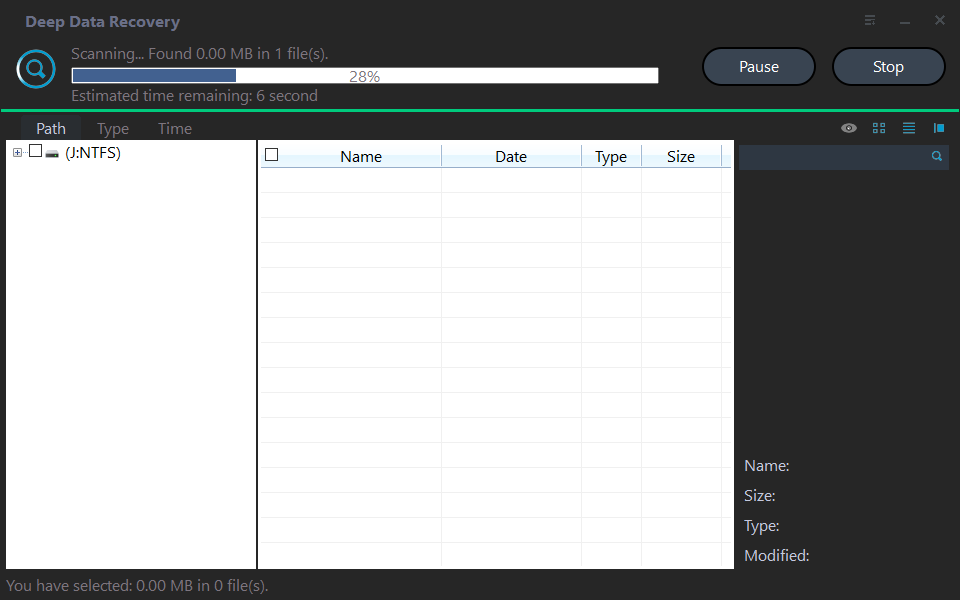
Step 1. Run Deep Data Recovery on your PC, and hover the mouse over the partition that includes your desired files. Then click Scan.
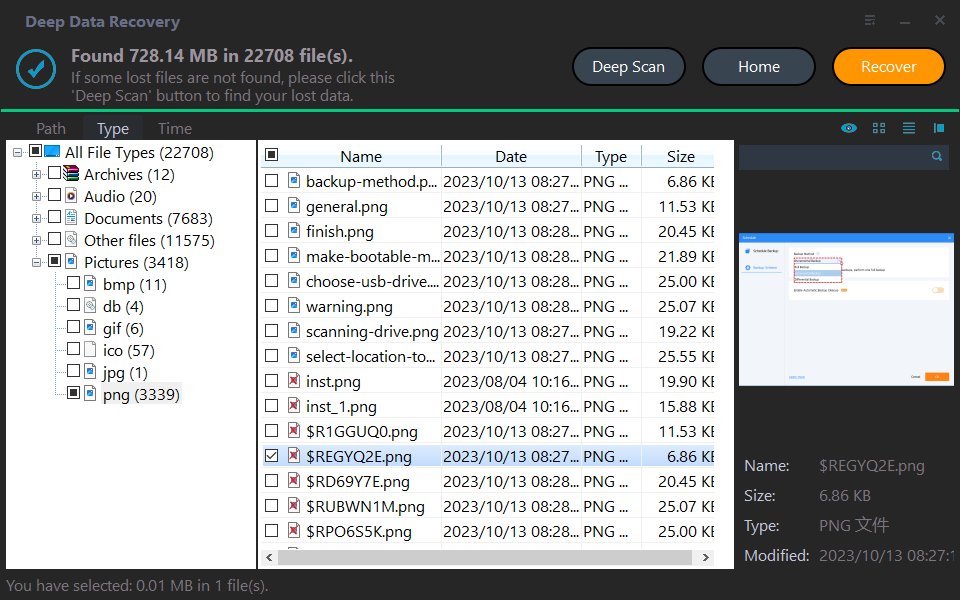
Step 2. Quickly locate your needed files by filtering them by Name, Date, Type, Size, or Path. You can also view all deleted and raw files after a Quick Scan or Deep Scan.
Step 3. Go to the deleted files/raw files folder, click "Recover" to get the selected files back, and save them in a new location afterwards.
Wrapping up
You can use the dir command to show hidden files by adding the /a option followed by the letter "h" as in `dir /ah`, or use the attrib command to show hidden files by adding the +h attribute as in `attrib +h`. If you're familiar with CMD, you can refer to the last two solutions.
To show hidden files, folders, and drivers on Windows, you can use Windows File Explorer. It's a more straightforward method than using the Command Prompt.
If the above methods are useless, you'd better go to the last part and seek help from Deep Data Recovery. To prevent data loss at the source, it's time for you to create regular file, disk, partition, or system backups using free backup software for Windows.
Related Articles
- (Recommended) How to Recover Hidden Partition Windows 7?
Want to recover hidden partition windows 7? Learn more about how to show hidden partition in windows 7 with efficient solutions. - 6 Ways to Solve Desktop icon Reappears after Delete
Desktop icon reappears after delete? This post lists six feasible fixes for you to delete shortcuts from desktop. Besides, you can restore desktop icons/files Windows 10 and get relevant desktop data recovery tips. - Comprehensive Guide: How to Recover Permanently Deleted Photos Free?
Learn how to recover permanently deleted photos free via Windows features or photo recovery tools on this page. Moreover, you can get other relevant tips about photo recovery. - M.2 Drive Not Showing up in BIOS or Disk Management? Fixed!
M.2 drive not showing up in BIOS or Disk Management? Get corresponding fixes to fix them and get your data back from M.2 SSD quickly. - How to Recover Deleted/Lost Files from Pen Drive
When you delete files from a pen drive, unlike a computer, they are not moved to the recycle bin and are instead permanently deleted. This means that you have no way to recover them unless you use a data recovery tool, which is what this article will show you how to do. - How to Recover Deleted/Lost Files on ASUS Laptop
Here are the 3 efficient ways for ASUS laptop recovery if you don't know how to recover deleted files from ASUS laptop. You can free download ASUS data recovery software to recover files from ASUS computer now!