2 Ways: Transfer Windows 10 to USB Drive and Make It Bootable
- Why transfer Windows 10 to USB drive?
- 2 Ways: how to transfer Windows 10 to USB drive
- 1. Move Windows 10 onto USB via inbuilt "Windows To Go"
- 2. Migrate Windows 10 on USB via Qiling Disk Master Professional
- Further reading: how to run Windows 10 from USB?
- Summary
Why transfer Windows 10 to USB drive?
To make Windows 10 bootable on a USB flash drive, allowing you to use the same environment in different locations or on business trips, or to migrate to a newer PC with an older OS, you can create a bootable Windows 10 USB drive. This way, you can directly boot into Windows 10 from the USB drive.
2 Ways: how to transfer Windows 10 to USB drive
To move Windows 10 to a USB flash drive, you have two options. If you're a Windows 10 Enterprise/Education user with a Microsoft-certified USB drive (at least 32GB capacity), you can use the built-in Windows To Go tool to create a bootable USB. Alternatively, if you're using a different version of Windows 10 or don't have a Microsoft-certified USB drive, you can use Qiling Disk Master Professional to create a bootable USB.
1. Move Windows 10 onto USB via inbuilt "Windows To Go"
Windows To Go allows users to transfer Windows 10 to a USB drive, creating a portable version of the operating system that can be taken on-the-go. This feature, available in Windows 10 Enterprise and Education, enables users to bring their own device to work, making it a convenient option for those who need to access Windows on multiple devices. To use Windows To Go, users can follow the steps to transfer Windows 10 to a USB drive, creating a self-contained Windows environment that can be booted from the USB drive.
- Note:✎...
- This operation will erase all data on the destination USB drive, so you should back up all important data first.
1. Mount the ISO file and connect a certified USB drive to your Windows 10 computer. Once you have done that, open the command prompt as an administrator and use the command `bcdboot C:\path\to\ISO\file\Windows.
2. To create a Windows To Go workspace, click the Windows button and navigate to the "Control Panel", then select "Windows To Go".
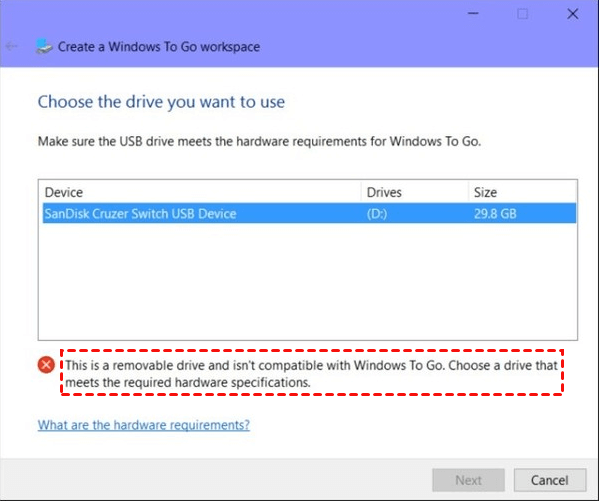
3. In the Create a Windows To Go workspace window, choose the certified USB drive to which you want to transfer Windows 10 and click "Next".
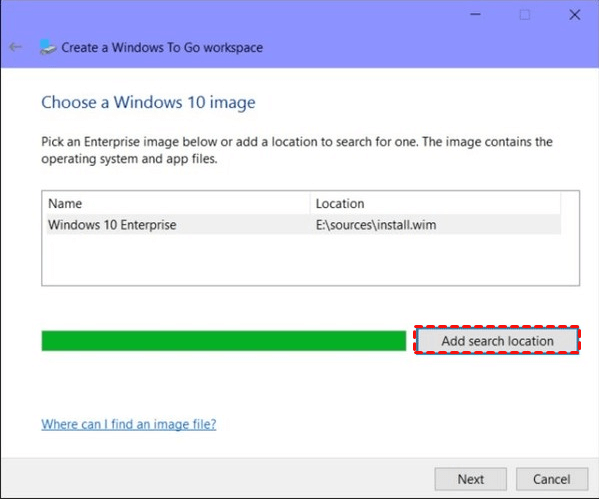
4. To add the search location, click on the "Add search location" button, then select the mounted ISO file of the Windows 10 installation from the available options. This will allow the system to search for and utilize the ISO file for the installation process.
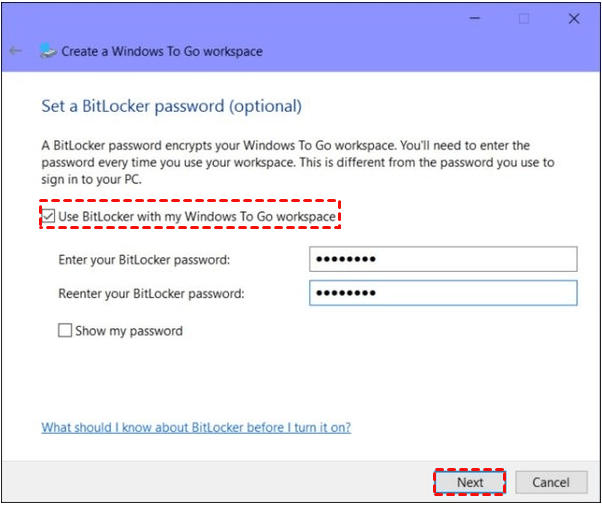
5. Decide whether to use BitLocker on the USB drive, then click "Next".
6. Wait patiently for the whole process to complete, then click "yes" or "no" to boot windows 10 from the newly created bootable USB drive.
2. Migrate Windows 10 on USB via Qiling Disk Master
Windows 10 has 7 editions, including Home, Professional, Enterprise, Education, Mobile, Mobile Enterprise, and loT Core, but the Windows To Go feature is only available in the Enterprise and Education editions.
You can create a bootable USB drive for any edition of Windows 10/11/8/7, not just Enterprise or Education, using third-party software like Qiling Disk Master, which can help you move the operating system to any USB drive larger than 13 GB, even if it's not Microsoft-certificated. The process is simple and easy to follow.
- ★Before you do:
- To prepare a Windows 10/11 ISO file, you can either download it from Microsoft's official website or use a physical installation CD/DVD if you have one. If you prefer the latter, simply insert the CD/DVD into your computer's CD/DVD drive. If you're downloading the ISO file, you can do so from Microsoft's website and then proceed with the installation process.
- Prepare a USB flash drive of at least 13 GB, preferably a USB 3.0, as it will significantly improve the speed of creating a Windows To Go environment.
PS.: You can download the demo version of Qiling Disk Master for free to try it out.
Further reading: how to run Windows 10 from USB?
Here are the detailed steps to boot Windows 10/11 from a USB drive:
Step 1. To access the BIOS settings, simply reboot the computer and press a specific key (usually F2, F12, or Del) as soon as it starts booting up. This will allow you to enter the BIOS settings and make any necessary changes.
Step 2. To boot from a USB flash drive, select USB Device and press Enter.

Once you've created a bootable USB drive with Windows 10/11, you can run the operating system from the USB drive, allowing you to work in the same environment as you would on a traditional installation. This can be a useful option for testing or troubleshooting purposes.
Summary
You can use Qiling Disk Master software to easily copy and transfer Windows 10 to a USB flash drive and make it bootable, or use it to create a bootable USB drive for repairing Windows boot issues.
Related Articles
- Clone a Hard Disk Drive in Windows 10 using Free Software
If you want to clone hard drive Windows 10 to SSD without reinstalling everything, you can free download Qiling Disk Master Standard. It can copy hard drive effectively in Windows 11,10, 8, 7. - Windows 10 Disk Management - The Built-in Disk Partition Manager
In this tutorial, you will learn what is Windows 10 Disk Management, how to open it as well as how to use it for disk partition management. Moreover, a better Disk Management tool will be introduced to help manage disk partitions more conveniently in Windows 11, 10, 8, 7. - How to Transfer Windows 10 to a USB Flash Drive?
If you want to transfer Windows 10 to USB and make it bootable, you can use the Windows 10 built-in function Windows To Go or via third-party software – Qiling Disk Master Professional. - [Tutorial] How to Install Windows 11 without Secure Boot and TPM
Although you are not allowed to install Windows 11 on devices that don't enable Secure Boot or TPM 2.0, you can still find some workarounds to get it done. This article will show you the detailed steps to install Windows 11 without Secure Boot/TPM and a way to work Windows 11 on any unsupported PC. - Recover Deleted Files from SanDisk Extreme Pro | 3 Ways
The SanDisk Extreme Pro series is popular, and it is not impossible to recover deleted files from your SanDisk Extreme Pro devices. Keep reading this passage, and you'll find three effective methods. - How to Unlock SD Card Without Switch [6 Methods]
Are you having trouble writing to a locked SD card? This post offers 6 ways to gain access to an SD card so you can use it without restrictions. Additionally, it describes how to retrieve data from an encrypted SD card. Deep Data Recovery is a one-stop software to recover different data types