How to Format USB Drive to FAT32 in Windows 11/10/7
Quick Navigation:
- Part 1: Why You Need to Format USB to FAT32 on Windows PC
- Part 2: Guide for How to Format USB to FAT 32 in Windows 11/10/7
- Part 3: Recovery of the Data from USB Drive after Formatted
- Your Best Formatted USB Drive Recovery Software
- Step-by-Step Guide for How to Recover Files from Formatted USB drive
A USB drive is an essential device that needs to be compatible with various devices and operating systems to work smoothly. To achieve this, people often format their USB drive to FAT32 in Windows 11/10/7, as it is the most compatible file system. The main reason behind formatting a USB drive to FAT32 is to make it compatible with different devices or operating systems, making it a convenient and essential step in our daily personal and work life. In this article, we will explore how to format a USB drive to FAT32 in Windows 7/10 and understand the importance of this process.
Part 1: Why You Need to Format USB to FAT32 on Windows PC
FAT32 is the oldest file system of Windows, replacing FAT16 with the launching of Windows 95. It is still widely used today, especially for formatting USB drives, as it is supported by most operating systems and devices. There are several reasons why you might need to format a USB drive to FAT32 in Windows 10/7, including compatibility with older systems, smaller file size, and ease of use. FAT32 is a simple and straightforward file system that is easy to work with, making it a popular choice for USB drives and other removable storage devices. Additionally, FAT32 is often used for formatting USB drives to be used with devices that do not support newer file systems like NTFS or exFAT.
- FAT32 is the oldest file system of Windows, which is why most external devices, including flash drives, come pre-formatted with FAT32.
- FAT32 is widely used due to its compatibility with a wide range of devices, including both modern and older computers.
- The USB drive is often used on removable devices to ensure compatibility across different systems, allowing it to work seamlessly with all of them.
Part 2: Guide for How to Format USB to FAT 32 in Windows 11/10/7
Formatting a USB drive to FAT32 is a good option for files under 4GB. While the maximum partition size is 8TB, it's suitable for smaller files. If you have less than 4GB data, FAT32 is highly recommended. Here's a step-by-step guide to format a USB drive to FAT32 in Windows 7, 10, or 11.
Step 1: To access the files on your USB drive, connect it to your Windows device. Then, click on "My Computer" or "This PC" (depending on your Windows version), where you should see the USB drive listed. Next, click on the "Open folder to view files" option to access the contents of the USB drive.
Step 2: To format your USB drive, right-click on it and choose the Format option. In the window that appears, select FAT32 from the file system drop-down menu.
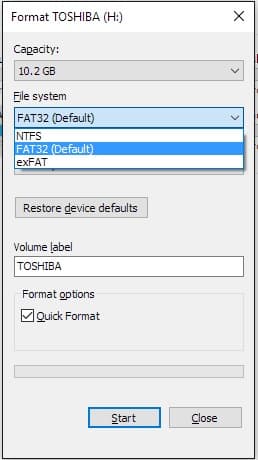
Step 3: To format a USB drive to FAT32, click Start, then OK, and follow through with the formatting process. Once complete, click OK again.
Part 3: Recovery of the Data from USB Drive after Formatted
Before formatting your USB drive, make sure to back up any important files present on it. This will allow you to restore them later if needed. You can use a reliable backup software like Qiling Disk Master to create a backup, which is user-friendly and efficient. Don't forget to take this precautionary step to avoid losing any valuable data.
If you've forgotten to make a backup and have already formatted a USB drive to FAT32 for use with Windows 11/10/7, you can use Deep Data Recovery to recover your data, even if you have no technical expertise. This data recovery tool is designed to be user-friendly and powerful, allowing you to easily navigate the recovery process and retrieve your lost data on your own.
Your Best Formatted USB Drive Recovery Software
- The software provides safe and effective data recovery after formatting a USB drive to FAT32, making it easy to use and highly effective for recovering data on both Mac and Windows devices.
- This software can recover data in various situations, including accidental deletion, cleared recycle bin, format, inaccessible or unreadable drive/partition, partition loss, drive corruption, and data loss due to incorrect operations or virus attacks.
- This recovery software can recover data from a wide range of devices, including PCs, servers, SD cards, digital cameras, camcorders, external hard drives, USB flash drives, and many more.
- It supports various file types including pictures, audio, videos, documents, archives, and more, allowing for a wide range of file sharing and management capabilities.
Step-by-Step Guide for How to Recover Files from Formatted USB drive
Step 1: Install data recovery software
Download and install this unformat USB drive tool on the computer, then connect the USB drive to your computer.
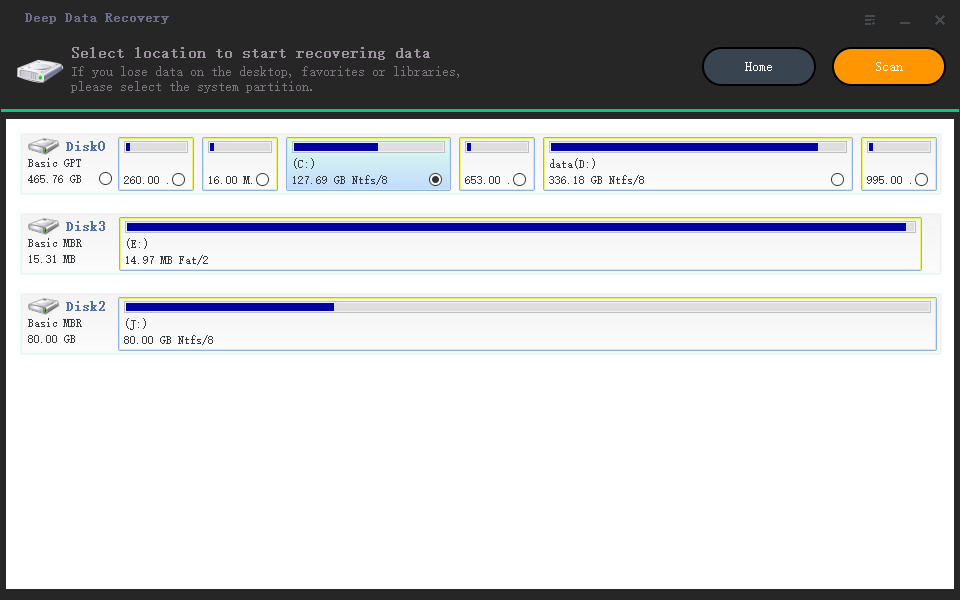
Step 2: Choose Formatted USB Drive to Scan
To proceed, select the USB drive from the list and click "Scan" to begin the scanning process.
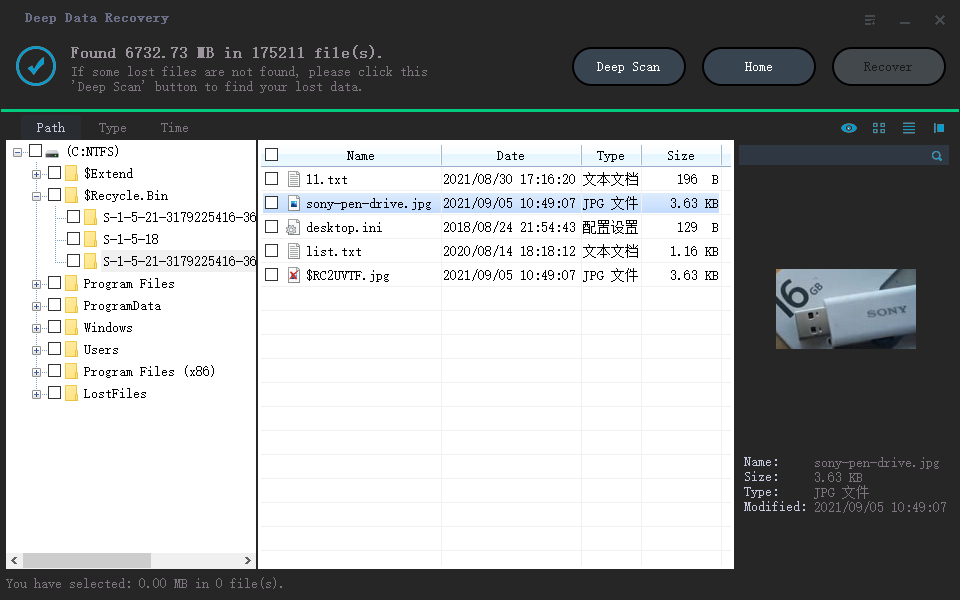
Step 3: Preview and Recover Data after Format USB Drive to FAT32
After scanning, a window will appear listing all the files that were lost from your USB drive. You can preview the files you want to recover and select them, then click "Recover" to start the recovery process on your computer.
To format a USB drive to FAT32 in Windows 10/11, follow the traditional method by right-clicking on the drive, selecting Format, and choosing FAT32 as the file system. Alternatively, you can use Qiling Disk Master to back up your data before formatting, and if you forget, use Deep Data Recovery software to recover files from the formatted USB drive. This step-by-step process will be easier to follow, and the tools mentioned can help you avoid data loss.
Related Articles
- How to Fix USB Drives not showing up in Windows 10
- How to Recover Deleted Files After Windows 10 Updates [Fast and Safe]
Windows 10 updates delete my files. What can I do? You can recover Windows 10 updates deleted files with the Backup and Restore utility, File History utility, File Recovery, or Recycle Bin. The easiest way to recover deleted files on Windows 10 is by applying Deep Data Recovery. - 3 Ways to Show Hidden Files/Folders in Windows 11
Windows 11 hidden files not showing; how to fix this error? You are in the right place. You can learn three ways to view and show hidden files in Windows 11. Read this post and restore hidden files with simple clicks. - 2023 Tips: How to Stop Windows 11 from Automatically Deleting Files
Windows 11 keeps deleting my files without asking. How to fix this error? Relax. You can learn effective solutions to stop Windows 11 from automatically deleting files and recover deleted files in Windows 11 with Qiling data recovery software. Read on to get more details. - Guide: Use Dir/Attrib Command to Show Hidden Files
Learn how to use DIR and ATTRIB commands to show hidden files in Windows, and how to view hidden files with File Explorer. - 5 Ways to Fix External Hard Drive Access Denied
External hard drive access denied? Get five solutions to fix this issue on this page. Besides, you can get related tips about external hard drive data/partition recovery.