How to Fix TPM Not Detected in Windows 11/10
- User Case
- What Causes TPM Device Not Detected Error?
- Quick Fixes for TPM Not Detected on Windows 11/10
- Solution 1. Enable TPM from BIOS
- Solution 2. Update BIOS or UEFI
- Solution 3. Reinstall or Update TPM Driver
- Solution 4. Troubleshoot Network Connection
- Solution 5. Clear All Keys from TPM
- Protect Your Important Data Ahead of Time with Free Software
- Final Words
User Case
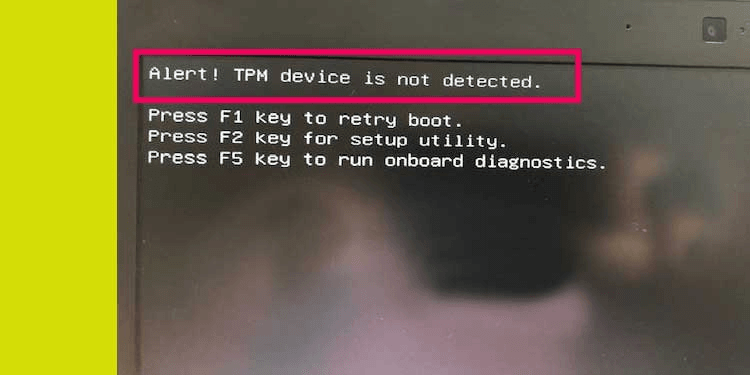
Alert! TPM device not detected
"You've had your Dell laptop for a few weeks and just noticed that the BIOS is now warning you that the TPM (Trusted Platform Module) device is not detected, despite Microsoft's compatibility check showing all green for your model, which is fully compatible with Windows 11. You're unsure what's causing this alert."
- Question from Elevenforum
TPM The Trusted Platform Module (TPM) is a security chip on the motherboard that stores all passwords and security-related data. Some users have reported receiving a "TPM device is not detected" error message on their computer in Windows 11 or 10. This issue can occur due to various reasons such as a faulty TPM chip, incorrect TPM settings, or conflicts with other hardware components. To resolve this problem, users can try updating their TPM firmware, checking the TPM settings in the BIOS, or disabling the TPM in the Device Manager. If the issue persists, it may be necessary to consult a professional for further assistance.
What Causes TPM Device Not Detected Error?
Starting with Windows 10 and Windows 11, the operating system automatically initializes and takes ownership of the Trusted Platform Module (TPM), which is different from previous operating systems where the TPM was initialized and an owner password was created.
The TPM (Trusted Platform Module) chip is a small microcontroller that provides a secure way to store and manage sensitive information, such as encryption keys and passwords. It's usually located on the motherboard and is used to provide an additional layer of security for the system.
⚠️ Outdated BIOS
❌ TPM chip damaged
🔌 Network connection issues
⚙️ Problem with TPM keys
Quick Fixes for TPM Not Detected on Windows 11/10
When a TPM (Trusted Platform Module) is not detected, Bitlocker can't be enabled, and even if the system boots normally, the TPM chip's stored passwords and encryption are inaccessible. This prevents access to the encrypted data.
Users are unable to upgrade their systems to Windows 11 due to the TPM not detected issue, which prevents them from meeting the minimum system requirements for the upgrade, and it is crucial to resolve this issue for computer security.
Clearing the TPM from the BIOS may cause data loss, so backup files in advance.
Solution 1. Enable TPM from BIOS
To resolve the TPM not detected error on Windows 11, ensure that the Trusted Platform Module (TPM) feature is enabled. This can be done by following the steps to enable TPM, which typically involves accessing the BIOS settings and enabling the TPM feature. If the TPM settings are disabled, the error message will be displayed. Enabling the TPM feature will resolve the issue and allow the computer to run from the BIOS, protecting the computer.
- Press the key corresponding to your motherboard's BIOS entry method during startup, which is usually Del, F2, or F9, depending on the manufacturer.
- Look for the option named Security or Advanced.
- To resolve the issue of a TPM device not being detected on a Dell computer running Windows 10 or 11, look for the TPM feature in the BIOS settings and enable it. This should resolve the problem and allow the TPM device to be detected.
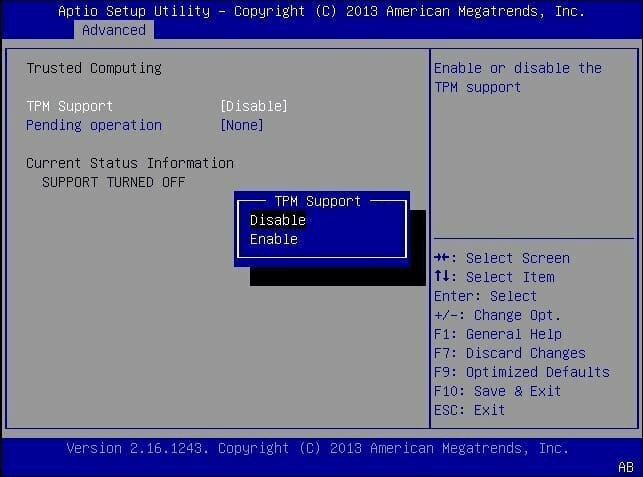
NoteDue to the varying nature of BIOS versions, there is no one-size-fits-all approach to enabling TPM. For specific guidance, it's best to consult the manual provided with your motherboard.
Solution 2. Update BIOS or UEFI
If the BIOS is not updated in a timely manner, it may start to fail, affecting the overall performance and functionality of the computer.
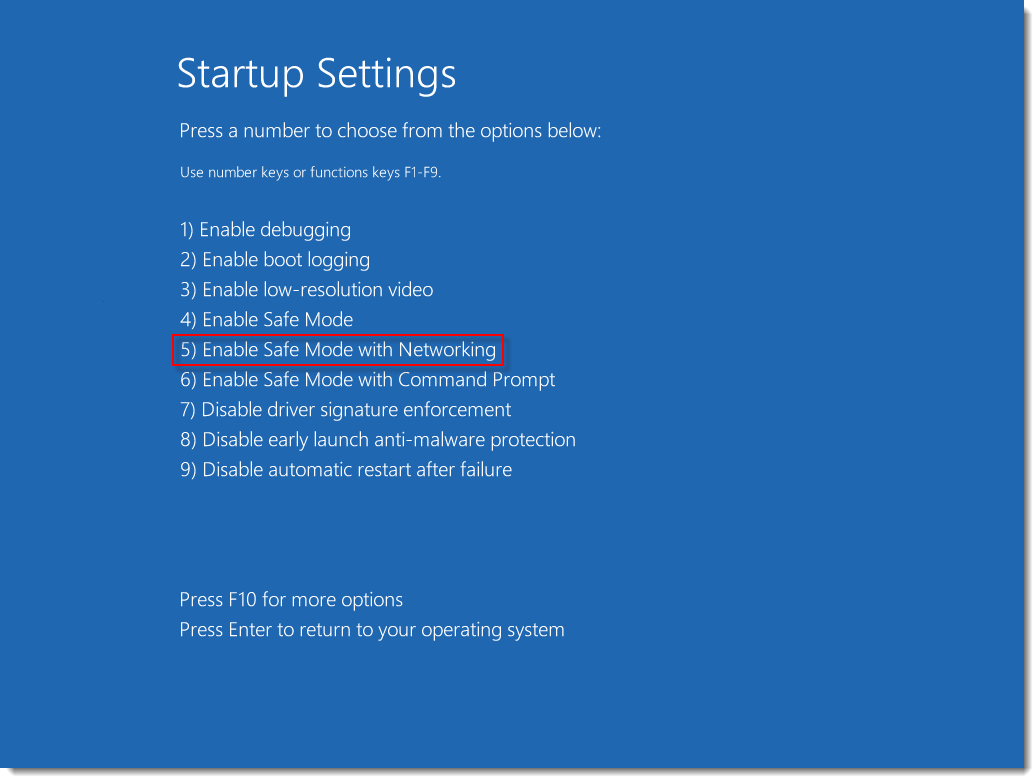
- To enter the Windows Recovery Environment (Windows RE) by force, the computer is shut down and then rebooted twice. This process initiates the Windows RE, allowing for various troubleshooting and recovery options.
- Click Troubleshooting -> Advanced Options -> Startup Settings -> Restart.
- After the computer restarts, press F5 or the number key 5 to enable Safe Mode with Networking.
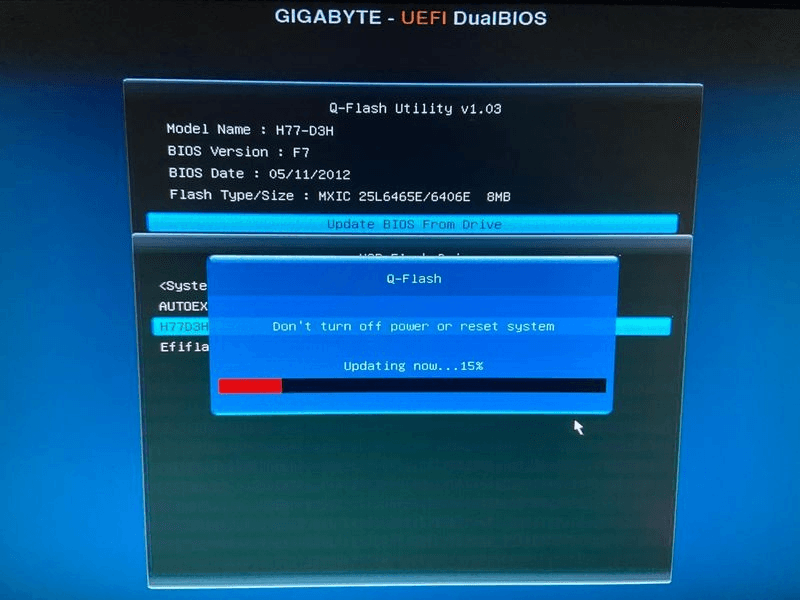
- To update the BIOS, open a browser and visit the official website of the computer motherboard manufacturer, and download the BIOS update file.
- Copy the previously downloaded BIOS update file to a USB flash drive and restart the computer.
- To update your BIOS, press the corresponding button to enter the BIOS interface and select the "Update BIOS From Drive" option. From there, select the BIOS update file downloaded on a USB, confirm the operation, and wait for the update to complete.
Solution 3. Reinstall or Update TPM Driver
If the TPM driver is outdated or corrupted, it may cause the "TPM device not detected" issue in Windows 11 or Windows 10. To fix this, you can try reinstalling or updating the TPM driver using the steps provided. This may resolve the problem and allow the TPM device to be detected again.
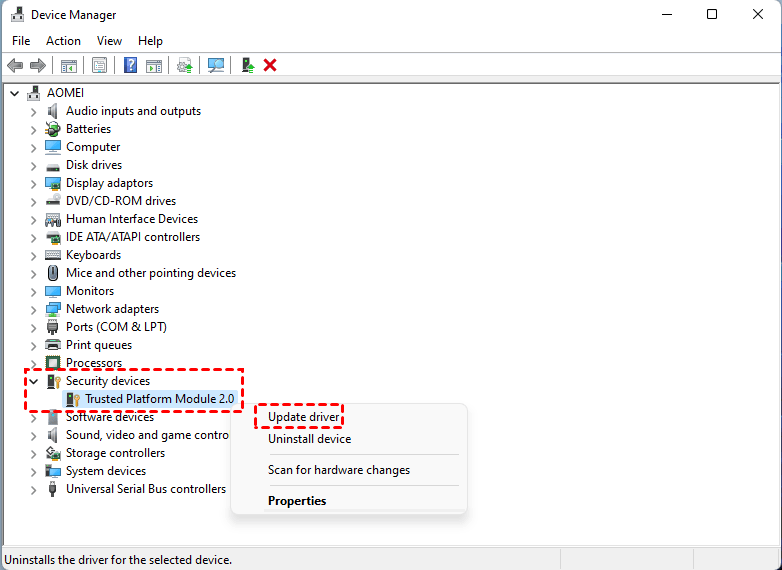
- Right-To start, click on the Start menu and select Device Manager from the list.
- To update the Trusted Platform Module 2.0 driver, right-click on the Security devices item in the Device Manager, then select Update driver from the context menu. This will initiate the driver update process.
- Then click Search automatically for drivers to continue.
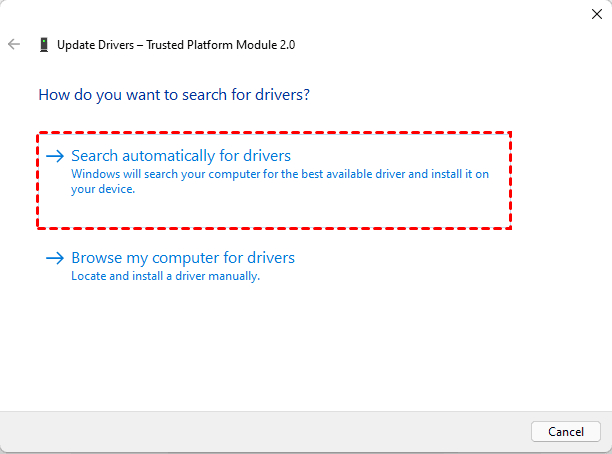
- If an update is detected, update your TPM drive right away and restart your computer to see if the TPM not detected issue is resolved.
- To uninstall the Intel Trusted Platform Module driver, go to the Device Manager, find the Intel Trusted Platform Module driver, right-click on it and choose "Uninstall device". A confirmation dialog will appear, then click "Uninstall". After uninstalling the driver, restart your PC and reinstall the Trusted Platform Module driver.
Solution 4. Troubleshoot Network Connection
If the system is using Windows 10 version 1507 or 1511 or Windows 11, it may struggle to detect and initialize the Trusted Platform Module (TPM) if there are network connectivity issues.
To resolve the issue, you can run the network connection troubleshooter to check for any internet connection problems.
- Press Windows + I to open Settings.
- To troubleshoot network issues, navigate to Settings > Network & internet > Troubleshoot. The Network Adapter will automatically detect and resolve the problem.

Solution 5. Clear All Keys from TPM
To resolve the issue of the TPM not being detected on Windows 10/11, we can use the Windows Defender Security Center utility to clear the TPM value, which may serve as a final solution. This approach can potentially fix the problem without the need to physically replace the TPM chip itself.
NoteClearing the Trusted Platform Module (TPM) may result in data loss, so it's recommended to make a backup before proceeding.
- Enter the Windows Recovery Environment and press F5 or the number key 5 to enable Safe Mode with Networking.
- To open Windows Security, press Windows + S to open the search bar, type "Windows Security" and press Enter.
- To view the security processor details, go to the Device Security page and click on Security processor details.
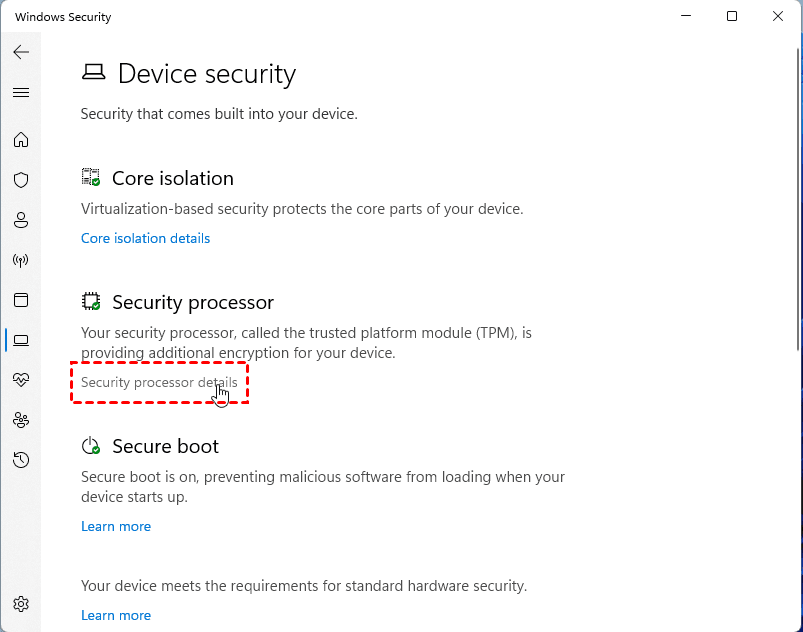
- In the new window, tap Security processor troubleshooting.
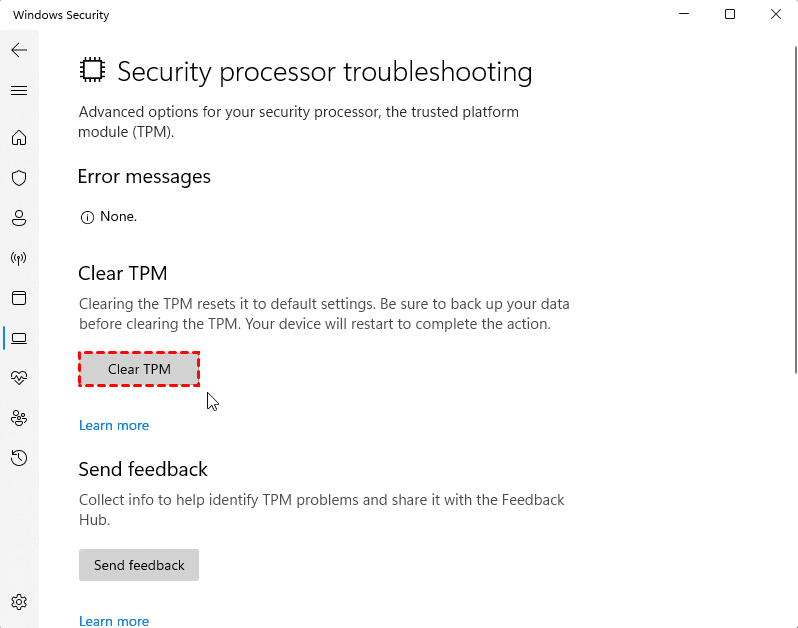
- In the new window, tap the Clear TPM button, and then select the Clear and restart option.
Protect Your Important Data Ahead of Time with Free Software
When encountering the issue "TPM device is not detected" on Windows 11, you can try the above five methods to resolve it. However, note that these methods involve clearing the TPM from the BIOS, which may result in data loss.
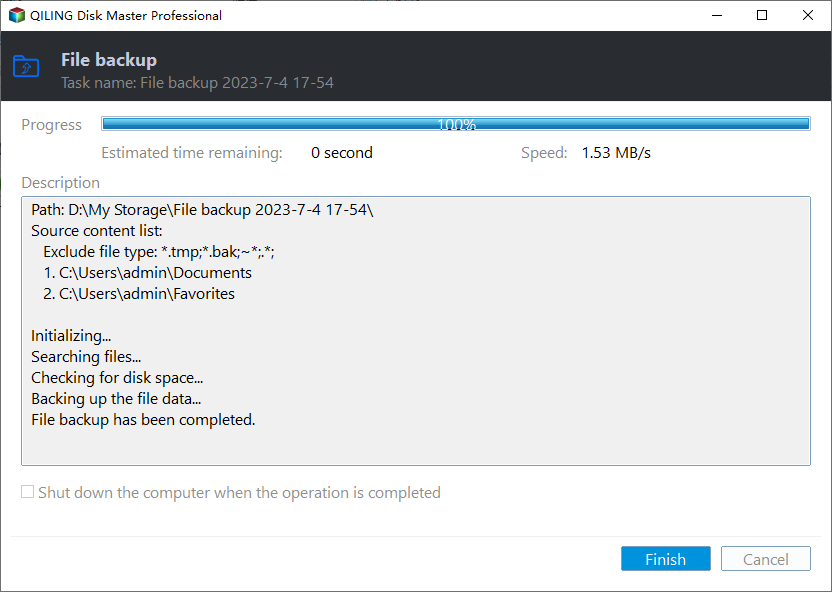
To avoid losing important data, it's a good idea to create a backup of your files on your computer before performing any operations. You can use free backup software like Qiling Disk Master, which has a simple interface and no unwanted ads. This will ensure your files are safe and secure.
Check out its standout features:
🖥️ It supports all Windows operating systems such as Windows 11/10/8.1/8/7.
🏆 It offers 4 backup types: System Backup, File Backup, Disk Backup, and Partition Backup.
💿 This software enables you to back up your data to various storage devices, including USB drives, SD cards, NAS, SSDs, HDDs, and cloud services.
👾 It provides you with intelligent backup methods (Incremental backup) to only backup the changed or newly added data since the last backup.
📌 This system also has other functions such as recovery, clone and sync, in addition to its main function of backing up data.
You can download a free software, which, when opened, displays its available functions.
To back up your important files, navigate to Backup, then File Backup, and choose Disk Backup if you want to back up the entire disk.

If you have a Qiling account, you can use the Cloud Backup feature to backup files to Qiling Cloud, which offers 1TB free storage for 15 days after signing up.
Final Words
To resolve the "TPM not detected" issue on Windows 11 and Windows 10, it's essential to address the problem promptly for the safety of your computer. On Windows 10, failing to resolve this issue may prevent you from upgrading to Windows 11, presenting a dilemma.
Operating some of these methods carries certain risks and results in data loss, so it's recommended to use Qiling Disk Master for backup in advance. This software can also help you migrate your Windows 11 system or other important data.
Related Articles
- Full Guide: Check and Enable TPM 2.0 for Windows 11 Update
What is TMP, how to effectively check and enable TPM 2.0 for Windows 11 update? This article will provide you with the most detailed guide. - This PC Can't Run Windows 11 | How to Fix or Bypass it
Many users receive "This PC can't run Windows 11" when they try to install it, or check if their computer is compatible. Why does this happen and how to fix it? - How to Dual Boot Windows 7 and Windows XP?
If you want to run both Windows 7 and Windows XP on the same computer, you can dual boot them. To do this, you'll need to follow a step-by-step process that allows you to install and configure both operating systems on your machine. - How to Migrate Windows 7 from HDD to SSD for Free?
The Qiling Disk Master Standard allows you to migrate Windows 7 to SSD drive without reinstalling Windows. And you don't need to worry that you cannot boot from the new disk after migrating Windows OS from HDD to SSD. - Top 5 C Drive Full Windows 7 Solutions
Are you anxious about your computer running slower and slower? You are so lucky, this article provides 7 reliable solutions to solve C drive full in Windows 7, 8, 10. - C Drive Is Filling Up By Itself in Windows 7 – Fix It with 6 Solutions
To deal with C drive full in Windows 7/8/10, you can run anti-virus, fix corrupted file system, disable Hibernation, and so on.