How to Transfer Windows 10 to SSD
Quick Navigation:
- Part 1: Why transfer Windows 10 to SSD?
- Part 2: Best software to move Windows 10 to SSD
- Reliable system migration software for Windows
- Part 3: How to transfer Windows 10 to SSD step by step
Moving Windows 10 from an old HDD to an SSD is one of the most effective ways to improve computer performance. With a reliable migration tool, you can transfer Windows 10, boot files, installed programs, settings, and personal data to an SSD without reinstalling the operating system.
If you are moving from an HDD specifically, compare this guide with putting Windows 10 on SSD from HDD.
Qiling Disk Master helps simplify the process. Whether you want to transfer Windows 10 from HDD to SSD, move Windows 10 from one SSD to another SSD, or upgrade to a larger drive, disk cloning can keep the system usable after migration.
Part 1: Why transfer Windows 10 to SSD?
Compared with a traditional hard drive, an SSD usually provides faster boot speed, shorter application loading time, lower noise, and better shock resistance. If Windows 10 runs slowly on your current disk, transferring it to an SSD can make the computer feel much faster.
Transferring Windows 10 to SSD is also useful when the old drive is failing, the system disk is nearly full, or you want to replace a smaller SSD with a larger one. Instead of reinstalling Windows and all programs, cloning can copy the existing system environment directly.
Part 2: Best software to move Windows 10 to SSD
Windows does not offer a simple built-in feature to transfer the entire Windows 10 system to another SSD. Qiling Disk Master provides disk clone and backup features that can copy the operating system, boot partitions, applications, and files to a new SSD.
Using cloning software can reduce migration errors, such as missing boot files, incomplete system partitions, or programs that fail to run after manual copying. It is suitable for users who want to move Windows 10 to SSD without reinstalling Windows.
Reliable system migration software for Windows
- Transfer Windows 10 to SSD while keeping boot files, programs, settings, and personal data.
- Support disk clone, system backup, partition clone, and drive backup for different migration needs.
- Help move Windows 10 from HDD to SSD or from one SSD to another SSD.
- Work with Windows 11, 10, 8.1, 8, 7, and other common Windows systems.
- Provide a clear interface for SSD upgrades and system disk replacement.
Part 3: How to transfer Windows 10 to SSD step by step
Before you start, connect the target SSD to your Windows 10 computer and make sure it can be detected. If the SSD contains important files, back them up first because the destination disk may be overwritten during the migration process.
- Select the Windows 10 source disk
- Choose the target SSD
- Start transferring Windows 10 to SSD
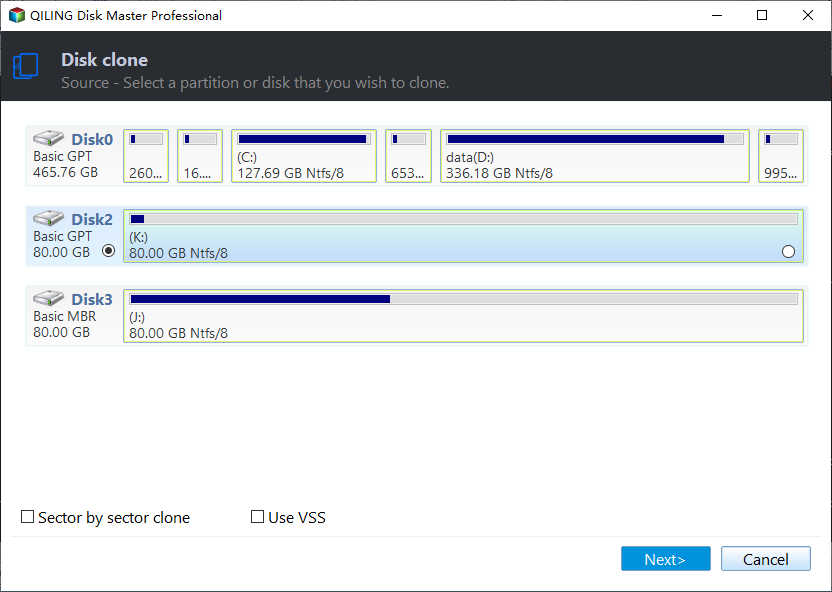
Install and launch Qiling Disk Master. Choose the clone or drive backup function, then select the current Windows 10 system disk as the source disk.
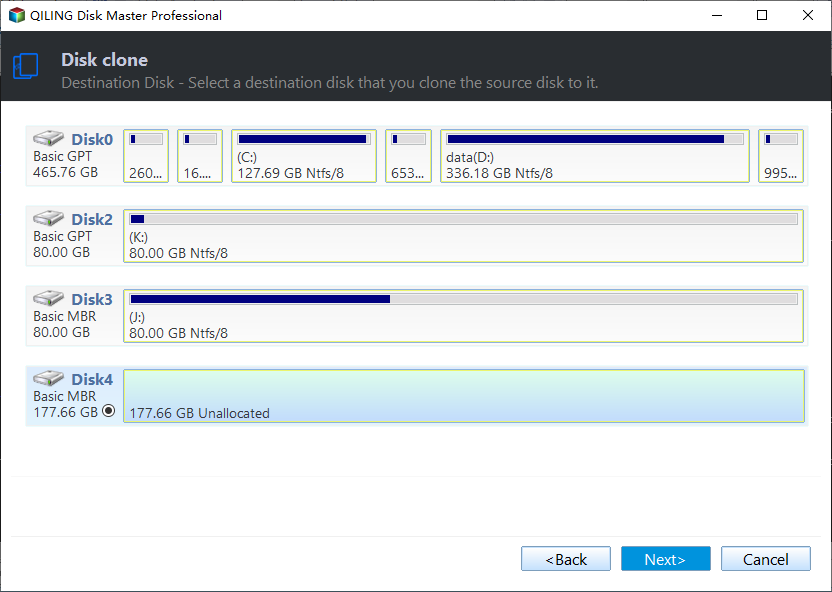
Select the connected SSD as the destination disk. Confirm that the SSD has enough capacity for the used space on the Windows 10 system disk.
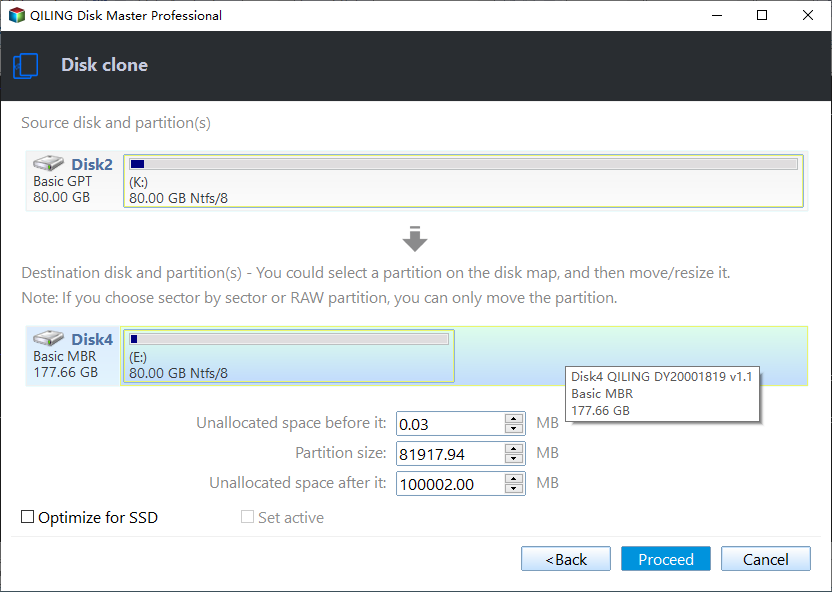
Review the source and destination disk information carefully. If everything is correct, click "Proceed" to transfer Windows 10 to the SSD and wait for the process to complete.
After the transfer is complete, shut down the computer and install the SSD as the boot drive if needed. You can also enter BIOS or UEFI settings and set the cloned SSD as the first boot device.
When Windows 10 boots successfully from the SSD, check your files, applications, and system settings. Keep the old disk unchanged for a while as a backup until you are sure the SSD works correctly.
Related Articles
- How to Clone HDD to SSD with Free Hard Drive Clone Software
- How to Clone HDD to SSD in Windows 10
- How to Clone Hard Drive in Windows 11/10
- Transfer Windows 10 to New Hard Drive
- Migrate Windows 10 to Smaller SSD
- Transfer OS from SSD to New SSD
- Free Disk Cloning Software for Windows 11/10
- How to Clone HDD to SanDisk SSD
Products
Articles & Tutorials
- Data Recovery
- Data Backup
- File Recovery
- File Backup
- File synchronize
- System Backup and Restore
- Disk and Partition Clone
- Technical articles
- Disk Master Help
- Windows Deleted File and Disk Recovery Tutorials
- Windows File and Data Recovery Tutorials
- More Windows Tutorials for Install, Security, Files, and PC Tips
- Windows Boot, Repair, and Recovery Environment Tutorials
- Windows Backup Tutorials
- Windows Restore Tutorials
- Windows Clone and Migration Tutorials
- Windows Server Backup, Recovery, and Management Tutorials
- Windows Disk, Partition, and Storage Management Tutorials