How to Image Windows 10 to SSD without Reinstalling [2 Ways]
Restore Windows 10 image to SSD | why and how?
You're considering replacing your hard drive with an SSD and want to move your Windows 10 operating system to the new drive while keeping all your existing settings and personal files intact.
To achieve this, one common method is to image Windows 10 to an SSD or new hard drive, creating a system image of Windows 10 on the old hard drive and then restoring the image to the new drive, also known as a bare metal restore. This process allows for a PC to be restored without previously installed software and OS.
Cloning your Windows 10 system directly to the target SSD or HDD simplifies the backup and restore process into one migration, allowing you to boot Windows 10 from the cloned SSD, but this feature is not included with Windows and requires the use of disk clone software.
- Efficient tool you need to image Windows 10 to SSD
- How to image Windows 10 to smaller SSD easily and securely
- Transfer Windows 10 to SSD with Windows built-in features

Efficient tool you need to image Windows 10 to SSD
Imaging Windows 10 to another drive using built-in utilities can be challenging, with a high risk of failure due to factors like a smaller target SSD, different partition style, or other issues. This process typically involves creating a system image, creating bootable media, booting from the new SSD with the media, and then performing System Image Recovery, which can be time-consuming and prone to errors.
I recommend using the freeware Qiling Disk Master Standard to ease the burden of restoring Windows 11/10/8/7 to another HDD or SSD, with its powerful yet easy-to-use system backup and restore features.
✔ The intelligent mode only backs up used sectors and allows you to restore Windows 10 to a smaller drive, making it a convenient option for users who need to upgrade their storage capacity.
✔ You can restore a Windows 10 image directly to a connected SSD without needing an installation disc or recovery drive.
✔ It is also a SSD cloning software that supports cloning a hard drive with Windows installed to an SSD without needing to restore.
The process of imaging Windows 10 to an SSD can be easily and quickly completed with this tool, allowing users to download and try it out. For server users, Qiling Disk Master Server is also available.
How to image Windows 10 to smaller SSD easily and securely
You can restore a Windows 10 image to a smaller SSD using either the backup and restore method or the cloning feature, which allows you to directly migrate Windows 10 to the new SSD. I will cover both methods in the following article.
☛ What you need to prepare:
- Install the SSD alongside the old hard drive and ensure it is detected. If only one slot is available, use a USB to SATA adapter or enclosure to connect it.
- If the target SSD isn't blank, make a backup of the important files on it before proceeding with the cloning process.
- Make sure the total disk space of the SSD is larger than the used space of the HDD.

Way 1. Backup Windows 10 and restore image to SSD (free)
System backup and restore is a method carried out to recover system data. The process involves creating a backup of the system, which includes all the data, settings, and configurations, and then restoring it in case of any system failure or data loss. This can be done by using built-in system backup and restore tools or third-party software.
☛ Create a Windows 10 system image:
1. Launch the software, navigate to the Backup tab, click System Backup, and if desired, choose Disk Backup to back up the entire hard drive.

2. The system will automatically select the partition to install the operating system on. Simply specify a destination and click "Proceed" to continue.
In daily use, you can also click Schedule Backup to set an automatic backup for continuous protection, and also set incremental or differential backup or automatic backup cleanup in the Backup Scheme to reduce disk space and image size.

☛ Image Windows 10 to SSD:
1. To restore a Windows 10 image to an SSD, navigate to the "Restore" tab, select either "Select Task" or "Select Image File" to locate the desired system backup.

2. Select the option to restore the system image, choose to restore the system to a different location, and then click the "Next" button.

3. Select the target SSD as the destination and click Next to proceed with the process.

4. To confirm the operation and proceed with restoring the Windows 10 image to the SSD, please confirm the operation. This will initiate the process of restoring the Windows 10 image to the SSD.
To restore a system image to a different/new computer, enable Universal Restore (available in the Pro edition) to ensure proper booting after restoration. If the target computer fails to start properly, create a bootable media to boot it into WinPE.

You can choose to create a recovery environment to help with system backup restore or other backups restore operations, which adds the "Qiling Disk Master Recovery Environment" option to the system boot menu page, allowing you to directly start the system from the recovery environment to restore images created by Qiling Disk Master to a new hard drive.
To install Windows 10 on the new SSD, you'll need to connect it to your computer. If your computer has multiple slots, you can simply connect the SSD to an available slot. However, if your computer only has one slot, you'll need to replace the hard drive with the SSD. Once connected, you can restart your computer and enter the BIOS settings to select the SSD as the first boot option, allowing you to boot Windows 10 from the SSD.

Way 2. Clone Windows 10 to even smaller SSD (easiest)
This software allows you to use its Disk Clone feature to migrate data from a hard drive to a solid-state drive (SSD), or its System Clone feature to migrate only the Windows 10/11 operating system to a smaller SSD, leaving non-system data on the original hard drive.
The cloning features require the Professional edition of Qiling Disk Master, and here's a demo you can try out.
The clone features in the free trial can only be demonstrated, not used for actual data analysis or processing. This means users can see how the features work, but they cannot apply them to real-world data or tasks.upgrade for full functionality.
To perform a Windows 10 system clone, start by backing up your data and shutting down the system. Next, insert the Windows 10 installation media and boot from it.
☛ Move Windows 10 to smaller SSD directly:
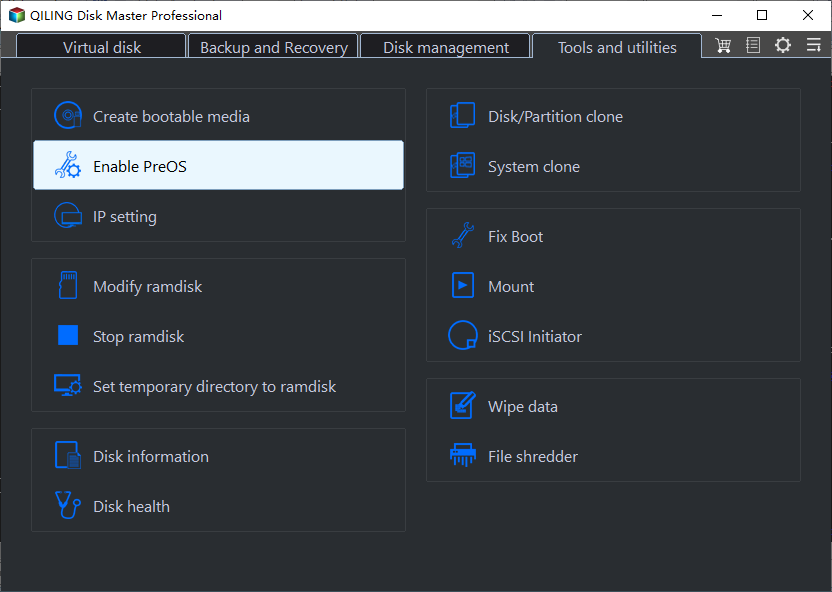
1. Launch Qiling Disk Master Professional and click Clone to choose System Clone.

2. Choose the destination SSD and click Next.

3. To accelerate the reading and writing speed of the cloned SSD, select the "SSD Alignment" option and then proceed to move Windows 10 to the SSD, utilizing the intelligent cloning technology to transfer Windows 10 to a smaller SSD.
✍ Qiling Disk Master allows you to clone all data disks and system disks, as well as copy dynamic volumes on dynamic disks.
✍ If your target disk has enough space, you can also select "Sector By Sector Clone" to make a complete copy, including all sectors, even blank or logically bad ones.
✍ Optionally, you can click Edit Partitions to adjust partition size and drive letter of the destination disk, and convert the destination disk from MBR to GPT or vice versa if their partition styles are different.

After cloning, you can boot from the cloned SSD. If your computer has multiple slots, set the SSD as the first boot option in BIOS and keep the old hard drive as a secondary storage. If it has only one slot, replace the old hard drive with the SSD by disassembling and reinstalling it.
Transfer Windows 10 to SSD with Windows built-in features
To image Windows 10 from an HDD to an SSD using built-in features, you'll need to create a Windows 10 system image containing all system files, then create a bootable media to access recovery options and perform System Image Recovery. This process can be divided into three parts.
Part 1: Create a system image
Windows has a System Image Backup feature that lets you back up all system required drives into an image file, and you can also add additional drives to backup the entire hard drive.
1. To backup settings on Windows 10, search for "backup settings" on the task bar, launch it, click "Go to Backup and Restore (Windows 7)", and then choose "Create a system image" on the left side.

2. It's recommended to store the Windows 10 system image on an external hard drive when planning to move it to an SSD.

3. To continue, select the additional drives you want to backup, review the information to ensure accuracy, and then click Proceed to initiate the backup process.

Part 2: Create a recovery media to boot the SSD
To restore a system image to a new SSD, you need to boot from the SSD and access Windows 10 advanced options for System Image Recovery, which requires an installation disc or recovery media.
Create a recovery drive: Connect a USB drive with at least 16 GB of free space, search for "recovery drive" on your computer, and follow the on-screen wizard to create a recovery drive.

Create a repair disc: To create a system repair disc, insert a blank CD or DVD into your disc burner, then click on "Create a system repair disc" in the Backup and Restore (Windows 7) utility, and follow the on-screen wizard to complete the process.
To learn more details and make sure which one to create in your case, please read about Windows 10 recovery tools.
Part 3: Restore Windows 10 image to SSD
To upgrade to an SSD, you need to shut down your computer, physically replace the existing hard drive with the new SSD, and then insert the recovery media and the device containing the system image. This will allow you to restore your system to its original state on the new SSD.
1. Boot your computer and if it can't boot from the recovery drive, enter the BIOS by pressing the required key and set the recovery drive as the first boot option, allowing you to access Windows Setup.

2. To repair your computer, go to Settings, then choose language, keyboard, etc. and click "Next". Then, select "Repair your computer", followed by "Troubleshoot", then "Advanced options", and finally "System Image Recovery".

3. When the wizard appears, your latest system image will be automatically detected. Verify that it's the correct one you want to restore, or select a different system image if needed. Once confirmed, click Next to proceed.

4. Make sure the "Format and repartition disks" option is selected when restoring a system image to a new SSD, as this ensures a clean installation. This is especially important if the new SSD is not blank, so it's recommended to back up any existing data beforehand to avoid loss. Click "Next" to proceed.

5. Confirm the operation and hit Finish to start imaging Windows 10 to SSD. Wait patiently till it's complete.
System Image Recovery failed?
If you're unable to restore Windows 10 to a new hard drive, it may be due to the target SSD being smaller than the old hard drive, resulting in error 0x80042407, which prevents the system image from matching the layout of the new drive.
You may also receive "no disk can be used…", "Windows cannot restore a system image to a computer with different firmware", or "Windows Backup is unable to determine the boot volume" in the recovery process, which can be time-consuming to troubleshoot. Consider using alternative software like Qiling Disk Master to image Windows 10 or directly clone the system to a smaller SSD.

Conclusion
To image Windows 10 to an SSD using built-in utilities, you need to create a system image backup, create recovery media, and then perform a system image recovery. However, this process can be simplified with alternative tools like Qiling Disk Master. Nevertheless, it's still not the most efficient way to move Windows 10 to an SSD.
With Qiling Disk Master, you can clone Windows 10 directly to another drive, allowing you to clone larger HDD to smaller SSD or migrate only the OS to a new drive. This process can improve the performance of your SSD disk, enhancing both reading and writing speeds.
You can also use Qiling Image Deploy to deploy system image to multiple computers over network, which is available on the technician or techplus edition. This feature allows you to create bootable media, enabling you to backup, restore, or clone the system on any computer without needing to reinstall.
Related Articles
- Top 2 Easy Ways to Install Windows 10 on SSD
- Migrate Windows 10 to SSD without Reinstalling | Bootable
- Transfer Windows 10 OS from HDD to SSD for Better Performance
- Clone C Drive to Move Windows 10 installation to SSD Safely
- Backup GPT Disk Partition for All Windows PCs (Worry-Free)
This article will introduce you to the best free GPT disk backup software and how to backup GPT disk for all Windows PCs without boot issues. Learn more about it now! - Get Backup Retention Policy Best Practices Here!
Get backup retention policy best practices here to manage backup disk space while keeping the latest backups.